This was an 1855 point game between my Chaos Space Marines and Brennan's Tau. The mission was Crusade with 5 objectives using the Hammer and Anvil deployment type.
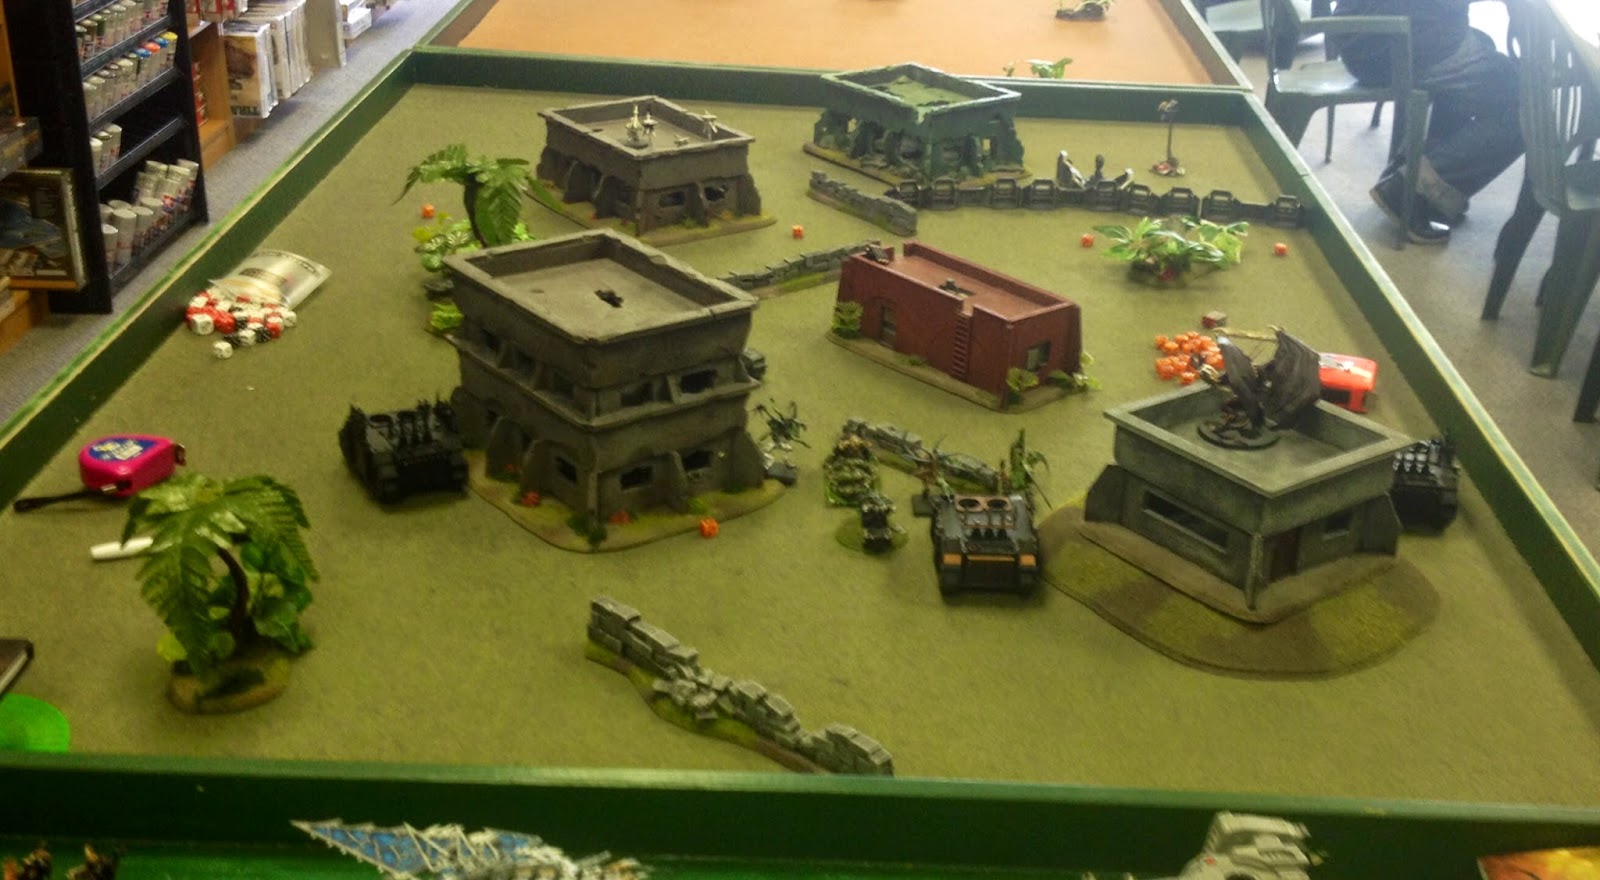 |
| The Board |
The Armies
Chaos Space Marines
HQ:
- Sorcerer With Mark of Nurgle, Mastery Level 3, Sigil of Corruption, Meltabombs, Bike, Spell Familiar ,and Gift of Mutation (Warlord) - 200
- Daemon Prince of Slaanesh with Wings, Power Armour, Mastery Level 3, Gift of Mutation, Spell Familiar, and the Black Mace - 360
Troops:
- 10 Chaos Space Marines with 2x Plasma Guns, Aspiring Champion with Meltabombs in Rhino with Dozer Blade - 215
- 10 Chaos Space Marines with 2x Plasma Guns, Aspiring Champion with Meltabombs in Rhino with Dozer Blade - 215
- 10 Chaos Space Marines with 2x Meltaguns, Aspiring Champion with Meltabombs in Rhino with Dozer Blade - 205
Fast Attack:
- 4 Spawn with Mark of Nurgle - 144
- Heldrake with Baleflamer- 170
Formation:
- Mayhem Pack with 3x Multi-Meltas, 3x Powerfist, and 3x Heavy Flamer - 345
Total: 1854
This list was sort of experimental. I wanted to try and bring a whole bunch of cheap Marines with Rhinos to try and give them a bit more mobility and survivability. I know that Rhinos tend to be First Blood bait, but this list isn't very shooty anyways. It was mostly intended to be in effective range and assault distance turn 2 or 3 and to just push forward with everything I had. The Helbrutes would hopefully prove to be a god distraction and take down light troops and or vehicles fairly well the turn they came in, and I was hoping that the Daemon Prince and the Spawn would prove to be enough of a threat to somewhat mitigate the agro coming at my Marines.
 |
| Chaos SPAAACE Marines |
Tau
HQ:
- Commander in Iridium Suit with Fusion Blaster, Missile Pod, Multi-Spectrum Sensor Suite, Neuroweb System Jammer, Onegar Gauntlet, Puretide Engram Neurochip, Repulsor Impact Field, Shield Generator, Stimulant Injector (Warlord) - 232
Elites:
- 3 Stealth Suits with 1 Fusion Blaster and Target Lock, 1 Vectored Retro-Thrusters, Shas'vre with Marker Light and Target Lock - 120
- 3 Stealth Suits with 1 Fusion Blaster and Target Lock, 1 Vectored Retro-Thrusters, Shas'vre with Marker Light and Target Lock - 120
- 3 Crisis Suits with 3x Fusion Blaster, 3x Missile Pod, 2x Target Lock, 1 Vectored Retro-Thrusters - 171
Troops:
- 6 Fire Warriors with Shas'ui with Marker Light and Target Lock - 79
- 6 Fire Warriors with Shas'ui with Marker Light and Target Lock - 79
- 6 Fire Warriors with Shas'ui with Marker Light and Target Lock - 79
- 6 Fire Warriors with Shas'ui with Marker Light and Target Lock in Devilfish with Blacksun Filter, Burst Cannon, Disruption Pod, and a Seeker Missile - 183
Fast Attack:
- Piranha with Fusion Blaster, Disruption Pod, Seeker Missile - 73
- Piranha with Fusion Blaster, Disruption Pod, Seeker Missile - 73
Heavy Support:
-Hammerhead Gunship with Longstrike, Automated Repair System, Sensor Spines, Disruption Pod, and a Seeker Missile - 203
- Sniper Drone Team with 3x Sniper Drones - 58
- 3x Broadside Battlesuits with 2x Target Lock, 1 Drone Controller, Twin-Linked High-Yield Missile Pods, Twin-Linked Smart Missile System, and 6x Missile Drones - 295
Fortification:
- Aegis Defence Line with Icarus Lascannon - 85
Total: 1855
This is a pretty typical Tau list for Brennan, with a pair of Piranhas, a unit of Missilesides, a bunch of Stealth Suits and a Beefcake Commander with retinue of Crisis suits. It isn't typical, however, that he brought tau at all, as he usually likes to be "in the shit" as he so eloquently puts it. I was most scared of the Broadsides, as the amount of firepower they can put out is just plain stupid, and the Fire Warriors could prove to be a problem for my Daemon Prince and Marines. The Crisis suits were likely to drop in and really put the hurt on a unit or two, so I'd have to wait for that and see how it went and how I would need to respond to it when it came in. Overall, he outnumbers and outguns me pretty vastly, so it will be a tough fight.
 |
| The Tau |
We rolled all of our upkeep stuff and in the end my Sorcerer got the Hatred Warlord Trait and rolled Nurgles Rot, Endurance, and Life Leech for his powers, and he got the Shred Boon. The Daemon Prince rolled Sensory Overload, Iron Arm, and Smite for his powers and got the re-roll armour saves Boon. Brennan's Commander got the no scatter deep strike Warlord Trait, which was perfect for him.
Brennan won the roll to pick his side, and surprisingly didn't pick the side with the tall building and the bunker on the hill. He deployed his defence line in a pretty standard line to block off my assault lane, and then put a little section down the middle around his gun emplacement.
I won the roll for first turn and decided to go first in an attempt to get as close as possible before my Rhinos were blown up. Night Fighting was turn 1, but with his Missilesides and tanks all having Blacksun Filters, it wouldn't really matter. I deployed fairly aggressively, as I figured the volume of fire would hurt me bad regardless of how much cover I had anyways. the 2 Plasma squads went on the flanks, while the Spawn and the Melta squad went in the center to be able to throw themselves wherever they needed to go. The Prince went on top of the Bunker on the hill, ready to fly forward.
 |
| My Deployment |
Turn 1
I start by rolling my Psychic Powers and first roll I get a double 1 on my Sorcerer for Endurance, dropping him to 1 wound right away. Awesome start! The Daemon Prince rolls for Iron Arm and it goes off but I only get a 1 on my d3, so he's still a little gooey this turn. The Plasma Rhino on my Right and Melta Rhino both move forward 12 and Turbo-Boost. The Daemon Prince flies forwards as fast as he can, and the Spawn move up and run forward a mighty 2" The last Rhino moves up 6 and the Plasma gunners take some pot shots at a Piranha, but fail to hurt it. The Daemon Prince casts Sensory Overload on the rightmost Fire Warrior Squad and kills 2, blinding them in dazzling lights, but they hold firm and don't flee.
Brennan stars his turn by moving up both Piranhas and the Devilfish towards my Rhino, and shuffling over the second Fire Warrior Squad to get a guy on the Lascannon. the two Fire Warrior squads on the ground shoot at the Daemon Prince, but thanks to his altitude and fast movement, get no hits. Both Shas'uis try and mark the Spawn, and they get 1 counter on them. The Piranhas both shoot their fusion guns at the Rhino, and while the first misses, the second hits and blows it up, killing 3 Marines and getting first blood. The Devilfish then shoots them but no more die, and they are not pinned. The Broadsides, Sniper Drones and last Fire Warrior Squad all fire into the Spawn, and manage to kill 2 of them. Feel no Pain really helped mitigate that damage. Longstrike shoots at the Rhino, but misses.
.jpeg) |
| End of Turn 1 |
Turn 2
Rolling for powers again and both of my Blessings go off and I get a 2 for Iron Arm. Neither the Heldrake nor the Mayhem Pack arrives this turn. The Prince moves towards the larger Fire Warrior squad. The Plasma Rhino moves towards the Fire warriors hoping to kill some and maybe make them flee. The Melta Rhino moves forwards as well. The Spawn move forwards some more, hoping to get an assault off on the Broadsides this turn.The Marines move through the crater 3 whole inches. No assault for them this turn. Shooting and the Prince again casts Sensory Overload, this time on the larger squad and kills 1. The Plasma guys shoot at the other Fire Warriors and kill another one. The other Plasma squad shoots at the Lead Piranha, but sucks again. The Melta Rhino and 2 guys shoot at the Fire Warriors on the roof, but fail to kill anything.
Assault, and the Prince takes a wound from the Black Mace but butchers the Shas'ui, and the Fire Warriors flee and get cut down. The Spawn take overwatch from the Sniper Drones and the Broadsides, and while one takes two wounds and the other takes a wound they both survive to assault. Unfortunately, they then fail the assault. Luckily, the more wounded Spawn and the Sorcerer get a wound back from It Will Not Die.
Brennan rolls his reserves and both Stealth teams drop in. near the Rhinos, but the Commander stays in reserve. Movement, and the Broadsides move back, while the Devilfish moved over to try and kill the Spawn. Unfortunately, he forgets to move the Piranhas this turn, so they just hang out. Shooting begins and the Fire Warriors and Longstrike shoot at the Daemon Prince, but he takes only 1 wound. The Piranhas shoot at the Marines and kill all but 4, but they're fine.The Sniper Drones and Missilesides all fire at the Spawn and Sorcerer and wipe them out, gaining him Slay the Warlord. The Stealth Suits both Target the Melta Rhino, but he misses with the Fusion guns and does a bad job with the burst cannons and it's unscathed.
 |
| End of Turn 2 |
The Daemon Prince casts Iron Arm again and gets a 2 for his Strength and Toughness again. The Mayhem Pack drops in, but the Heldrake is a lazy jerk and stays in reserve again. I drop one Brute next to Longstrike and he scatters right to the edge of the table, but stays on and within Melta Range, the second goes in front of the Broadsides, but scatters to the side of them, and the third drops behind the Devilfish but scatters huge and lands on top of the building with the Sniper Drones. The Plasma Rhino drives up onto the Defense Line and the Marines jump out, ready to shoot some Fire Warriors. The Melta Rhino stays put and the Marines jump out from it as well. The Marines in the crater move towards the Piranhas, ready to assault, and the Daemon Prince moves towards the Broadsides.
Shooting begins with the Melta Marines shooting at the rearmost Stealth Suits, and while the Bolters and Meltas do nothing, the Aspiring Champion manages to pick the Shas'vre with his Bolter and gets the Icy Aura boon. The Stealth Team runs away. The Helbrute by Longstrike hits and pens with his Multi-Melta, but the crafty tank ace jinks out of the way. The Brute by the Broadsides fires it's Heavy Flamer and toasts a couple of Drones, but misses with the Multi-Melta. The Daemon Prince then casts Sensory Overload again and kills the remaining Drones. The Last Helbrute Flamers the Sniper Drones and kills the Spotter and a Drone, but misses with the Multi-Melta, and the Drones flee. The Plasma Marines shoot at the last 3 Fire Warriors by the objective and clear them off. The 4 Marines on the left flank try and lob a Krak Grenade at the closest Piranha, but miss.
The Marines declare a Multi-Assault on the Piranhas, and make it easily, and the Daemon Prince attempts to assault the Broadsides, and though he takes no wounds from the Overwatch, he fails the assault even with the Fleet re-roll. What a dunce.Thankfully, our friends the Marines manage to blow up one Piranha and wreck the other, though the Champion and one of the Plasma Gunners are killed in the explosion.
With the Tau line starting to waver, the Commander arrives with his bodyguard of Suits. The Stealth Team and Drones both continue to run, though neither make it off the board. Longstrike turns around to shoot the Helbrute, and the Broadsides move back a bit as well. The Devilfish moves near the objective in the bushes and the Fire Warriors jump out, ready to kill the last two Marines. Lastly, the other Stealth Suits move to try and gun down the Melta Marines.
The Broadsides start their shooting by firing at the Daemon Prince, but once again, his re-rollable armour save holds out. The Crisis Team splits its fire with one Suit each firing at the Helbrutes, and the last one and Commander shooting at the Daemon Prince, and while a missile finds its way through the Prince's armour, the Daemon's invulnerable save saves it from the fusion shot. The other suits do scarcely better with one Brute getting stunned only. Longstrike finally proves he's a tank ace and blows the Helbrute haranguing his flanks to smithereens. Both Stealth Teams fire everything they have at the Melta Marines but only kill 1, and the Fire Warriors on the building try and kill the Daemon Prince, but his armour holds out. Lastly, the Devilfish and Fire Warriors shoot at the last two Marines and kill the Plasma Gunner, but the other one survives. Once again, no picture was taken this turn, because as we have already determined, I'm dumb.
Turn 4
The Heldrake finally decides to stroll in and moves towards the newly-emerged Fire Warriors, to help out his beleaguered buddy. I roll the Helbrute's crazy test and they decide to get the only one I didn't want this turn; a Fire Frenzy. The Daemon Prince casts Iron Arm and gets another 2. The lone Marine moves towards the Fire Warriors and their Transport, ready to go in and blow some stuff up. The Plasma Marines move towards Longstrike and the building, hoping to kill two birds with one stone. The Melta Marines shuffle about to shoot at the larger, braver Stealth Team.
The Heldrake uses its Daemonforge and makes the Fire Warriors literal warriors on fire, but takes a Hull Point. The Marine lobs a Krak Grenade at the Devilfish, but fails to hurt it. The Melta Marines kill a single Stealth Suit, but they hold, and firing from the other Marines does nothing to Longstrike. The Helbrutes fire everything at the Crisis Suits, but with one snap firing and the other in a bad position, only one wound goes through and it gets Look Out Sir'd to the Suit with Hit and Run. The Daemon Prince casts Smite on the Crisis Suits and kills the Hit and Run guy.
In my Assault Phase, the Marine makes his assault against the Devilfish, the Plasma Marines multi-assault Longstrike and the building with the Fire Warriors, and the Daemon Prince Assaults the Crisis Suits. Try as they might, none of the overwatch does anything and all of my guys make it in. The Lone Marine sticks a Krak Grenade in the Devilfish's feul tank and the transport explodes, leaving him unscathed. The Plasma Marines strip 2 Hull Points off Longstrike and kill a pair of Fire Warriors by blowing up bits of the building. The Daemon Prince challenges the Commander to single combat and he accepts. Thanks to his Shield Generator and Stimulant Injectors, the Commander only takes two wounds, but he misses his return attack with the Onager Gauntlet. The Black Mace's dark sorceries deals a wound to one of the Suits as well. Luckily, they hold.
Things are looking bad for the Tau. Longstrike flies up onto the building with the Fire Warriors to get away from the Marines. The Broadsides stay put and the Stealth Suits all go after the Melta Marines. Shooting begins with Longstrike attempting to take out the stunned Helbrute, but he gets a 1 for his penetration roll, even with Tank Hunter. The Missilesides try to finish the job and manage to wreck the Helbrute. All the Stealth Suits shoot at the Marines, with the Fusion Blaster splitting its fire to the Rhino. The Rhino explodes, but no Marines are hurt. Lastly, the Fire Warriors shoot at the Plasma Marines and manage to kill a regular Marine.
In assault the Daemon Prince wiffs hard and fails to hurt the Commander at all, but the Commander has a similar experience, so everyone kind of stands around awkwardly.
 |
| End o Turn 4 |
Turn 5
The Prince casts Iron Arm again and gets a 3 this time, and the remaining Helbrute gets a Blood Rage for its Crazy Check. The Heldrake flies over the two stealth suits in the middle of the board and kills them with its Vector Strike. The Plasma Marines move back a bit to claim the objective, and the Helbrute leaps from the roof to get into combat with the Crisis Suits.
The Heldrake opens the shooting phase by torching two of the 3 remaining Fire Warriors, though the last one holds. the Marines gun down the last remaining suits. Assault begins and the Helbrute charges in. The Daemon Prince slaughters the Commander, giving me Slay the Warlord, and the Helbrute kills the two remaining Suits. Both consolidate towards the Missilesides.
With this, Brennan concedes the game, as there's no way he can take out all my troops with what he has left and still score an objective.
 |
| End of the Game |
Total Points
Chaos: 11 ( 3 Objectives, Linebreaker, Slay the Warlord)
Tau: 2 (First Blood, Slay the Warlord)
Post Game Thoughts
Well this game did not go as expected. I honestly thought I would be fighting hard for every inch of ground, and that just wasn't really the case. The first couple of turns could have gone either way, with me losing my Spawn and Sorcerer pretty much immediately, but the Daemon Prince was just such a tank that he managed to wipe the Tau almost single-handedly.
Now, it's hard to convey with a Battle Report, but Brennan's dice were pretty heavily against him pretty much from the start. in the early turns he shot a lot of stuff at the Daemon Prince and just couldn't get even one 6 to hit him and bring him down. If he had gotten lucky and grounded the Prince right away, he might have been in a better position to take him out, but he just couldn't do it. Later on, his Stealth Suits were getting on average about 2 hits from their Burst Cannons and he was missing his Fusion Gun shots almost every time. I also managed to get all of the powers I needed with Iron Arm on the Prince, and Endurance on the Sorcerer, and getting the re-roll armour saves boon very well may have won me that game, as it made my Daemon Prince basically impervious to anything with AP of 4 or higher.
Now, aside from the Dice, I think Brennan's Target priority was as good as it really could have been, though I probably would have hopped out the Fire Warriors from the Devilfish Turn 2 instead of 3 to help gun down the Marines on the flank. He did make a big mistake with his first turn shooting as well, as he forgot to shoot his 3rd Fire Warrior squad before he shot the Broadsides. If he had managed to get another counter on the Spawn, he could have removed my cover save completely, and I have very little doubt that he would have wiped all the Spawn with the Broadsides alone had that been the case. I also would probably have taken Plasma Rifles on the Crisis Suits instead of Missile Pods. I think that even though they have lower strength, the AP2 would really have benefited him more, and would probably have killed the Daemon Prince, and vastly changed the game.
As for my game, I think I played it fairly well. I knew that I would have to be very aggressive right away against him, so I didn't bother trying to hide my Rhinos and stuff in cover too much if it was going to hamper my speed. Getting into range with my guns, especially rapid fire range, was very important if I wanted to be able to take out his troops and start claiming objectives. It definitely helped that he was unable to deal with the heavy hitters of my army fast enough to really get to focus on my Marines as well, because if they had been taking heavy fire the whole game, they may have all been killed, or at least ran away. As has been the Case with the Mayhem Pack, I think that they are well work bringing. Having them drop down wherever you want is really awesome, and even though you're likely to lose them all in the next turn, the fact that they're right up in your opponent's face means that he has to deal with them or suffer a follow up turn of shooting and assault. It also helps draw away their heavy weapons from your more vulnerable troops, so I really think its a worth while unit.
As always, thanks for reading, and feel free to comment on either of our lists or tactics. Give your feed back on what you think we could improve on and what we're doing well!
No comments:
Post a Comment