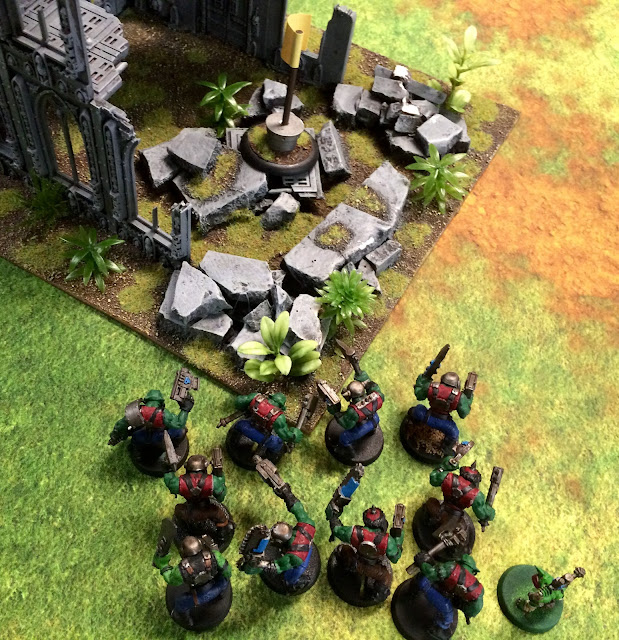
Battle reports, tactics, and general banter about Warhammer 40k, D&D 3.5/Pathfinder, Malifaux, and Warhammer Fantasy!

Sunday 18 September 2016

Guild Ball: Engineer's Guild

Hey everyone! Guild ball has been gathering quite an audience in my area lately, and after a couple of demo games, I too have caught the fever. After some deliberation, a minor amount of research, and a look at the various model ranges, I have decided to play a team of Engineers. Now, all of my research has told me that the Engineers have a tougher learning curve than some of the other guilds, but after a demo game with them, I think that their play style could be a lot of fun for me, and possibly frustrating for my opponent, based on the amount of knockdown, push, and other shenanigans that even just the starter set offers. Also, after looking through the various model ranges, I was most attracted to their asthetic, particularly the constructs. I had always like the idea of doing up a Necron army and painting them all as escaped puppets, but now I'm getting my fill with the engineers. So with all these factors I went down and got myself a starter box. 

The first thing I noticed with these models was the incredible level of fine detail all over them. Looking them over, I found myself wondering exactly where to start and what kind of colour scheme to go with. Once I had decided on colours I found myself having hard time deciding on where to start putting down colours. There are lots of small bits sitting on top of other bits that made it impossible to use my usual style of doing all of one colour at once, so I ended up having to jump around quite a bit, which was sort of annoying, and led to me missing things here and there that I would then have to go back over again. This isn't really an issue with their design or the models themselves, but more with my own approach to model painting. Another thing that I found a little annoying was that these models use slotted bases I ended up being back able to work around it pretty easily though by using greenstuff over the slots and the metal bits, and with Ballista, I cut the metal part right off and just stuck him on directly.  Anyways, the models are really very nice and look great when painted up, so without further ado, here's a showcase of my Engineers so far. 


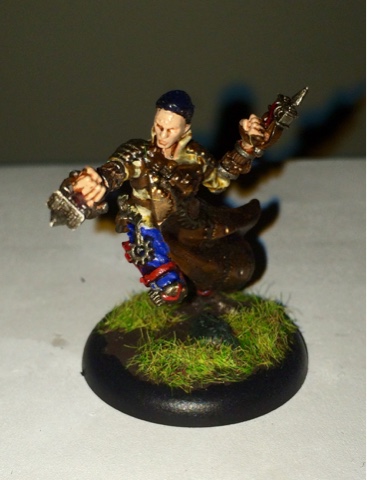
We'll start with the team captain Ballista. I decided that I wanted a scheme that was a little different than the showcase one so I went with blue for the pants, deciding on a blue-jeans kind of look. I originally had the shirt in green, but after looking at it I thought it looked stupid, so after deciding on a leather brown for the apron, I went with creme for the shirts for a brighter colour that goes well with blue and brown and really pops on the model. I decided on red for an accent colour, which I think looks cool on the fletching of the arrows. I was originally going to do his hair in a black/silver sort of greying scheme, but with all the metal parts already on the model I thought it might look weird, so I went with sandy blonde instead, and I'm glad I did. Lastly for the goggles I got to use the citadel green gemstone color, which I love the look of, to give them a night-vision goggles look. 


Next is Salvo. Salvo was a bit more of a challenge because there a lot of really small details on him. His little hand crossbows were sort of annoying and he has these leg braces that combined with his pose were sort of tough to get at. The leg brace thing was weird to me, because he's sort of a fast dodgy character, so it seems strange that he's got leg braces like he's got polio or something. I don't know. Anyways, for him I mostly did the same thing as ballista, but I did the hair in a sort of blue-black look, which really only shows up in certain lights. 


Velocity is the next one, but actually the first one I painted. This model was super easy. Thinned down brown with a black wash for the wood, gun metal with a brown was for the metal and some minor blue blending with a touch of white for the face glow thing. When I end up getting Hoist it's nice to know that it'll be easy to deal with. Nothing better than a model that takes minimal effort to complete but still looks good. 


And finally, what would Guild Ball be without the ball? I decided to do this one sort of in the Engineers colours rather than the kinda typical off-white look. There's not really much to say about it. It's just a few layers of red and some black on a base. 


Lastly is a team shot. The Engineers ready to play. 

Tuesday 23 August 2016

The Dance of Death: First of the Harlequins

This is sort of a late post, as I've had these guys done for a few months now, but I've finished my first squad of Eldar Harlequins along with a Death Jester and a Shadowseer. 


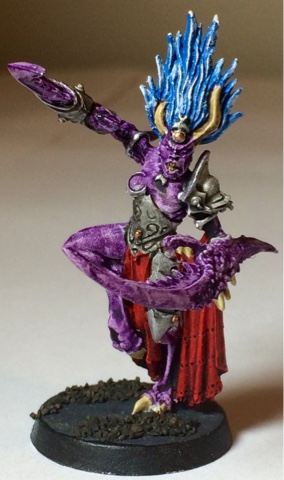
So first is the Death Jester. This guy was actually super simple to paint, which was a surprise after having done a whole bunch of players. I pretty much just primed black, did some highlights, a bit of a diamond patter in the one leg, and the cowl and inner jacket in a deep purple. The bone was simple. Just a bone colour, a sepia wash, then a light drybrush or white. Finally, the gems were done using the new citadel gemstone paint, which are totally awesome. 


Next is the shadowseer. This was a lot more like the other harlequins. As usual, diamond patters are a pain to do, but I really think that it's worth the effort. I decided to do the mask using the blue gemstone paint, and I think it worked really well. I think that I'll do the other ones the same way, but using different colours so that I can easily deferentiate between them. 


And now the main event. These harlequins took me a good amount of time to paint, as it's a pretty daunting task, and I found myself having to go back and forth quite a bit to get things right. The diamond patterns of these guys can be pretty tough, especially on the arms. Any time there's a bend in an arm or a leg, you have to try and compensate, and sometimes it really screws up the pattern. Fortunately, most of these weird areas are also in places that you generally wouldn't notice except with close inspection, so for my table-top needs, I'm very happy with how they turned out. Seeing the one squad on the table makes me really excited for the day that I've got a full army of these wackos running around. 


Lastly, this group shot, including the Solitaire from a previous post. I think it looks pretty striking, how about you?

Tuesday 28 June 2016

Warhammer 40,000 Battle Report: Speed Freeks V.S. Eldar

Engines revving and belching polution into the air, the Orks begin their invasion of a long-forgotten Imperial world. Troubled by grim portents of the burgeoning WAAAGH!!!'s warpath,a small compact strikeforce of Eldar have arrived to put down the savage greenskins.

Hey all! It's time for a new Battle Report; the first in a long time. This battle was a 1000 point Crusade with 4 objectives. My Speed Freek Orks took on Austin's Eldar. We used a standard deployment type, and it was night fighting in the first turn.

The Armies

Combined Arms Detachment Speed Freeks

HQ:
- Warboss with Power Klaw, Boss Pole, and 'Eavy Armour, Da Finkin' Cap - 99

- Painboy - 50

Troops:
- 18 Slugga Boyz with Nob with Power Klaw and Boss Pole - 148

- 20 Slugga Boyz with Nob with Power Klaw and Boss Pole - 160

Fast Attack:
- 5 Warbikers with Nob with Big Choppa - 110

Heavy Support:
- Battlewagon with Reinforced Rams, and Boarding Planks - 130

- Battlewagon with Reinforced Rams, and Boarding Planks - 130

Allied Detachment WAAAGH!!! Ghazgkull

HQ:
- Big Mek with Mega Forcefield, Warbike - 135

Troops:
- 10 Gretchin - 35

Total: 997

If you'veread any of my previous battle reports in which I play Orks, this list is probably fairly familiar. It has all the staples of my Ork lists. A strong core of Boyz in Battlewagons with a Big Mek to give the transports a 4++ for their initial surge up the board. This is a tactic I like to use a lot, because it gives me a really good chance of getting at least something into combat. Battlewagons are fairly tough, especially at lower points, and having the 4++ is just gravy. I also really like the Finkin' Cap. 10 points to get an extra Strategic Warlord Trait is awesome, and can be enough to give you that little extra edge. I was feeling a little bad about bringing a wall of AV14 to such a small game, but that pretty much went away when I saw Austin's list...

Combined Arms Detachment Eldar

HQ:
Farseer - 100

- Spiritseer - 70

Elites:
- 5 Wraithguard in Wave Serpent with Scatter Lasers and Shuriken Cannon - 285

- 5 Wraithguard with D-Scythes in Wave Serpent with Scatter Lasers and Shuriken Cannon - 335

Troops:
- 10 Guardians with Scatter Laser Platform - 105

- 10 Guardians with Scatter Laser Platform - 105

Total: 1000

Yep, that's right. 10 Wraithguard at 1000 points. Now I wasn't too worried about the standard Wraithguard, as they have short range, and killing a 5 boyz isnt really a big deal, but those D-scythes were going to be a make or break unit in the game for me. If I'm able to deal with them quickly and with minimal casualties, I should be ok, but if I get stuck out in the open, they're more than capable of completely annihilating a squad in a single volley. Morover, I have very little shooting, and even less capable of really being a threat to them, so just running off and shooting them to death isn't really an option, meaning I'll be losing a lot of Boyz to overwatch. should be interesting.

The Game

Austin won both the roll for first turn and first deployment, and his warlord trait allowed his D-scythe Wraithguard to scout. My traits were +1 to seize the initiative, re-roll my reserves, and -1 to his reserves.

Eldar Deployment
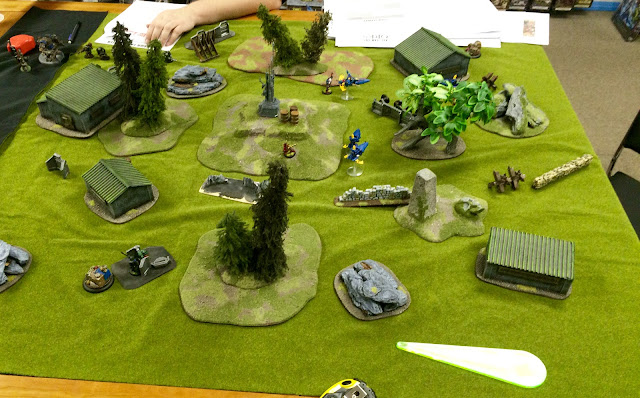
Austin Deployed his force fairly far forward, with his Guardians occupying both the ruins to claim their objectives, and both units of Wraithguard in the Wave Serpents. The D-Scythe guard were in the central seroent, while the other ones along with the Spiritseer were in the serpent on the flank

Orks Deployment
I countered by deploying on my left flank, directly across from the Guardians and Wave Serpent, far enough away from the D-scythes that they wouldn't be able to move up and blast me right away. The last thing  needed was 5 d6 flamer hits on the occupants of my wagon right away. I decided to not try and seize the initiative.

Turn 1

The Eldar begin by advancing the Guardians and Wave Serpents to get into better firing positions. The Farseer casts guide on his unit, getting a 6 on the Perils table in the process. Both Wave Serpents and the Guardian's Scatter Laser fire into the Warbikers, killing 2 of them, thanks to jinking and night fighting. They then pass their Morale test.

In retaliation, the Orks gun their engines and take off towards the enemy. The Battle Wagons peel off towards the two Serpents, while the Bikes take off towards the Guardians. The Big Mek joins the squad that disembarked from the left Battlewagon, which was going after the scythe guard, to offer a bit of extra protection. Shooting from the Bikers does nothing, and so assaults begin. The Warboss' unit charges the right Serpet and wrecks it, while the Big Mek squad does the same to the other one. The Bikes attempt a long charge on the Guardians, but fail. First blood to the Orks, but now the Wraithguard are in a position to start doing some damage.


Turn 2

With their enemy right in front of them, The Eldar move to get to the best possible line of sight. The Farseer Dooms the Warbosses unit, and in a brutal mind war, manages to daze the beast as well. He also guide's his Guardians. The incoming fire is absolutely brutal, destroying all of the Warbosses unit save for a single Boy and the Nob, as well as the other boy squad losing fully half the squad. Fortunately, the Orks hold.

Their bloodlust rising, the remaining Orks surge forwards. The Warbikers charge into the Farseer's unit and after the Nob killed the Farseer, ran them down. The Warboss' unit charges the Wraitguard, Losing the Boy and the Nob, but cutting down 3 of the Wraithguard in return. The Big Mek's group attempts a charge, and lose all but the Mek and 2 Boyz, but they manage to make it in and kill a Wraithguard for no further casualties.


Turn 3

With most of his units locked up in combat, Austin just plinks away with is remaining Scatter Laser, hoping to take out the bikers, but they make their saves. In combat, the Warboss cleans up his fight, while things go better for the Eldar on the other side. The Big Mek and a Boy are killed, and the last Boy nearly breaks, but for a 1 on the Mob Rule table

With all his enemies taken care of, the Warboss hops back into his Battlewagon, which moves him off towards the other combat. The bikes head over as well to help out the last Boy. Once again, there is no real shooting. The Warbikers charge in and kill a Wraithguard, but the Boy is killed in return.


Turn 4

The Eldar take some side armour shots on a Battlewagon, but fail to hurt it. In combat, a Bike dies, but they hold. When the Warboss shows up, things go differently, with both the Wraithguard going down, as well as another bike.


The Grots finally showed up, and moved towards the objective in my corner.


Turn 5

With the Eldar all but defeated, they continue to shoot at the Biker, dealing a wound. The Warboss hops into the other Battlewagon and heads towards the Guardians, along with the Warbiker. The Grots move onto the objective.


Turn 6

Once again, the Eldar shooting does nothing. The Warbiker and Warboss charge in and cut down the Guardians. Having slain all their enemies, the Orks are victorious.


Post-Game Thoughts

That was an extremely brutal and bloody battle. It really went back and forth for the first few turns, and while it ended in a tabling, it really could have gone either way. Austin's dice were absolutely bonkers in the beginning. He failed basically no saves, and his Guardians hit and wounded all but 1 shot when he fired on the Warboss' unit turn 2. While he did have guide and doom to help him, I think it was only the difference of 4 or 5 dice. His D-scythe Wraithguard were also insane. On their overwatch they got 13 wall of death hits, and no 1s (3 2s though). The game was really decided by that lone Ork making his Mob rule roll, thus saving my incoming Warbikers and Boss from certain death from the Wraithguard's overwatch.

There are a few things I might have done differently. I maybe should have assaulted the Guardians instead of the Wraithguard Serpent Turn 1, as they ended up doing way more damage. I was hoping to charge them with the bikes, but a 10" charge was a little cheeky, even with 'Ere we go, so I shouldn't have relied on it. In Austin's Case, I think he would have been better served by Deploying his Scytheguard on foot and scouting them up, and saving his Wave Serpent to lend its fire and speed later in the game. Even if I had decided to just avoid the Scytheguard, he still would have had that board control, and it would have given him an advantage in objective grabbing later on.

I really had a lot of fun with this game, and with this list, even thought it was looking really bad for a bit there. And even thought the game did end in a tabling, I don't think that either Austin or I felt like it was a slaughter until maybe about turn 3 or 4. It really was quite close. As always, thanks for reading!

Tuesday 31 May 2016

Narrative Battle Report: The Doom of Sirris V

::INCOMING TRANSMISSION FROM OUTCAST TARTHALAS;;

We have been silently observing the events surrounding the planet known to the Imperium of Man as Sirris V for several months as ordered. The presence of the Great Enemy has been growing more and more powerful for some time, and most alarmingly, there have been many rituals preformed by what appear to be elite members of an Emperor's Children warband. We have not been able to approach too closely, but the name Zarakunel has been overheard, so we fear the worst. They seem to be attempting to summon forth a sizable Daemonic incursion. To make matters worse, a spacecraft containing many Orks has entered orbit over the planet, and rather than the wanton destruction that we had hoped for, they seem to have struck some sort of deal with the  Emperor's Children and their human auxiliaries, and the two forces are now collaborating, albeit begrudgingly. Construction of a massive war engine has commenced, and seems to be moving along swiftly. There is good news however,  our seers have been detecting a presence in the warp approaching the planet, so it seems the intervention from the Imperium that we have predicted is fast approaching. If all goes well, there is the possibility that we will not have to intervene directly at all.

::END TRANSMISSION::


;;INCOMING TRANSMISSION FROM OUTCAST TARTHALAS::

We have continued to observe as best we can and even attempted some sabotage to disrupt the plans of the Great Enem, with little real success. The Orks have managed to build their war machine, and the followers of She Who Thirst have succeeded in bringing forth many powerful Daemons, including the dreaded Souleater Zarakynel. Fourtunately, it seems your warnings to the Imperium have not gone unheeded. Sammael of the Dark Angels space marine chapter has arrived, as well as Logan Grimnar and Ragnar Blackmane of the Space Wolves. perhaps most fortunately, Brother-Captain Stern of the Grey Knights has also arrived leading a strike force to banish the Daemons.It seems that the Imperium have sent any of their finest to this confrontation, but even with these forces, the combined might of the Ruinous Powers and the savage Orks may prove too powerful after all this time. 

::END TRANSMISSION::


:: INCOMING TRANSMISSION FROM OUTCAST TARTHALAS::

The battle has begun in earnest. The Imperial forces were quick to mount an assault, with Logan Grimnar and his retinue crashing fearlessly into the Souleater, whilst elements of the Ravenwing forces attempted to harrass the Orks and Daemons The Grey knights as of yet are holding back, seemingly waiting for the right moment to strike at the Daemons. All has not gone well, however, with the Chaos air support arriving, and along with charges from a horde of Seeker cavalry they have decimated a large amount of the Ravenwing forces.

It seems that the Souleater was taken off guard by the sudden ferocity of the Great Wolf's charge, and it seems to have already been injured. Meanwhile, a Librarian has somehow disabled the Orkish warmachine's most potent weapons, and there have been some casualties to the Ork horde as well.

::END TRANSMISSION::


::INCOMING TRANSMISSION FROM OUTCAST TARTHALAS::

The Space Marine counter-attack has come, but not gone well. Stern led an ill-fated charge into a horde of Daemonettes, losing the majority of his troops, and managing to cause few casualties of their own. Elements of the Death Wing, as well as some Space Wolf terminators teleported in behind the cavalry, only to be decimated in a counter-charge. The aerial battle has seen a little more success, with many of the Chaos fliers taking some severe damage, with little being taken in return. Perhaps most alarmingly, the Great Wolf has fallen to the combined might of the Souleater, and a Keeper of Secrets.

Toward the other side of the field, the Stompa has once again been rendered far less effective, while the tide of Orks has taken even more casualties while inflicting precious few of their own. The Imperium's assault seems to be losing momentum, but they still have forces that have yet to be committed to battle, many of which are very potent.


::INCOMING TRANSMISSION FROM OUTCAST TARTHALAS::

The battle is all but over.Whilst the Orks have suffered significant casualties, and the Chaos Air support has dwindled some, the majority of the Daemonic forces are still fully intact. Stern was forced to withdraw, but not before banishing a Daemon Prince, and several lesser Daemons, and Ragnar Blackmane and his retinue fight for their lives against Zarakynel and the Keeper of Secrets. a Timely charge from a large Wulfen pack has destroyed many Orks, but the Stompa is all but unharmed.All of the Deathwing have been destroyed, and the Ravenwing, with the exception of its master Sammael, have been completely wiped out. The remaining Imperial forces are beginning to retreat.It seems that we were wrong to trust the Mon-Keigh to deal with this problem. I advise that we mobilise our forces with all haste to prepare for the inevitable course that these events will take.

::END TRANSMISSION::

Tuesday 15 March 2016

The Lonely Path: Harlequin Solitaire

Hey everyone. So recently I have decided to embark on one of my most challenging painting projects that I have ever attempted. A Harlequin Solitaire. It was a lot of fun to paint and not nearly as frustrating as I had anticipated.

What a beut!

This is the photo I decided to use as sort of a reference, I'm not 100% sold on the way GW had painted up their solitaire, as I think the black on black on black is just sort of boring and underwhelming for such an impressive model. I also wanted to try my hand at doing some diamond patterns, as I'm going to need to be able to do them when I go to finish up my Troupe that has been in progress for like 7 years, no to mention the Shadowseer. Lastly, I decided to do the cloak in purple rather than black, partly because I think it would be a little more interesting, but more honestly, just because it's pretty difficult to make black look really effective, particularly black cloth. Finally, I decided to add one last touch of my own to the model. The model has a really long hood trailing behind it that just kind of ens. Now, being that Harlequins are both Space Elves and Space Clowns, I thought that a little something was needed. Namely a bell. Jesters and Elves are both sort of known for their jingle bells, and I saw the opportunity to add one. All I did was just make a tiny little ball of green stuff and stuck it on the end. Simple and easy.


By far the hardest part of this model was the diamond patterns. they took a lot of focus, and a couple of tweaks to get them to look more or less right.They're not totally perfect by any means, but I think that they came out quite nicely, and I'm pretty happy with them.

The next hardest part was a little surprising to me.The cloak. I thought this would be very simple to do, but I had a surprisingly difficult time with the highlights. In the end I think it looks decent so I'm happy with that too.

In the end, I think that the model turned out really well, with all the component pieces coming together really nicely for an eye-catching model. Thanks for reading!

Saturday 13 February 2016

Daemons Daemons Everywhere!

So for the last couple of weeks I have been preparing for an upcoming Apocalypse game by getting all my Daemons painted up. I'm planning on taking the Tetragon of Darkness formation, and taking tons of psykers to help summon more Daemons. So far I have managed to do 10 Daemonettes, 10 Horrors, a Herald of Slaanesh, and a Herald of Khorne. 


So first up is the Herald of Slaanesh. This was a pretty nice model to paint. All I did for this one was prime white and apply a heavy wash of druchi violet for the skin, did a layer of alaitoc blue and then a highlight of white scar for the hair, leadbelcher with a nuln oil wash, then a quick drybrush of leadbelcher again, and finally mephiston red with a highlight of evil suns scarlett topped off with a wash of carroborough crimson. Nice and simple, but I think it turned out pretty good. 


Next is my new Herald of Khorne. This is actually a beastman model that my buddy Ryan had laying around. I feel it matches the old 3rd edition Bloodletters that I have. Basically this was a lot of red. The fur and armour plates were a base of khorne red, then a drybrush of mephiston red, then a highlight of evil suns scarlet. All the leather was a layer of mournfang brown with a wash of nuln oil. The hair I painted black with a heavy drybrush of naggaroth night. All the studs were has hashut copper, as well as the skulls on the pendants. All the metal was again leadbelcher with a wash of nuln oil. The horns I did in ushabti bone with a wash of agrax earthshade. Lastly the blood on the axe was a layer of khorne red with a liberal amount of blood for the blood god to keep it glossy and wet looking. The base was a micro art chaos base that I had lying around, and was pretty simple to paint as well. My only complaint about the model is that it was metal. I just really dislike working with metal models. 

Next is the Horrors. The main part was a layer of emperors children with a wash of druchi violet then a couple of drybrush layers of emperors children the gold bits are hashut copper with a wash of nuln oil. The blue is a base of alaitoc blue, then drybrushes of temple guard blue and finally ice blue. For the fire I did the same thing but with a drybrush of yriel yellow. The claws and nails are ushabti bone and a wash of agrax earthshade. Lastly the feathers were just a white base with a really watered down layer of trollslayer orange. 

The daemonettes followed the same process as the herald. I painted all of the Slaanesh Daemons to match some used Daemonettes that I got a while ago, and I think I did a good job of that.


Wednesday 20 January 2016

Kill Team Battle Report 2: Alaitoc V.S Orks

We hadn't made it very far before we ran into some more aliens on this wretched planet, this time it was the loathsome Orks. As soon as the beasts saw us they began to charge forwards, shooting wildly, ostensibly at us, but doing nothing more than minor paint scratches to our fine armour. As they approached, we launched our attack. Using the runes as you taught me I was able to strike down nearly half their number in a psychic storm, while our warriors all but shredded their leader. The orks continued to try and resist, but it wasn't long before we had wiped out the majority, and sent the rest fleeing for their lives. We decided not to pursue, our own agenda being more important than the lives of a few battered and bloody greenskins.

--- Psyhic message from Warlock Ylrad to Farseer Aldean of Alaitoc ---

My second battle in the Battle for Piscea Prime was against Jordan and his Orks. We played the same mission that I played against Ben in the last game, as he wanted to try it out. I think I mentioned before that this particular mission is one that my particular list really excels at, as I can use my speed to great effect. Jordan is also relatively new to 40k, and unlike with Ben I thought to give him a bit of a briefing on what each of my models was capable of before we had started, to make things a little more fair. The lists were as follows:
Alaitoc Strikeforce
Team Leader:
Warlock Ylrad - Warlock on a Jetbike with the Spirit Stone of Windfall - 65

Core:
Jetbike - 17

Jetbike - 17
Jetbike with Shuriken Cannon - 27

Ranger - 12

Special:
Warp Spider - 19

Warp Spider - 19

Fire Dragon - 22


Total: 198

Fast, shooty, tough (for Eldar at least), and with psychic support. Whats not to like here? The only change here is that I had some RP from my battle with Ben. I put my jetbikes into a group and upgraded them to be BS 5, and I upgraded the Fire Dragon to BS 5 as well. Maybe now he'll hit something.

Boss Bludkrumpa's Boyz
Team Leader:
Boss Bludkrumpa - Boss Nob with Big Choppa, Eavy Armour, Metal Skull, Ammo Runt, Bosspole - 55

Core:
Boyz Mob with 4x Shootas, 1x Big Shoota, and 'Eavy Armour - 60

Boyz Mob with 4x Shootas, 1x Rokkit Launcha - 40

Special:
Killa Kan with Grotzooka - 55 

Total: 200

What we have here is a few Boyz, a Nob and a Walker. Bludkrumpa could be a problem, as T5 is pretty tough, and if he makes combat I'll be in trouple, and if the Kan makes combat i'm losing the model that it fights pretty much for sure, so they are probably the biggest threats. Personally, I would probably have ditched the armour on the Boyz, and gone with sluggas instead to take a whole other squad, but the injury rules are pretty punitive towards melee armies, so I see why he may have wanted guns instead. I think that this list will really start to come into its own once we get to higher points levels and he's able to add a few more toyz.

The Playing Field
I went with Destructor/Renewer for this battle, which may have been a little dirty, but I just couldn't resist the idea of being on the other side of the flame template for a change. Jordam one the roll to deploy/go first and elected for first turn. As I wanted him to get a little closer anyways, I decided not to attempt to seize the initiative. His deployment was pretty simple, as it generally is with this few models. The Big Shoota Boyz went on the right behind the piece of defence line, while the Rokkit squad went in the forest. The Kan deployed half in the forest, a bit behind them , and Bludkrumpa stood boldly in the middle, able to go either way.

I continued with my tactic from last game, mostly clumping up as close to the center as I could, trying to hide behind the hill as best I could, with the Ranger on his own guarding my objective.

Turn 1

With a great cry of "Waaagh!" the orks surged towards the Eldar battle group, the Boyz with the Big Shoota moving into cover behind the defence line section, joined by their Nob, and the Rokkit squad moving carefully through the trees. The Killa Kan moved up a bit, but was also hindered by the thick woods. Firing wildly at the assembled Eldar was inneffective, the few shots that did manage to make contact with the sleek Jetbikes skipping harmlessly off their armour. 

The Orks had advanced, just as Ylrad knew they would, so the Eldar of Alaitoc sprang their trap.the entire force heading directly toward's Bludkrumpa and the Boyz on the right flank. Calling upon his runes of psychic destruction, Ylrad send bolts of eldritch lightning washing over the Boyz, causing four of them to collapse writhing on the ground. With that threat all but neutralized, Ylrad directed his warriors to shoot at Bludkrumpa himself, bringing him down under a volley of Shuriken and Deathspinner fire. The Jetbike with the Shuriken Cannon fired instead into the Killa Kan, stunning the rickety walker. Their targets neutralized, the force faded back towards the hill.

Turn 2

Angered by the loss of their leader, the Boyz in the forest fought their way free, while Ork resilience made itself known, with some of the hardier members of the ravaged squad on the right managing to struggle to their feet, despite the psychic lightnings still lingering in the area. Unfortunately, their rage didn't manage to improve their aim, and their shooting continued to leave the Eldar warhost unscathed. 

Having dealt a heavy blow to the Ork forces, Ylrad ordered his host forwards once more for another attack on the beleaguered Orks. Once again calling upon his Runes, he managed to bring down the final members of the squad with the Big Shoota, though the Rokkit Boyz were left unharmed. to make up for it, the entire warhost blasted into the Rokkit squad, cutting them down where they stood, leaving just a few weakly struggling survivors. The Shuriken Cannon's heavier discs finished off the Killa Kan, turning it back into a useless pile of junk. In a final act of contempt, Ylrad smashed into the injured Boyz from the Rokkit squad, slaying them. With the battle turned hopelessly against them, the remaining wounded Orks fled the battle, dragging the body of their fallen leader along with them.


Post Game Thoughts

Well, this game turned into a massacre very quickly. I attribute most, if not all of that to Ylrad and his psychic power. In two turns, Ylrad was able to all but decimate the boyz, leaving the rest of the force to mop up survivors and key targets. Stunning the Killa Kan right away was a huge deal for me, as it meant that I could sort of throw caution to the wind that turn and clup up without fear of the Grotzooka just wrecking me.

I think that this battle illustrates the massive gap between the armies on the top of the food chain versus those closer to the bottom. The difference in the sheer offensive and defensive capabilities of what an Eldar force can bring compared to the Orks is just crazy, considering his troops were slower than mine, squishier than mine, and with worse shooting than mine, and he scarcely had more of them to make up for it. I think this is where community moderation has to step in a little, as even with the Heralds of Ruin ruleset, which I think is great, these imbalances still occur, simply because the lists still rely heavily on the codices that have little to no semblance of balance. I think that next time we play, 

There is another potential problem I see with the campaign rules for this game, and that is with how RP is handled. The way that RP is done is that it is awarded at the end of the game based on a team's specific accomplishments in that battle, so in essence the more crushing your victory, the more likely you are to gain more RP. If you win, you get 5, if you kill the enemy leader that's 3, if you lose 25% or less of your models that's another 2, etc. Once you determine your RP, you are free to spend it as you wish, and it can be spent to buy your models stat boosts, or cool special rules, as well as to buy back models that were lost in the previous game (which you also roll for). What this means, is if I have played a game already and won, gaining a sizable amount of RP (say 20+), I am at a pretty substantial advantage over a player who hasn't played a game yet, or who hasn't done too well and had to spend virtually all their RP on buying back their troops. What this does is create a game where the rich get richer and the poor get poorer so to speak. I understand that the point is to give players a bonus for doing well, and I don't totally disagree with that, but I think that the system could use a little work. Maybe not forcing players to use RP to get back models that they lost in the battle so that they will still be able to use their points to get things for their guys, though maybe have a restriction of not being able to give upgrades to models that were previously lost (these are new recruits, not the battle hardened vets after all). That way if I gained 20 RP, and my opponent gained 15, but he lost models at the end, he's not getting penalized both for losing AND for losing models as well.

So let me know. What do you think about the Heralds of Ruin campaign rules? Do you think they work fine as it is, or do you think that a reworking would be beneficial?