Battle reports, tactics, and general banter about Warhammer 40k, D&D 3.5/Pathfinder, Malifaux, and Warhammer Fantasy!

Wednesday 28 May 2014

Warhammer 40k Battle Report: Chaos Space Marines V.S Chaos Space Marines

Having completely conquered an Imperial outpost, the tentative alliance between the Chaos warbands fractures completely. Led by a Ruthless Nurgle Lord on a bike, the Plague Marines, aided in a surprising twist by a small cabal of Thousand Sons fight it out with a force of Slaaneshi devotees.

This was an 1750 battle between my Chaos Space Marines, and Brennan's Chaos Space Marines. The mission was the Crusade with a Hammer and Anvil deployment. 
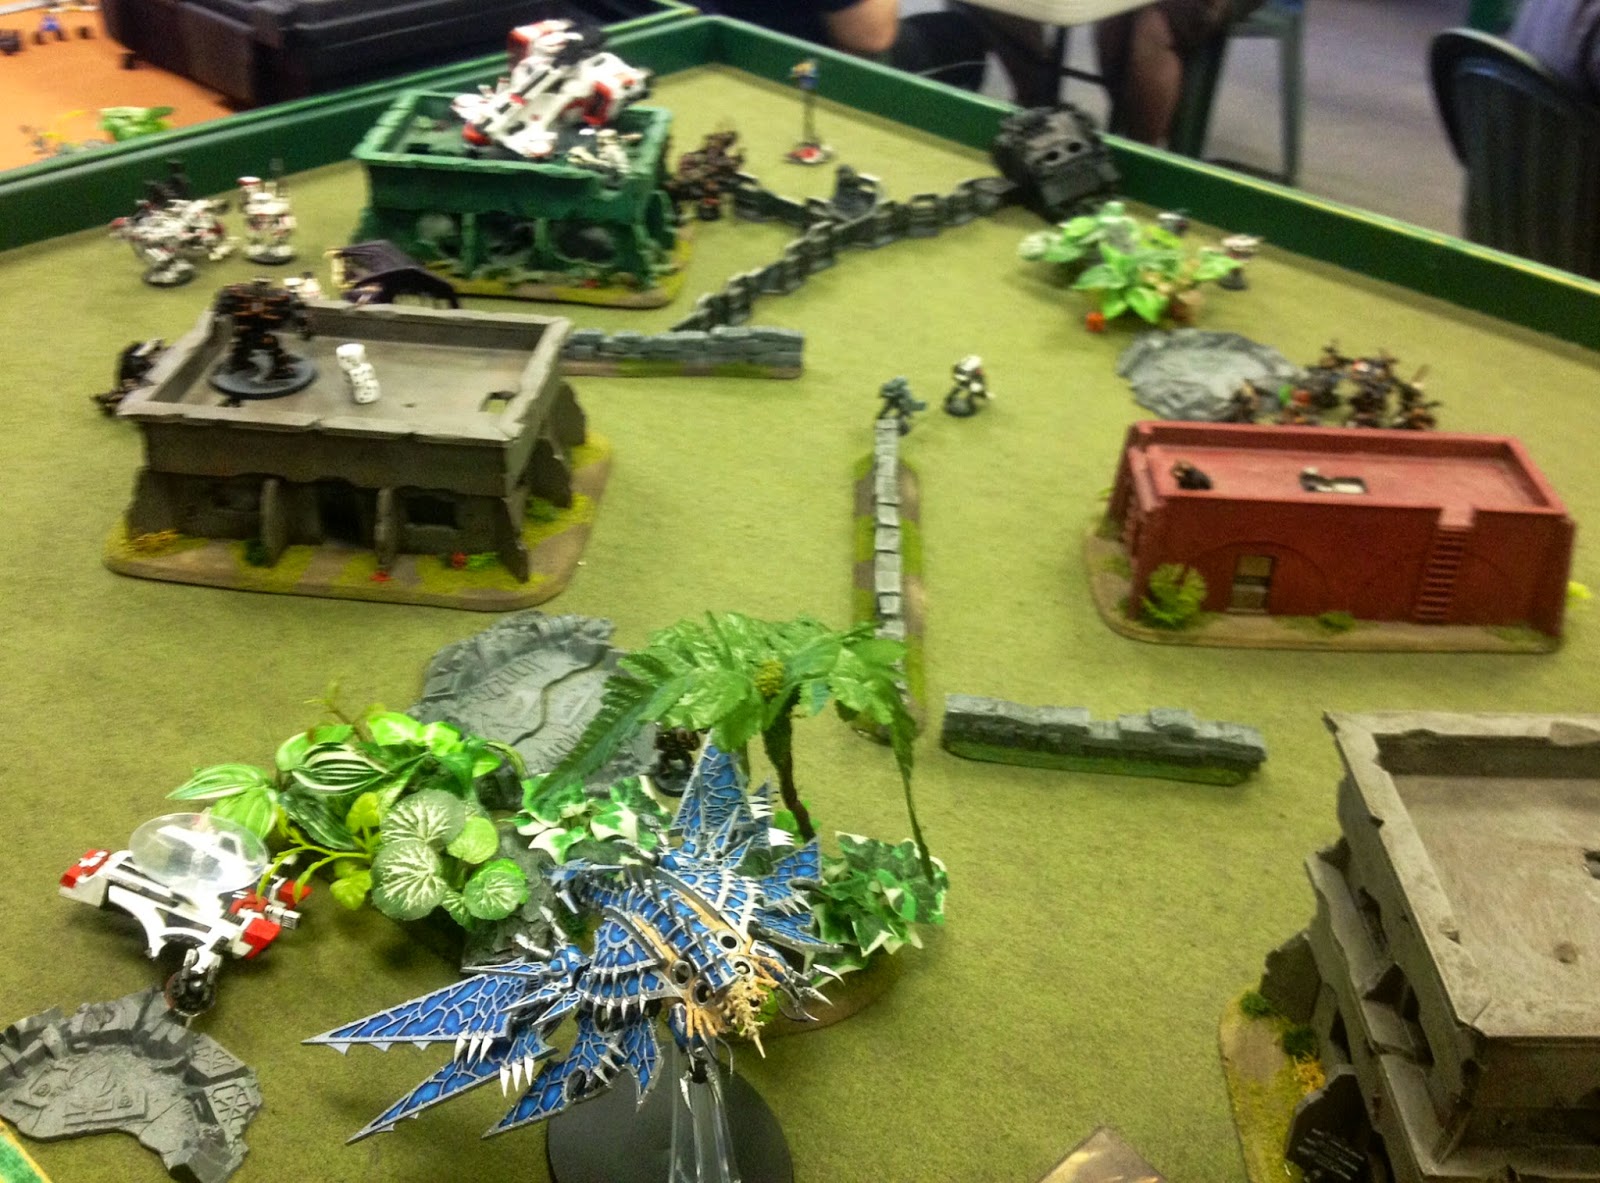
The Board

The Armies

Nurgle and Tzeentch

HQ:
- Chaos Lord with Mark of Nurgle, Bike, Lightning Claw, Meltabombs, and Sigil of Corruption, Gift of
   Mutation (Warlord) - 155

- Sorcerer with Mark of Tzeentch, Mastery Level 3, Terminator Armour, Gift of Mutation, Spell Familiar
   Meltabombs, Sigil of Corruption, Force Axe - 205

Elites:
- 6 Terminators of Tzeentch with 3x Combi-Meltas, 3x Combi-Plasmas, 2x Power Axe, 1x Power Maul, 3x
   Power Sword, Gift of Mutation - 260

Troops:
- 7 Plague Marines with 2x Plasma Guns, Meltabombs, Powerfist in Rhino with Dozer Blade - 268

- 7 Plague Marines with 2x Plasma Guns, Meltabombs, Powerfist in Rhino with Dozer Blade - 268

- 10 Thousand Sons with Gift of Mutation, and Force Axe in a Rhino with Dozer Blade - 315

Fast Attack:
- 4 Spawn with Mark of Nurgle - 144

Heavy Support:
- Maulerfiend with Lasher Tendrils - 135

Total: 1750

This was a fun list I threw together that heavily relied upon expensive troops in Rhinos to try and get them where they needed to be. The Plague Marines would be great for holding objectives, as Plague Marines in cover can be very hard to shift, and it would require nothing less than their complete destruction to get them off the objective. The Thousand Sons would be great for gunning down Marine squads, and for tarpitting anything big and scary, not to mention the Force Axe would be able to cut down some HQs. The Terminators and Sorcerer would Deep Strike in and deal with any armour or heavy troops that he may have.

My Army

Slaanesh Marines

HQ:
- Chaos Lord with Mark of Slaanesh, Murder Sword, Gift of Mutation, Sigil of Corruption, Meltabombs
   (Warlord) - 155

- Sorcerer with Mastery Level 3, Gift of Mutation, Sigil of Corruption, Meltabombs,
   Spell Familiar, Force Sword - 165

Elites:
- Decimator Engine with Mark of Slaanesh, 2x Siege Claws - 220

Troops:
- 9 Chaos Space Marines with Mark of Slaanesh with 1x Plasma Gun, Icon of Excess, 8x Close Combat
   Weapon, Meltabombs in Rhino with extra Combi-Bolter and Dozer Blade - 256

- 9 Chaos Space Marines with Mark of Slaanesh with 1x Plasma Gun, Icon of Excess, 8x Close Combat
   Weapon, Meltabombs in Rhino with extra Combi-Bolter and Dozer Blade - 256

Heavy Support:
- Predator Tank with Twin-Linked Lascannon and Lascannon Sponsons - 140

- Predator Tank with Twin-Linked Lascannon and Lascannon Sponsons - 140

- Defiler with Warpflame Gargoyles - 200

Formation:
- Helcult - 220
     - 10 Cultists with Mark of Slaanesh - 60
     - 10 Cultists with Autoguns - 60
     - Helbrute - 100

Total: 1752

This was a sort of scary list for me, as I didn't have tons of anti-armour outside the Terminators and the Maulerfiend. If the Decimator and Defiler were to get stuck in with my troops there'd be pretty much nothing I could do about it. Unfortunately, the Terminators can only destroy 1 thing the turn they come in, and the Maulerfiend is fairly fragile, so it could easily be blown up right away.
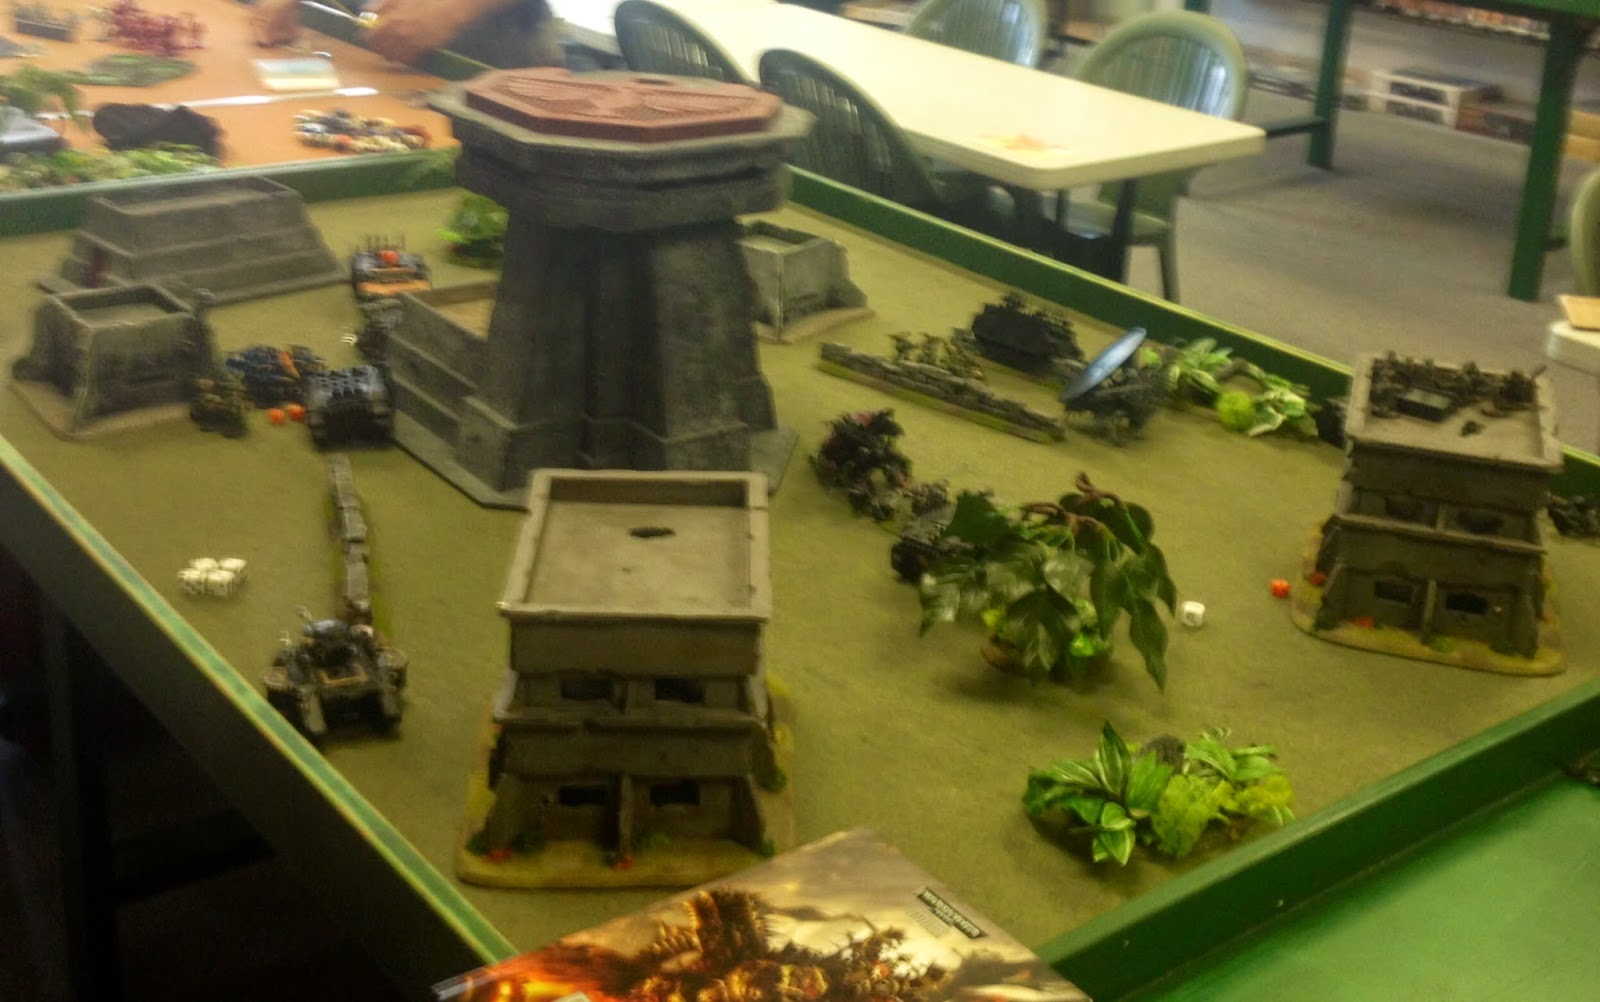
Brennan's Army

The Game

We started by rolling our upkeep. My Lord on the Bike got Re-Rollable Armour Saves, the Sorcerer got Feel no Pain, the Aspiring Sorcerer got +1 Toughness, and the Terminator Champion got Poisoned melee attacks.The Sorcerer got Iron Arm, Gift of Mutation, and Flame Breath, and the Aspiring Sorcerer got Doombolt. Brennan got Inferno, Endurance, and Invisibility on his Sorcerer. Neither of us got useful Warlord Traits. We rolled for table side and I chose the side with more buildings on it so he would have less to hide behind. We then rolled for first turn and I chose to go first.

I deployed first and Deployed my Maulerfiend, the Spawn and Lord, and the Thousand Sons in the middle behind the large tower in the middle. The two squads of Plague Marines went on either flank, and the Terminators and Sorcerer went into Deep Strike reserves. 

Brennan Deployed second and deployed his Lord's Rhino on the left flank, and the Sorcerer's Rhino on the right flank The Decimator went alongside the Sorcerer's Rhino, and the Defiler went on the far left flank. One Predator was deployed on each flank, and the Helbrute with the Slaaneshi Cultists were deployed near the Lord's Rhino and the shooty Cultists went on a building in the rear of his deployment zone with the objective.

Turn 1

The Lord and his Spawn begin by rushing forward up the left flank of the central building. The Maulerfiend races up the central building to end up mostly hidden. The Thousand Sons Rhino moves forward to hide behind the central building, waiting for their movement to strike. The Plague Marines on the right move over to the building with the objective on it, and jump out into the building and onto the battlements. and the Marines on the left move forwards as fast as possible. Both the Plague Marines Rhinos pop smoke. The Plague Marines on the building take some pot shots with their Plasma Guns, but fail to do any damage to the Sorcerer's Rhino.

The Sorcerer casts Invisibility on his Rhino. The Slaanesh Lord moves his Rhino Towards the Nurgle Lord, who he has vowed to kill and the Marines jump out of their ride. The Cultists and Helbrute move forward hoping to get close enough for an assault. The Defiler moves along with the Predator to try and get line of sight to the Maulerfiend. The Sorcerer's Rhino moves up towards the Plague Marines on the right.

Shooting starts with the Defiler taking a shot at the Maulerfiend, luckily, it's Daemonic nature saves it. The Predator then shoots at it and manages to get a glancing hit through. The other Predator fires everything into the Plague Marine's Rhino, but thanks to the smoke, fails to damage it. The Lord's Marines shoot everything at the Spawn and manage to do a single wound. In the assault phase, the cultists attempt to assault, but fail their roll.
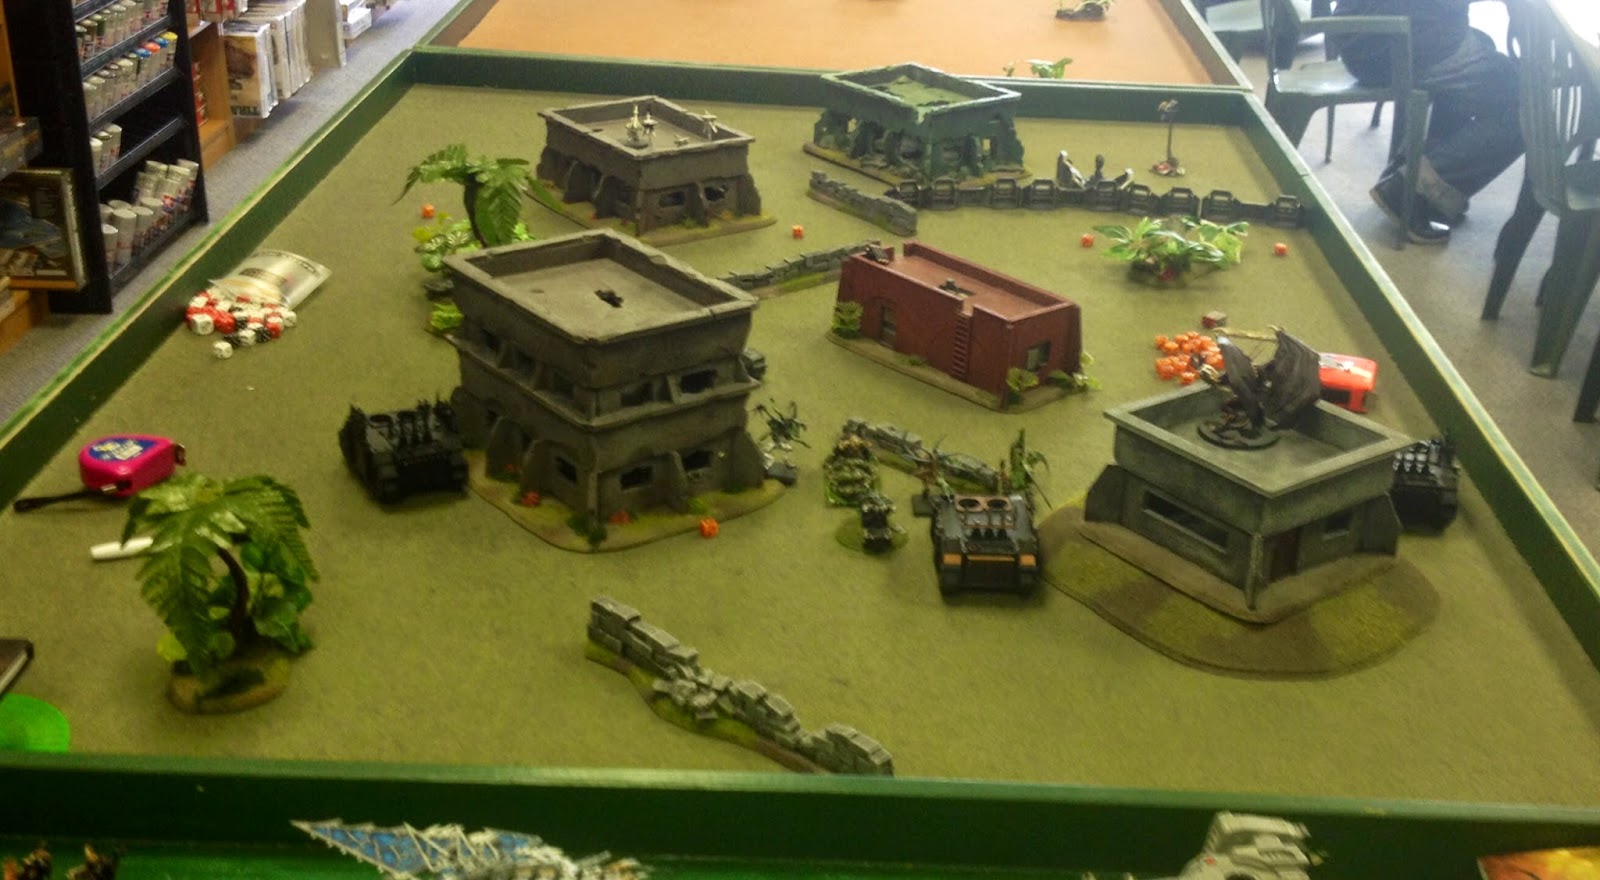
End of Turn 1

Turn 2

Seeing a time to strike, the Sorcerer leads his Terminator squad through the warp, stepping out of a portal behind the Helbrute. The Lord splits off from the Spawn and heads towards the Cultists, while the Spawn race up towards the Lord and his Marines. The Maulerfiend heads towards the Defiler, hoping to engage it this turn. The Thousand Sons drive over and hop out of their Rhino to blast apart the Slaaneshi Marines with their inferno bolts. The left Plague Marines drive forward, ready to lend their support where needed.

Unleashing their Combi-Meltas, and the power of the Warp, the Terminators manage and Sorcerer manage to blow up the Helbrute for first blood, and the Sorcerer's Flame Breath kills a single Cultist as well. The Thousand Sons fire into the Marine squad and kill over half the squad, while the Lord kills a single Cultist with his Bolters. The Plague Marines take some potshots at the Marines with their Plasma Guns, but fail to do anything. The other Plague Marines fire at the Invisible Rhino, but predictably, fail to do anything to it.

In the assault phase, the Spawn charge the Marines, the Lord charges the Cultists, and the Maulerfiend makes it in with the Defiler. In combat, the Maulerfiend tears the Defiler limb from limb, and manages to survive. The Lord kills a bunch of Cultists, but they're fearless because of the Helcult formation. The Spawn kill a Marine or two and take a wound in return, but again, it ends up mostly as a big slap fight.

The Sorcerer attempts to cast Invisibility again, but fails, even with the re-roll from his Spell Familiar (double elevens!). The Sorcerer's Rhino moves up and the Marines jump out to fire upon the Plague Marines on the objective. The Decimator moves over to help out the Lord with the Spawn. The Predators both turn to target the Maulerfiend this turn.

Shooting starts with the left Predator firing at the Maulerfiend and wrecking it. The other Predator fires its Lascannons at the Terminators and kills 2. The Cultists on the building kill another Terminator with their Autoguns. The Lord's Empty Rhino fails to kill any Termies. The Sorcerer casts Inferno at the Plague Marines, but they Deny the Witch. The Marines all shoot at them, and kill 2 Plague Marines.

In combat, the Lord reduces the Cultist unit to 4 and takes no wounds in return. The Spawn succeed in killing a few more Marines, but lose two of their number as well.

End of Turn 2

Turn 3

The Tzeentchian Sorcerer begins by casting Iron Arm on himself getting +2 strength and toughness. He casts Gift of Mutation on the Terminator Champion, but he gets something stupid. With the powers dealt with, the Sorcerer splits off from his bodyguard and heads over to help out the Spawn against the Lord. The Terminators move to go beat up the Predator. The Plague Marines in their Rhino move to try and put some fire into the Predator's side armour to maybe blow it up or something. the Thousand Sons jump back into their transport and drive over to lend their aid to the other flank. The last Rhino moves right up against the door of the building the Plague Marines are in to block it off.

Shooting begins with the Plague Marines firing out of their Rhino at the Predator, but they fail to do anything. The Plague Marines on the other flank shoot into the Marines and kill a couple. The Aspiring Sorcerer fires off a Doombolt from the hatch of his Rhino at the Marines and their Rhino, but the Sorcerer denies him. The Bolter from the Son manages to kill a Marine though.

In combat, the Sorcerer charges into the melee with the Spawn and challenges the Lord to single combat. The Terminators charge the Predator tank. The Lord lashes out with his Murder Sword, but the Sorcerer's thick Terminator Armour protects him, and he dispatches the Lord with his Force Axe. The Spawn kill another Marine, leaving only the icon bearer left in the squad, but he holds. The Bike Lord kills another couple of Cultists, but the last two stick it out stubbornly. The Terminators mange to knock out one of the Predator's Sponsons, but it is otherwise unharmed.

The Sorcerer casts Invisibility on his squad again, and they stay more or less where they are. The Rhino rams the Thousand Sons' Rhino, but neither vehicle takes any damage. The Decimator moves right up to the combat with the Spawn and Marine. The Predator on the left moves a bit and turns to blow up the Plague Marine's Rhino while the other one pivots to shoot the one blocking the door to the Plague Marine's building.

The Marines open fire on the Plague Marines, with the Sorcerer once again casting Inferno, and manage to kill 2 more. The Predators open fire on the Rhinos, but cover saves them both. The Cultists on the roof shoot at the Terminators again, but fail to do any damage.

In the assault phase, the Decimator charges the Sorcerer. The Decimator puts all of its attacks on the Sorcerer, but only gets one wound through. The Spawn fail to kill the Marine, and he has similar success. The Sorcerer sticks a Meltabomb on the Decimator, but it's saved by its Daemon save. The Lord only manages to kill one more cultist, leaving him stuck for yet another turn.

End of Turn 3
Turn 4

The Sorcerer again casts Iron Arm on himself and gets a 2. The Rhino in front of the door of the building moves forward to make room for the Thousand Sons who leap from their Rhino to lay into the Sorcerer and his squad. The Plague Marines in their Rhino move to try and take some shots at the Cultists on the building. The Terminators move to assault the building.

The Thousand Sons and Plague Marines fire everything they have at the Sorcerer's squad and kill all but the Sorcerer and one Marine. Firing from the other Plague Marines does nothing. In assault, the last Marine is finally killed, and the Sorcerer fails to do any damage to the Decimator again. The Lord finally manages to cut free of the Cultists, and the Terminators destabilize the building a bit and kill a couple of Cultists.

The Sorcerer casts Endurance on himself and his Marine and prepares to assault. The Predators once again fire at the Rhinos, but fail to blow anything up. The Cultists shoot at the Lord, but fail to do any damage. The Sorcerer Charges into the Thousand Sons, but it ends up being a big slap fight and everyone survives. The Decimator has a better time of it this Turn and manages to kill the Sorcerer.

End of Turn 4.

Turn 5

The Plague Marines move over and hop out of their Rhino and move towards the objective, but they're pretty out of position and will need another turn to get there. The Terminators move into the building to try and go in and wipe the Cultists off their objective. The last few Plague Marines from the other squad leap from the roof of their building to engage the Marines. 

In the assault. The Plague Marines assault the Marine and Sorcerer. The Aspiring Sorcerer wins the challenge with his Force Axe and cuts down the Sorcerer, while the Plague Marines easily finish off the last Marine.

At this point Brennan concedes as there's no way to pull a victory.

End of Turn 5

Total Points:

Nurgle/Tzeentch: 6 (1 objective, First Blood, Slay the Warlord, Linebreaker)

Slaanesh: 4 (1 Objective, Linebreaker)

Post-Game Thoughts

That was a really interesting game with interesting lists. I thought for sure that I was going to have an uphill battle set out for me with all that armour, but some luck on my part really made it not so bad. The Terminators sticking the landing and taking out the Helbrute turn 2 was pretty clutch, as was the Maulerfiend making it into combat and taking down the Defiler. Without those two beasts in the game I had a much easier time gaining control of the board which really won me the day.

That being said, I definitely think I could have played a better game. Firstly, I think instead of sending the Terminators off to deal with the Predator it would have been more prudent to have kept them back to go help out the Lord, as he got stuck in combat for most of the game against a stupid unit of fearless Cultists. This would have freed up the Lord to rip around and maybe take out the Decimator, the Predator, or with some luck, both. Next, I really should have kept the Plague Marines in the Rhino right on the Objective in the center. Moving them up to try and engage the Predator and the Cultists was stupid, as they were unlikely to have done much anyways, and they would have been much better used sitting on the 3rd objective.

Brennan played a pretty solid game, but got betrayed pretty heavily by the dice once again. Failing Invisibility was bad, and he failed a charge against the Spawn on turn 2 which could really have swung things in his favour on that flank. I'm still having a hard time seeing a use for Decimators, at least with the Close Combat loadout. They just seem too slow to get to where they're needed.

On a side note, I'd like to give a shout out to Force Weapons. Both of Brennan's HQs fell in a single hit to Force Weapons, and I think they're totally awesome if you can bring them to bear.

As always, thanks for reading and make sure to comment below on the army lists and/or tactics used in this game!

Thursday 15 May 2014

Warhammer 40k Battle Report: Eldar V.S Iron Hands/Tau

The impetuous Mon'Keigh have once again defiled a maiden world belonging to the Eldar. A strikeforce of skimmers and aspect warriors from the Alaitoc Craftworld has been sent to cleanse the world of this xenos filth.

This was a 1500 point game between my Eldar and Todd's Space Marines with Tau allies. The Mission was The Emperor's Will with a Hammer and Anvil deployment type.

The Board
The Armies

Eldar

HQ:
- Farseer (Warlord) - 100

- Farseer on Jetbike with Mantle of the Laughing God, The Spirit Stone of Anath'lan, and Runes of
  Witnessing - 185

Troops:
- 5 Dire Avengers in a Wave Serpent with Twin-Linked Scatter Lasers, Shuriken Cannon, and Holo-Fields
  -210

- 5 Dire Avengers in a Wave Serpent with Twin-Linked Scatter Lasers, Shuriken Cannon, and Holo-Fields
  -210

- 3 Windrider Jetbikes with a Shuriken Cannon - 61

Fast Attack:
- 3 Hornets each with 1x Brightlance and 1x Pulse Laser, 3x Holo-Fields - 285

- 5 Warp Spiders with Exarch with Fast Shot - 115

Heavy Support:
- 6 Dark Reapers with Starshot Missiles, and Exarch with Fast Shot - 248

Fortification:
- Aegis Defence Line with Icarus Lascannon - 85

Total: 1499

This list was an experiment to try out Dark Reapers. I figured that a big group of them behind a defence line with a Farseer with psychic support (Guide/Prescience and Perfect Timing specifically) would be pretty deadly and they're pretty versatile with the Starshot and Starswarm Missiles as well. Of course I had the tried and true, and sort of obligatory squads of avengers in Serpents. They're just to good to not take. I also wanted to try the Mantle on a Jetseer to see if it was as good as the Autarch. The Hornets were also something I don't normally bring. I brought them with lances and pulse lasers for lots of strength 8 and lo ap stuff, in case Todd brought some Centurions or Terminators or something.

Eldar minus the Warp Spiders


Iron Hands/Tau

HQ:
- Master of the Forge with Conversion Beamer and Power Sword (Warlord) - 125

- Cadre Fireblade -60

Elite:
- Ironclad Dreadnought with Powerfist/Heavy Flamer and Seismic Hammer/Meltagun, Extra Armour, Hunter    Killer Missile, in a Drop Pod - 190

Troops:
- 7 Tactical Marines with Lascannon - 118

- 7 Scouts with 6x Sniper Rifles - 83

- 11 Fire Warriors in Devilfish with Twin-Linked Smart Missile System - 189

- 12 Fire Warriors - 108

Fast Attack:
- 3 Bikes with 2x Meltaguns, Sergent with Meltabombs - 88

- 3 Bikes with 2x Grav-guns, Sergent with Meltabombs - 98

Heavy Support:
- Predator with Autocannon and Lascannon Sponsons - 115

- Predator with Autocannon and Lascannon Sponsons - 115

- Predator with Autocannon and Lascannon Sponsons - 115

Fortification:
- Aegis Defence Line with Quad Gun - 100

Total: 1504

This list didn't freak me out as much as some of the other lists Todd has brought. I was really more worried about seeing a mess of 2+ saves, but instead was faced with a wall of AV 13 tanks and a bunch of infantry. The Ironclad could be a problem, but with my Brightlances, and general mobility, it probably wouldn't be too bad. With the mission being Hammer and Anvil, I really already had an inherent advantage with my Jetbikes being able to Turbo-Boost 36" to contest last turn. All I really had to do is get First blood and hunker down with my Objective.

The Iron Tau

The Game

I Started to roll all of my considerable upkeep on my Farseers and got Guide, Forwarning and Perfect Timing on the Footseer, and Guide, Doom, and Psychic Shriek on the Manseer. I got the Run +1" for my Warlord Trait, and Todd also got a running related one from the rulebook. We rolled to pick sides and I lost the roll. We then rolled for first turn and Todd won and made me go second. We rolled for night time and it was night first turn. I guess the crafty Eldar were using the cover of darkness to deploy.

Todd deployed first and stretched his Defence Line across his deployment zone up as far as he could. Mine went about halfway back from the edge of my deployment zone. He then put 2 of his Predators, his Bikes and his Devilfish behind it. One Predator went behind a building on my left flank. The Fire Warriors without a ride hid behind a building, while his Tactical Marines hid in a forest in the back of his deployment zone. The Scouts took up position around the Quad Gun.

Iron Tau Deployment


In response, I put the Wave Serpents behind my Defence Line, along with the Dark Reapers and Footseer who were manning the Lascannon. The Manseer and Hornets went on the other flank. I made sure to hide everything back out 36" for nightfighting, relying on my superior mobility to allow me to move just within range if he didn't move, or back enough that unless he went for a cruise he wouldn't be able to shoot me. 

Alaitoc Deployment
Turn 1

I tried to steal the initiative, but it didn't work out. The screech of a Drop Pod fills the air, cut short suddenly by the crash of twisting metal as the Iron Clad's Drop Pod malfunctions and scatters off the table and being destroyed by the hazardous terrain behind the Eldar line. With their ancient brother destroyed, the Space Marines shuffle around in the dark, trying to draw lines of fire on the shadowy shapes on the Eldar. The Bikes on the left head behind a building to the left, while the Melta Bikes head behind a Building on my right. The Devilfish flies forwards to get behind a building. With everything too far away in the dark, nothing shoots but the Bikes and Devilfish shuffle a bit for the Flat Out cover.

The Eldar begin with their Farseers sending their minds into the Warp in an attempt to divine the future. The Footseer casts Guide on the Dark Reapers, as well as Perfect Timing. The Manseer Guides the Hornets. The Hornets and Manseer then move up to get into the edge of range. The center Wave Serpent moves forwards 12 to get a bead on the Bikes, and the other one moves over a bit to try and get some line of sight to the Devilfish.

Focussing their attention on the Devilfish, the Dark Reapers let fly with a volley of Starshot Missiles with the Farseer firing the Lascannon, and through the gloom they manage to wreck the skimmer. Only two Hornets are able to get within range, and they fire at the Predator by the building, but the cover of darkness saves it. The Solitaire Turbo-Boosts up right by the Fire Warriors behind the building.

End of Turn 1
With dawn breaking, the Iron Hands begin to grow in confidence. The central Predator moves right up to the Defence Line to avoid giving more cover to the Hornets. The Grav Bikes move across the river to threaten the Hornets. The Melta Bikes are a bit unsre of what to do, as they don't really want to charge the Eldar Lines with the Dark Reapers waiting for them. Eventually, they make a break behind the Fire Warriors by the wrecked Devilfish. The Fireblade's squad moves to try and shoot down the Manseer.

Shooting begins with all of the Fire Warriors bar 3 or 4 from the Fireblade's squad firing into the Manseer, and after all is said and done he has taken only 1 wound, even after the Tactical Marines lend their might. The Scouts fire at the Dark Reapers, with the Sergent manning the Quad-Gun and down 2 Aspect Warriors. The right Predator shoots at the Wave Serpent that emerged from behind the Defence Line, but thanks to Holo-Fields, is unable to do anything. Both the other Predators shoot at the Hornets, as well as the Grav-Bikes, but only manage to explode one skimmer. The other Bikes Turbo-Boost. The Grav-Bikes then try and assault, but fail the distance.

Seeing a target open up, the Jetbikes come on to the field near the Grav Bikes. The Warp Spiders teleport onto the battlefield, but due to unsteady Warp eddies end up in the back corner of the Eldar zone. Once again the Farseers go to work, the Manseer foretelling the Doom of the leftmost Predator. The other Farseer guides the Dark Reapers and casts Perfect Timing. The Wave Serpent in the middle moves over towards the Grav-Bikes and the Dire Avengers get out. The Other Wave Serpent moves to try and shoot up the side of the middle Predator. The Hornets move up to target the doomed Predator and the Manseer moves right up to the Fire Warriors. The Warp Spiders run

With a blast of potent psychic energy, the Solitaire unleashes a Psychic Shriek into the Fire Warriors, Killing 4. The Dark Reapers open up on the Scouts huddled behind their Defence Line with their Starswarm Missiles and kill them all. The Hornets fire into the Predator, and blow off a Lascannon. The Wave Serpent, Dire Avenger and the Shuriken Cannon from the Jetbikes all fire into the Bikers and kill them all. The other Wave Serpent launches its shield at the center Predator and shakes it. In assault, the Manseer charges into the Fire Warriors and easily murders all of the creatures. The Warp Spiders use their generators to move forwards.

End of Turn 2
Turn 3

With the Scouts and Fire Warriors gone, the Tactical Marines with the Master of the Forge mover towards the Manseer. The rightmost Predator moves around the building to get a good shot at the Wave Serpent. The left Predator moves over to try and shoot up the Wave Serpent. The Last Predator charges at the Manseer, who moves out of the way. Finally, the Fireblade leads his troops around and over the Devilfish to take out the Hornets. The Melta Bikes move back to their other spot behind the other building.

Shooting starts with the Fire Warriors unloading on the Hornets and wrecking them. The Predator on the left shoots at the Wave Serpent but fails to hurt it. The Predator on the right fires at the other Wave Serpent and immobilizes it. The Marines shoot their pistols into the Solitaire, but fail to do any damage.

The Marines declare their assault and lose a Battle-Brother to overwatch. The Manseer challenges the Master of the Forge who accepts. The Seer is unable to get past the Master's armour, but the Master deals a wound in return. Seeing his disadvantage, the Jetseer disengages using Hit and Run and the Tactical Marines consolidate into what ends up being a Fireblood river, and lose a Marine to the hazardous water.

The Footseer attempts to Guide, but suffers a Perils of the Warp and must use his Ghosthelm to ward off the attack. Luckily he manages to get Perfect Timing off. The Manseer once again Dooms the left Predator. The Dire Avengers that hopped out of the Wave Serpent start to head towards their objective to claim it while their ride moves to go take down some Fire Warriors. The Warp Spiders jump forwads towards the Fire Warriors, eager to get to the battle. The Solitaire move up behind the right Predator. Launching a barrage of Starshot Missiles at the left Predator sees it explode in a hail of fire. The Wave Serpents both fire at the Fire Warriors and kill a few. The Manseer shoots at the rear armour of the right Predator, but cant do anything. The Dire Avengers continue to run to the objective.

In the assault phase, the Warp Spiders warp jump again towards the Fire Warriors. The Jetseer assaults the right Predator and blows it up with his Witchblade.

End of Turn 3

Turn 4

With the end of the game nearing and not much left to fight with, the Tactical Marines push on through the river, losing another of their number. The Predator shimmies to avoid being auto-hit by the Manseer should he come around. The Melta Bikes, seeing their chance for glory, head towards the immobilized Wave Serpent to blow it up. The Fire Warriors hustle back around the Devilfish to take out the Warp Spiders.

The Predator fires its weapons into the Wave Serpent, but fails to hurt it. The Tactical Marines take a few shots at the Manseer, but their weapons prove futile. The Bikes target the Wave Serpent with their Meltaguns and it explodes, though no Dire Avengers are harmed. The Fire Warriors blast into the Warp Spiders and kill them all.

Guide goes off on the Reapers, as well as Perfect Timing, and the Manseer Dooms the Bikes. The Manseer moves behind the building, ready to boost out and contest next turn. The Dire Avengers move towards the Fire Warriors, hoping to end them., as does the last Wave Serpent. The Dire Avengers finally make it to the Objective.

The Dark Reapers once again fire their Starshot Missiles, this time at the Bikes, and completely Annihilate them. The Dire Avengers Battle Focus forwards and kill 2 Fire Warriors and the Wave Serpent kills all but one and the Fire Blade.

At this point with no hope of Victory, the Space Marines and Tau call for a hasty retreat.

End of Turn 4
Total Points

Eldar: 2 (Fist Blood, Linebreaker)

Iron Tau: 0

Post-Game Thoughts

That ended up being a very one-sided battle. Todd's Drop-Pod scattering off the Table turn 1 may have won me the game, as it gave me First Blood and allowed me to kind of just sit back and plink away. I think once he lost the Dreadnought he should have just blasted everything at my troops and tried to at least deny me my objective, as if he could have held his, he still could have won. As it was, I had both a unit of Jetbikes and my Farseer hiding out waiting to Turbo-Boost in for the denial, and he had no way of really stopping me. I also find Emperor's Will to be a very one-sided mission, with the advantage going way more to whoever can get First Blood. With only two objectives to score, it makes it very difficult to push your opponent's army completely off their objective and still hold your own.

I do think I made a few mistakes this game. I probably should have outflanked my Hornets so that they could have come in and done a lot more damage. I also probably should have dealt with the Fireblade's unit first, and then come back and fought the other unit of Fire Warriors with my Manseer. I also maybe should have held back the Warp Spiders on Turn 3 instead of charging them forwards, and used them to sort of counter attack when I needed them.

It also helped that Todd's luck was fairly poor throughout the game, as he failed to hit and wound a lot with his Fire Warriors. And of course, scattering was a huge deal too. He did forget a few of his rules as well. He forgot about his Feel no Pain on his Marines and It Will not Die on his tanks, which could have made a difference.

Still, it was a fairly fun game, and any time I get to beat up loyalists is a good time for me. Thanks for reading!

Monday 5 May 2014

Warhammer 40k Battle Report: Chaos Space Marines V.S Tau

A marauding Chaos warband has spilled forth from the warp into the fringes of Tau space and is slaughtering its way through the surprised Tau forces. In the ruins of an Imperial city, the Tau dig in and wait once again for the onslaught of warp-spawned super soldiers.

This was an 1855 point game between my Chaos Space Marines and Brennan's Tau. The mission was Crusade with 5 objectives using the Hammer and Anvil deployment type.

The Board

The Armies

Chaos Space Marines

HQ:
- Sorcerer With Mark of Nurgle, Mastery Level 3, Sigil of Corruption, Meltabombs, Bike, Spell Familiar        ,and Gift of Mutation (Warlord) - 200

- Daemon Prince of Slaanesh with Wings, Power Armour, Mastery Level 3, Gift of Mutation, Spell Familiar,    and the Black Mace - 360

Troops:
- 10 Chaos Space Marines with 2x Plasma Guns, Aspiring Champion with Meltabombs in Rhino with Dozer    Blade - 215

- 10 Chaos Space Marines with 2x Plasma Guns, Aspiring Champion with Meltabombs in Rhino with Dozer    Blade - 215

- 10 Chaos Space Marines with 2x Meltaguns, Aspiring Champion with Meltabombs in Rhino with Dozer        Blade - 205

Fast Attack:
- 4 Spawn with Mark of Nurgle - 144

- Heldrake with Baleflamer- 170

Formation:
- Mayhem Pack with 3x Multi-Meltas, 3x Powerfist, and 3x Heavy Flamer - 345

Total: 1854

This list was sort of experimental. I wanted to try and bring a whole bunch of cheap Marines with Rhinos to try and give them a bit more mobility and survivability. I know that Rhinos tend to be First Blood bait, but this list isn't very shooty anyways. It was mostly intended to be in effective range and assault distance turn 2 or 3 and to just push forward with everything I had. The Helbrutes would hopefully prove to be a god distraction and take down light troops and or vehicles fairly well the turn they came in, and I was hoping that the Daemon Prince and the Spawn would prove to be enough of a threat to somewhat mitigate the agro coming at my Marines.

Chaos SPAAACE Marines

Tau

HQ:
- Commander in Iridium Suit with Fusion Blaster, Missile Pod, Multi-Spectrum Sensor Suite, Neuroweb          System Jammer, Onegar Gauntlet, Puretide Engram Neurochip, Repulsor Impact Field, Shield Generator,     Stimulant Injector (Warlord) - 232

Elites:
- 3 Stealth Suits with 1 Fusion Blaster and Target Lock, 1 Vectored Retro-Thrusters, Shas'vre with Marker    Light and Target Lock - 120

- 3 Stealth Suits with 1 Fusion Blaster and Target Lock, 1 Vectored Retro-Thrusters, Shas'vre with Marker    Light and Target Lock - 120

- 3 Crisis Suits with 3x Fusion Blaster, 3x Missile Pod, 2x Target Lock, 1 Vectored Retro-Thrusters - 171

Troops:
- 6 Fire Warriors with Shas'ui with Marker Light and Target Lock - 79

- 6 Fire Warriors with Shas'ui with Marker Light and Target Lock - 79

- 6 Fire Warriors with Shas'ui with Marker Light and Target Lock - 79

- 6 Fire Warriors with Shas'ui with Marker Light and Target Lock in Devilfish with Blacksun Filter, Burst          Cannon, Disruption Pod, and a Seeker Missile - 183

Fast Attack:
- Piranha with Fusion Blaster, Disruption Pod, Seeker Missile - 73

- Piranha with Fusion Blaster, Disruption Pod, Seeker Missile - 73

Heavy Support:
-Hammerhead Gunship with Longstrike, Automated Repair System, Sensor Spines, Disruption Pod, and a     Seeker Missile - 203

- Sniper Drone Team with 3x Sniper Drones - 58

- 3x Broadside Battlesuits with 2x Target Lock, 1 Drone Controller, Twin-Linked High-Yield Missile Pods,   Twin-Linked Smart Missile System, and 6x Missile Drones - 295

Fortification:
- Aegis Defence Line with Icarus Lascannon - 85

Total: 1855 

This is a pretty typical Tau list for Brennan, with a pair of Piranhas, a unit of Missilesides, a bunch of Stealth Suits and a Beefcake Commander with retinue of Crisis suits. It isn't typical, however, that he brought tau at all, as he usually likes to be "in the shit" as he so eloquently puts it. I was most scared of the Broadsides, as the amount of firepower they can put out is just plain stupid, and the Fire Warriors could prove to be a problem for my Daemon Prince and Marines. The Crisis suits were likely to drop in and really put the hurt on a unit or two, so I'd have to wait for that and see how it went and how I would need to respond to it when it came in. Overall, he outnumbers and outguns me pretty vastly, so it will be a tough fight.

The Tau
The Game

We rolled all of our upkeep stuff and in the end my Sorcerer got the Hatred Warlord Trait and rolled Nurgles Rot, Endurance, and Life Leech for his powers, and he got the Shred Boon. The Daemon Prince rolled Sensory Overload, Iron Arm, and Smite for his powers and got the re-roll armour saves Boon. Brennan's Commander got the no scatter deep strike Warlord Trait, which was perfect for him.

Brennan won the roll to pick his side, and surprisingly didn't pick the side with the tall building and the bunker on the hill. He deployed his defence line in a pretty standard line to block off my assault lane, and then put a little section down the middle around his gun emplacement.

I won the roll for first turn and decided to go first in an attempt to get as close as possible before my Rhinos were blown up. Night Fighting was turn 1, but with his Missilesides and tanks all having Blacksun Filters, it wouldn't really matter. I deployed fairly aggressively, as I figured the volume of fire would hurt me bad regardless of how much cover I had anyways. the 2 Plasma squads went on the flanks, while the Spawn and the Melta squad went in the center to be able to throw themselves wherever they needed to go. The Prince went on top of the Bunker on the hill, ready to fly forward.

My Deployment
To counter this, Brennan put two of his Fire Warrior  units behind the Defence Line, with the third on the large green building. The Sniper Drones went on the other building, and the Broadsides went in between the two. The Piranhas and Devilfish went on my left flank, hoping to loop around, and claim the objectives on that flank. Unfortunately, I didn't get a picture, because I'm dumb.

Turn 1

I start by rolling my Psychic Powers and first roll I get a double 1 on my Sorcerer for Endurance, dropping him to 1 wound right away. Awesome start! The Daemon Prince rolls for Iron Arm and it goes off but I only get a 1 on my d3, so he's still a little gooey this turn. The Plasma Rhino on my Right and Melta Rhino both move forward 12 and Turbo-Boost. The Daemon Prince flies forwards as fast as he can, and the Spawn move  up and run forward a mighty 2" The last Rhino moves up 6 and the Plasma gunners take some pot shots at a Piranha, but fail to hurt it. The Daemon Prince casts Sensory Overload on the rightmost Fire Warrior Squad and kills 2, blinding them in dazzling lights, but they hold firm and don't flee.

Brennan stars his turn by moving up both Piranhas and the Devilfish towards my Rhino, and shuffling over the second Fire Warrior Squad to get a guy on the Lascannon. the two Fire Warrior squads on the ground shoot at the Daemon Prince, but thanks to his altitude and fast movement, get no hits. Both Shas'uis try and mark the Spawn, and they get 1 counter on them. The Piranhas both shoot their fusion guns at the Rhino, and while the first misses, the second hits and blows it up, killing 3 Marines and getting first blood. The Devilfish then shoots them but no more die, and they are not pinned. The Broadsides, Sniper Drones and last Fire Warrior Squad all fire into the Spawn, and manage to kill 2 of them. Feel no Pain really helped mitigate that damage. Longstrike shoots at the Rhino, but misses.

End of Turn 1

Turn 2

Rolling for powers again and both of my Blessings go off and I get a 2 for Iron Arm. Neither the Heldrake nor the Mayhem Pack arrives this turn. The Prince moves towards the larger Fire Warrior squad. The Plasma Rhino moves towards the Fire warriors hoping to kill some and maybe make them flee. The Melta Rhino moves forwards as well. The Spawn move forwards some more, hoping to get an assault off on the Broadsides this turn.The Marines move through the crater 3 whole inches. No assault for them this turn. Shooting and the Prince again casts Sensory Overload, this time on the larger squad and kills 1. The Plasma guys shoot at the other Fire Warriors and kill another one. The other Plasma squad shoots at the Lead Piranha, but sucks again. The Melta Rhino and 2 guys shoot at the Fire Warriors on the roof, but fail to kill anything.

Assault, and the Prince takes a wound from the Black Mace but butchers the Shas'ui, and the Fire Warriors flee and get cut down. The Spawn take overwatch from the Sniper Drones and the Broadsides, and while one takes two wounds and the other takes a wound they both survive to assault. Unfortunately, they then fail the assault. Luckily, the more wounded Spawn and the Sorcerer get a wound back from It Will Not Die.

Brennan rolls his reserves and both Stealth teams drop in. near the Rhinos, but the Commander stays in reserve. Movement, and the Broadsides move back, while the Devilfish moved over to try and kill the Spawn. Unfortunately, he forgets to move the Piranhas this turn, so they just hang out. Shooting begins and the Fire Warriors and Longstrike shoot at the Daemon Prince, but he takes only 1 wound. The Piranhas shoot at the Marines and kill all but 4, but they're fine.The Sniper Drones and Missilesides all fire at the Spawn and Sorcerer and wipe them out, gaining him Slay the Warlord. The Stealth Suits both Target the Melta Rhino, but he misses with the Fusion guns and does a bad job with the burst cannons and it's unscathed.

End of Turn 2
Turn 3

The Daemon Prince casts Iron Arm again and gets a 2 for his Strength and Toughness again. The Mayhem Pack drops in, but the Heldrake is a lazy jerk and stays in reserve again. I drop one Brute next to Longstrike and he scatters right to the edge of the table, but stays on and within Melta Range, the second goes in front of the Broadsides, but scatters to the side of them, and the third drops behind the Devilfish but scatters huge and lands on top of the building with the Sniper Drones. The Plasma Rhino drives up onto the Defense Line and the Marines jump out, ready to shoot some Fire Warriors. The Melta Rhino stays put and the Marines jump out from it as well. The Marines in the crater move towards the Piranhas, ready to assault, and the Daemon Prince moves towards the Broadsides.

Shooting begins with the Melta Marines shooting at the rearmost Stealth Suits, and while the Bolters and Meltas do nothing, the Aspiring Champion manages to pick the Shas'vre with his Bolter and gets the Icy Aura boon. The Stealth Team runs away. The Helbrute by Longstrike hits and pens with his Multi-Melta, but the crafty tank ace jinks out of the way. The Brute by the Broadsides fires it's Heavy Flamer and toasts a couple of Drones, but misses with the Multi-Melta. The Daemon Prince then casts Sensory Overload again and kills the remaining Drones. The Last Helbrute Flamers the Sniper Drones and kills the Spotter and a Drone, but misses with the Multi-Melta, and the Drones flee. The Plasma Marines shoot at the last 3 Fire Warriors by the objective and clear them off. The 4 Marines on the left flank try and lob a Krak Grenade at the closest Piranha, but miss.

The Marines declare a Multi-Assault on the Piranhas, and make it easily, and the Daemon Prince attempts to assault the Broadsides, and though he takes no wounds from the Overwatch, he fails the assault even with the Fleet re-roll. What a dunce.Thankfully, our friends the Marines manage to blow up one Piranha and wreck the other, though the Champion and one of the Plasma Gunners are killed in the explosion.

With the Tau line starting to waver, the Commander arrives with his bodyguard of Suits. The Stealth Team and Drones both continue to run, though neither make it off the board. Longstrike turns around to shoot the Helbrute, and the Broadsides move back a bit as well. The Devilfish moves  near the objective in the bushes and the Fire Warriors jump out, ready to kill the last two Marines. Lastly, the other Stealth Suits move to try and gun down the Melta Marines.

The Broadsides start their shooting by firing at the Daemon Prince, but once again, his re-rollable armour save holds out. The Crisis Team splits its fire with one Suit each firing at the Helbrutes, and the last one and Commander shooting at the Daemon Prince, and while a missile finds its way through the Prince's armour, the Daemon's invulnerable save saves it from the fusion shot. The other suits do scarcely better with one Brute getting stunned only. Longstrike finally proves he's a tank ace and blows the Helbrute haranguing his flanks to smithereens. Both Stealth Teams fire everything they have at the Melta Marines but only kill 1, and the Fire Warriors on the building try and kill the Daemon Prince, but his armour holds out. Lastly, the Devilfish and Fire Warriors shoot at the last two Marines and kill the Plasma Gunner, but the other one survives. Once again, no picture was taken this turn, because as we have already determined, I'm dumb.

Turn 4

The Heldrake finally decides to stroll in and moves towards the newly-emerged Fire Warriors, to help out his beleaguered buddy. I roll the Helbrute's crazy test and they decide to get the only one I didn't want this turn; a Fire Frenzy. The Daemon Prince casts Iron Arm and gets another 2. The lone Marine moves towards the Fire Warriors and their Transport, ready to go in and blow some stuff up. The Plasma Marines move towards Longstrike and the building, hoping to kill two birds with one stone. The Melta Marines shuffle about to shoot at the larger, braver Stealth Team.

The Heldrake uses its Daemonforge and makes the Fire Warriors literal warriors on fire, but takes a Hull Point. The Marine lobs a Krak Grenade at the Devilfish, but fails to hurt it. The Melta Marines kill a single Stealth Suit, but they hold, and firing from the other Marines does nothing to Longstrike. The Helbrutes fire everything at the Crisis Suits, but with one snap firing and the other in a bad position, only one wound goes through and it gets Look Out Sir'd to the Suit with Hit and Run. The Daemon Prince casts Smite on the Crisis Suits and kills the Hit and Run guy.

In my Assault Phase, the Marine makes his assault against the Devilfish, the Plasma Marines multi-assault Longstrike and the building with the Fire Warriors, and the Daemon Prince Assaults the Crisis Suits. Try as they might, none of the overwatch does anything and all of my guys make it in. The Lone Marine sticks a Krak Grenade in the Devilfish's feul tank and the transport explodes, leaving him unscathed. The Plasma Marines strip 2 Hull Points off Longstrike and kill a pair of Fire Warriors by blowing up bits of the building. The Daemon Prince challenges the Commander to single combat and he accepts. Thanks to his Shield Generator and Stimulant Injectors, the Commander only takes two wounds, but he misses his return attack with the Onager Gauntlet. The Black Mace's dark sorceries deals a wound to one of the Suits as well. Luckily, they hold.

Things are looking bad for the Tau. Longstrike flies up onto the building with the Fire Warriors to get away from the Marines. The Broadsides stay put and the Stealth Suits all go after the Melta Marines. Shooting begins with Longstrike attempting to take out the stunned Helbrute, but he gets a 1 for his penetration roll, even with Tank Hunter. The Missilesides try to finish the job and manage to wreck the Helbrute. All the Stealth Suits shoot at the Marines, with the Fusion Blaster splitting its fire to the Rhino. The Rhino explodes, but no Marines are hurt. Lastly, the Fire Warriors shoot at the Plasma Marines and manage to kill a regular Marine.

In assault the Daemon Prince wiffs hard and fails to hurt the Commander at all, but the Commander has a similar experience, so everyone kind of stands around awkwardly.

End o Turn 4

Turn 5

The Prince casts Iron Arm again and gets a 3 this time, and the remaining Helbrute gets a Blood Rage for its Crazy Check. The Heldrake flies over the two stealth suits in the middle of the board and kills them with its Vector Strike. The Plasma Marines move back a bit to claim the objective, and the Helbrute leaps from the roof to get into combat with the Crisis Suits.

The Heldrake opens the shooting phase by torching two of the 3 remaining Fire Warriors, though the last one holds. the Marines gun down the last remaining suits. Assault begins and the Helbrute charges in. The Daemon Prince slaughters the Commander, giving me Slay the Warlord, and the Helbrute kills the two remaining Suits. Both consolidate towards the Missilesides.

With this, Brennan concedes the game, as there's no way he can take out all my troops with what he has left and still score an objective.

End of the Game

Total Points

Chaos: 11 ( 3 Objectives, Linebreaker, Slay the Warlord)

Tau: 2 (First Blood, Slay the Warlord)

Post Game Thoughts

Well this game did not go as expected. I honestly thought I would be fighting hard for every inch of ground, and that just wasn't really the case. The first couple of turns could have gone either way, with me losing my Spawn and Sorcerer pretty much immediately, but the Daemon Prince was just such a tank that he managed to wipe the Tau almost single-handedly.

Now, it's hard to convey with a Battle Report, but Brennan's dice were pretty heavily against him pretty much from the start. in the early turns he shot a lot of stuff at the Daemon Prince and just couldn't get even one 6 to hit him and bring him down. If he had gotten lucky and grounded the Prince right away, he might have been in a better position to take him out, but he just couldn't do it. Later on, his Stealth Suits were getting on average about 2 hits from their Burst Cannons and he was missing his Fusion Gun shots almost every time. I also managed to get all of the powers I needed with Iron Arm on the Prince, and Endurance on the Sorcerer, and getting the re-roll armour saves boon very well may have won me that game, as it made my Daemon Prince basically impervious to anything with AP of 4 or higher.

Now, aside from the Dice, I think Brennan's Target priority was as good as it really could have been, though I probably would have hopped out the Fire Warriors from the Devilfish Turn 2 instead of 3 to help gun down the Marines on the flank. He did make a big mistake with his first turn shooting as well, as he forgot to shoot his 3rd Fire Warrior squad before he shot the Broadsides. If he had managed to get another counter on the Spawn, he could have removed my cover save completely, and I have very little doubt that he would have wiped all the Spawn with the Broadsides alone had that been the case. I also would probably have taken Plasma Rifles on the Crisis Suits instead of Missile Pods. I think that even though they have lower strength, the AP2 would really have benefited him more, and would probably have killed the Daemon Prince, and vastly changed the game.

As for my game, I think I played it fairly well. I knew that I would have to be very aggressive right away against him, so I didn't bother trying to hide my Rhinos and stuff in cover too much if it was going to hamper my speed. Getting into range with my guns, especially rapid fire range, was very important if I wanted to be able to take out his troops and start claiming objectives. It definitely helped that he was unable to deal with the heavy hitters of my army fast enough to really get to focus on my Marines as well, because if they had been taking heavy fire the whole game, they may have all been killed, or at least ran away. As has been the Case with the Mayhem Pack, I think that they are well work bringing. Having them drop down wherever you want is really awesome, and even though you're likely to lose them all in the next turn, the fact that they're right up in your opponent's face means that he has to deal with them or suffer a follow up turn of shooting and assault. It also helps draw away their heavy weapons from your more vulnerable troops, so I really think its a worth while unit.

As always, thanks for reading, and feel free to comment on either of our lists or tactics. Give your feed back on what you think we could improve on and what we're doing well!

Thursday 1 May 2014

Chaos Space Marine Lurker Units

Lately I've been looking through the Chaos Space Marine codex a lot, trying to think of ways to make certain units work, and during this time of deliberation, I have noticed a few units that really stand out as potentially powerful, but are often overlooked due to either a more powerful unit in the slot, a silly rule that makes an otherwise great unit sort of dumb, or a similar unit in another codex that does the same thing but better. 

The first unit I want to talk about is the humble Chaos Spawn. These poor buggers are the result of drawing the attention of the Chaos Gods to yourself, either through incompetence, or sometimes from being a total badass. They don't really discriminate. Anyways, what makes Spawn so good? Well firstly they're beasts. Beasts are seriously awesome this edition, as they can move off the tabletop very quickly with their 12" move that ignores all but impassable terrain. This will help them get to where you need them, and really can take people by surprise with their speed. Next, they're pretty tough. Now I know they don't get an armour save, but proper use of cover can usually help mitigate this a bit, and Toughness 5 with 3 wounds each makes them pretty hard to gun down without dedicating a good chunk of shooting to do it. 

So Spawn are tough and fast, but they have other assets too. They get rage, to give them some more attacks on the charge (potentially 8 attacks each on the charge!) and are strength 5, so those attacks are going to put the hurt on most units. On top of this, they can take marks as well. Mark of Nurgle is my favorite, as Toughness 6 with 3 wounds is very hard to deal with in my experience. Even plasma is only wounding on a 3+, and regular old bolter fire is bouncing off you like its nothing. The downside is its the most expensive mark. Mark of Khorne isn't bad, but unless you're running a Juggerlord, or trying to do a themed army, I wouldn't generally bother, as you already get rage, and counter-attack is only ok. Slaanesh isn't too bad, as you'll now be striking at the same time as most things, but it's really nothing to write home about. Lets not even talk about poor old Tzeentch. It seems his power is on the wane this edition...

So why don't we see spawn on the table more? Well I think the main reason is because they are a Fast Attack choice, and we all know what Chaos players use their Fast Attack slots for. The other thing about them is that they are quite unpredictable. They have d6 attacks, which means that if the dice are against you, you might get a single attack each, which really kind of sucks. The Mutated Beyond Reason chart they roll on in close combat also isn't that great, though none of the results are particularly bad, just nothing too special. Overall, Spawn are a pretty solid unit, and you can get a unit of 5 with the Mark of Nurgle for less than 200 points.

Next, I want to do kind of a dual analysis, as both of these guys kind of have the same problem in my opinion. Warpsmiths and Dark Apostles. Neither of these units is really bad per se, but they both tend to be a little lackluster in the HQ slot when you compare them to a Lord, or a Daemon Prince. So lets start with the Warpsmith. While its sort of expensive for what is basically a 2 wound marine with a 2+ save, you have to remember that these guys come stock with a Power Axe and Mechatendrils, which give you +2 attacks, a Melta Gun and a Flamer, and you can fire 2 weapons in the shooting phase. You also get to run around repairing your vehicles in lieu of shooting if you so wish, and at the beginning of the game you get to reduce a piece of cover in your opponents deployment zone by 1 (though sadly this does not apply to fortifications to my knowledge). They also have access to pretty much all the same stuff as a Lord, just without being able to take Daemonic Steeds.

Dark Apostles are similar to Warpsmiths in their statline and points, but are sort of less a beatstick unit and more a buff unit. For the points of 2 units of cultists and a flamer, you get a Marine with 5 WS, 2 wounds and attacks, and LD 10. However, you get a Power Maul and Sigil of Corruption for free, which is 40 points of upgrades right there. You also get Zealot, a 6" LD 10 bubble, and all your characters int h e unit get to re-roll all their boons, which is nice. Both of these guys are viable, in my opinion, but they're overshadowed by Lords and Daemon Princes. This wouldn't be so much of an issue if they followed the same force org rules as Techmarines and Chaplains, but as it stands, they take up a valuable HQ slot which often are being used for other things.

Lastly, lets take a look at Helbrutes. Yes, Helbrutes. This comes with the caveat that they really need to be used using the formations if you want the most out of them. With the Helcult, and the Mayhem Pack, these guys can actually get somewhere where they can do some damage, though the Helfist Murderpack seems a little useless to me. The first thing that's col about Helbrutes is they're cheap. 5 points less than an Apostle gets you an AV 12/12/10 walker with a Multi-Melta and a Power Fist, which honestly, is how I would run them most of the time. On it's own, a Helbrute is vulnerable and easy to take down, but supported by a group of cultists giving you a 3+ cover save anywhere you go, or deep striking in and causing havoc can make them a real problem for you enemy. I know I wouldn't want to deal with 3 Helbrutes suddenly up in my grill, or a huge unit of Cultists or two backed by a Helbrute giving them fearless. 

The main thing about Helbrutes that turns people off is their fragility, and while the Dataslate has given us solutions, they aren't without their own risks. The Helcult is only useful until you run into some ignores cover, or something capable of wiping out your Cultists, and our Brutes don't have the benefit of Drop Pods to keep them safe from mishaps, and statistically, only one in 3 is going to stick the landing. Still, the tactical flexibility of these guys makes up for the inherent risks of taking them in my opinion.

So let me know what you think. Is there a unit I've missed? Maybe something that doesn't work as well as it seems?