Battle reports, tactics, and general banter about Warhammer 40k, D&D 3.5/Pathfinder, Malifaux, and Warhammer Fantasy!

Thursday 28 November 2013

Warhammer 40k Battle Report Orks V.S Tau

As the dawn broke, the Tau looked over the walls of their defence line, seeing the dim shadows of brutish warriors supported by noisy clanking vehicles. With a savage warcry the orks hurled themselves at the walls...

In this 1750 point game I brought my Orks out for a romp against Brennan's Tau. The Mission was Crusade with a Spearhead deployment
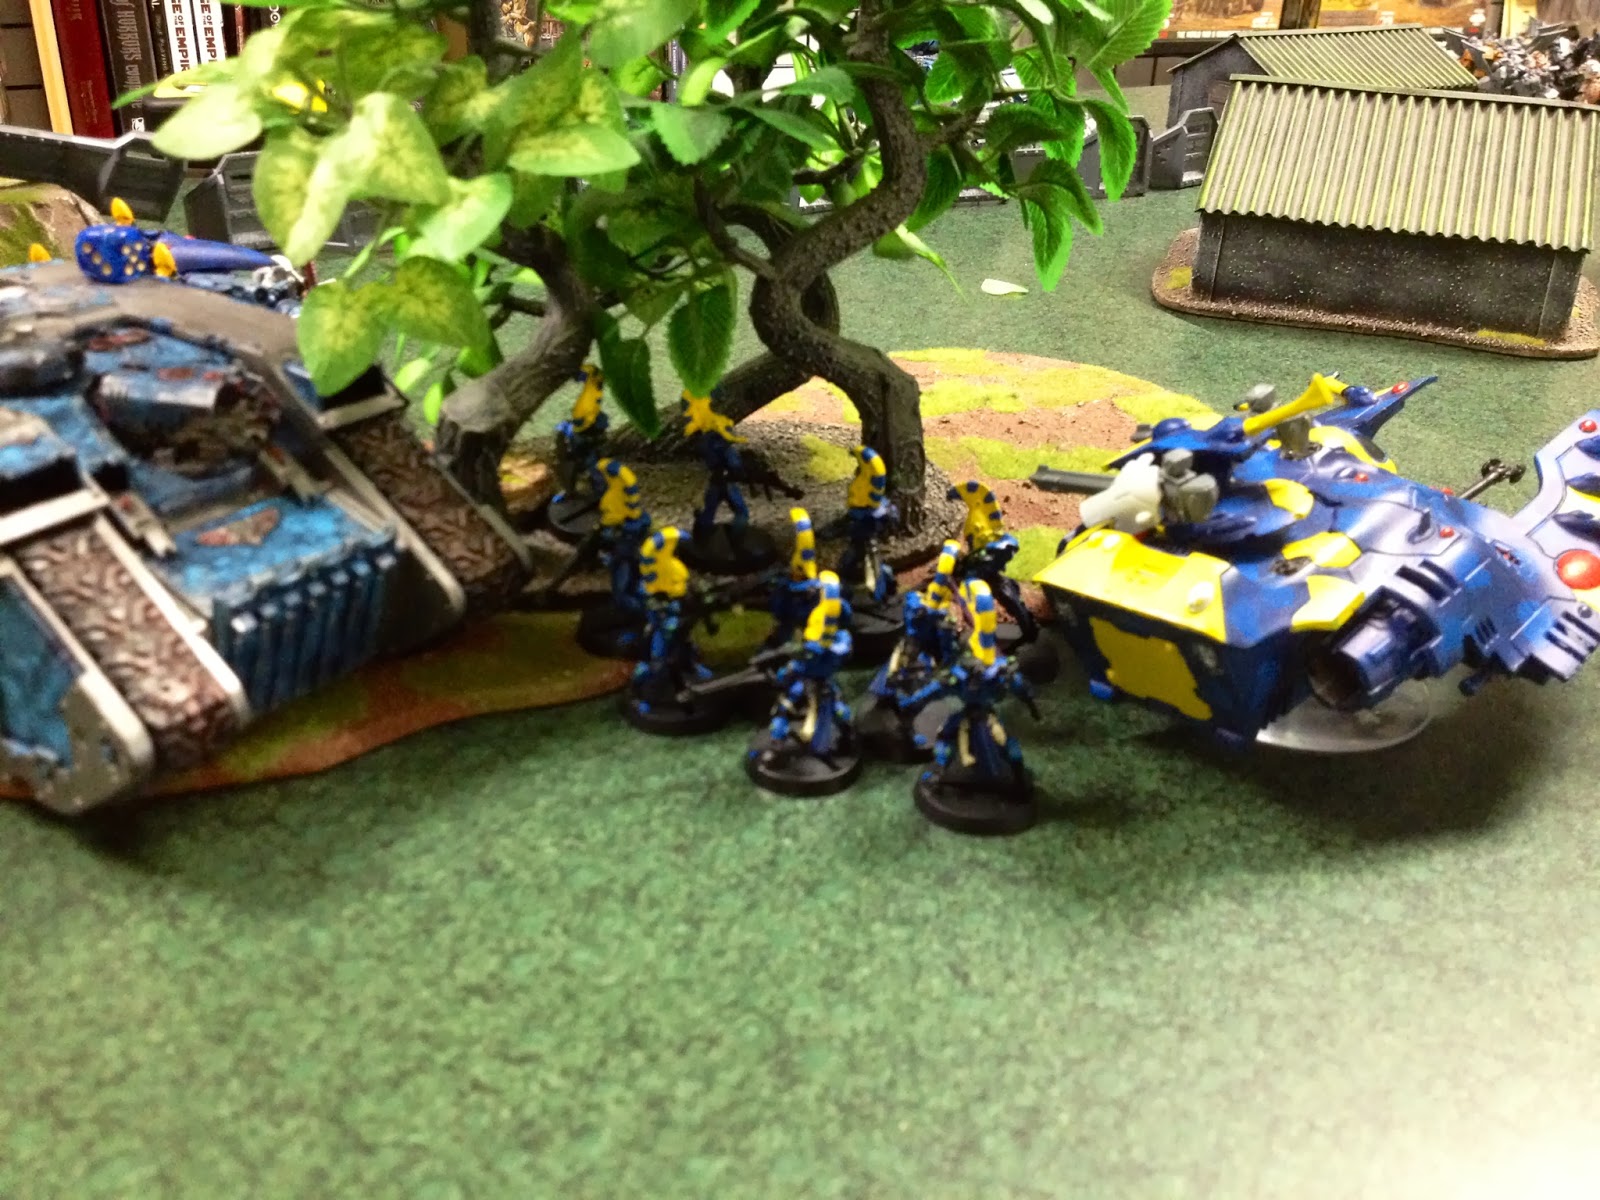
The Game Board
The Armies

Ork Horde

HQ:
- Warboss in Mega Armour with Attack Squig, Bosspole, Cybork Body, and Kobi-Scorcha (Warlord)
   - 138

- Big Mek with Bosspole, Cybork Body, Kustom Force Field, and Power Klaw - 128

Elites:
- 10 Lootas - 150


Troops:
- 3 Mega Nobz with Kombi-Scorchas in Battlewagon with 4x Big Shootas, Deff Rolla and Red Paint
   Job - 270

- 30 Shoota Boyz with 3x Big Shootas, Nob with Power Klaw, and Bosspole - 235

- 30 Shoota Boyz with 3x Big Shootas, Nob with Power Klaw, and Bosspole - 235

Fast Attack: 
- Dakkajet with Additional Supa Shoota and Fighta Ace - 130

- 3 Deffcoptas with Twin-Linked Rokkit Launchas and one Buzzsaw - 160

- 6 Warbikers with Nob with Power Klaw and Bosspole - 190

Heavy Support:
- Looted Wagon with 2x Big Shootas, Boomgun, and Reinforced Ram

Total: 1750

This was a list similar to one I've used before against Todd. The Meganobz go with the Warboss and the Big Mek in the Battlewagon, flanked by a couple units of Boyz who like to have the cover save, some bikes and Deffcoptas, and this time supported by a Looted Wagon, some Lootas, and a Dakkajet. Basically the Boyz, Bikes, and Battlewagon all rush forward to do as much damage as possible. the Coptas try and get me first blood by going after a lightly armored vehicle, or some side armour. Pretty one-dimensional, but I think half the fun is in it's straight-forwardness. I get to roll some dice, hang with a good friend and shout WAAAGH!!! at the top of my lungs in the middle of a game store. What more can I really ask for?

Tau

HQ:
- Commander with Cyclic Ion Blaster, Burst Cannon, Flamer, Neuroweb System Jammer, Onager
  Gauntlet, Shield Generator, Stimulant Injector, and XV8-02 Crisis 'Iridium' Battlesuit (Warlord)
   - 187

- Cadre Fireblade - 84

Elites:
- 2 Crisis Suits with Flamer and 2x Plasma Rifle each - 114

- 3 Stealth Suits with one Fusion Blaster - 105

- 3 Stealth Suits with one Fusion Blaster - 105

Troops:
- 12 Fire Warriors - 108

- 12 Fire Warriors - 108 

- Kroot Carnivore Squad with 15x Kroot, Sniper Rounds, 4x Kroot Hounds, 2x Krootox Riders, and
  Shaper - 197

Fast Attack:
- Piranha with Disruption Pods, Fusion Blaster, and Sensor Spines - 70

- Piranha with Disruption Pods, Fusion Blaster, and Sensor Spines - 70 

- Sunshark Bomber with Decoy Launchers, Disruption Pods, and Twin-Linked Missile Pod - 183

Heavy Support:
- Hammerhead Gunship with Longstrike, Disruption Pod, Automated Repair System, and Sensor
   Spines - 195

- Sniper Drone Team with 3x Sniper Drones - 58

- 3 Broadside Battlesuits with Twin Linked High-Yield Missile Pods, Smart Missile Systems, 2x
  Target Lock, and 6x Missile Drones - 277

Fortification:
- Aegis Defence Line with Quad- Gun - 100

Total: 1961

So it turns out Brennan accidentally took 210 extra points. We didn't realize till after the battle that he had brought too many points, but I'm not sure it really would have affected anything anyways. Anyways, being Orks, I was concerned about the amount of firepower I would have to wade through in order to get to him. Longstrike had the potential to punch right through my Battlewagon and his Kroot, Fire Warriors and Broadsides were more than capable of laying waste to my Boyz, and really basically anything in my army.

The Game

I won the rolls for both choosing sides and taking first turn. I chose the side with more forests and chose to deploy first. We rolled Warlord traits, and I got Move Through Cover on my Warlord and any units within 12". Super useful for me. He got the first one in the Tau book, but it never came up.
My Deployment
I deployed first in standard Orky fashion, with my Boyz all lined up across the table, nicely spread out toavoid any blasts or templates that may show up. The Battlewagon deployed in the center, able to go in either direction. The coptas and bikes I also deployed up forward  so that I could boost them up right away. The lootas went behind the wall on the right, with some boys conga-lining over to provide cover from anything deployed on the flank.
Brennan's Deployment
Brennan put up his Aegis right along the center of his deployment, pretty much as expected, and lined everything up behind it. Both squads of Stealth Suits went into reserves to deep strike, as did the Commander and his retinue, and of course the Bomber. The Kroot infiltrated up to the objective in the forest (the Zzap Gun) and the Fire Warriors on the right in the picture are on the other objective. We screwed up and only placed two objectives, but as you'll see it really didn't matter.

Turn 1

We started by rolling for the various random terrain features. Both of my forests ended up being Iron Bark, while the Kroot Forest was a Carniverous Jungle. The river down the center was an Iceblood river, and we treated the little puddle at the end as part of the river. Brennan rolled both objectives and they were both Sabotaged. We also rolled for night fighting and it was night.

I scout moved up my Deffcoptas to right behind the hill, hoping to jump out and maybe pop a Piranha right away and get first blood. Brennan promptly stole the initiative from me and dashed my hopes of First Blood.

Brennan moved up his Piranahs and moved his Kroot out of the forest, not really wanting to get eaten, while Longstrike shimmied around. He started by firing his Marker Drones into the Battlewagon, hoping to remove its cover save and open it up for a shot from Longstrike, but only hit once. Using the light to increase his BS, Lonstrike fired at the Battlwagon, but thanks to the hill in the way, no damage was done. The Kroot took a couple of pot shots at the Boyz and killed one, and the Fire Warriors and Piranhas fired at the Deffcoptas behind the hill and managed to kill two of them. We forgot that the Broadsides had Blacksun Filters built in to their suits, and so they didn't fire the first turn.

The Orks, still at almost full force surged forwards. The Battlewagon drove up the river, whilst the Boyz charged ahead, and I lost a single Boy to the river. The Bikes moved up towards the Piranhas and the remaining Deffcopta, who unfortunately didn't have a Buzzsaw did the same. The Looted Wagon moved over a bit to get a better line of sight.

With a thunderous boom the Looted Wagon unleashed a shell towards the Piranhas, hitting both, but poor visibility coupled with their disruption pods and speed left both unharmed. The Deffcopta missed it's barrage of missiles, and the Bikers were similarly unable to hit them through the cover of night. The Boyz ran forwards and the Battlewagon turbo-boosted farther up the river, hoping to drop its cargo off next turn. The Lootas fired a the shadowy Kroot in the forest and killed a single one. The Deffcopta charged a Piranha, hoping to get a couple glances through, but failed to do any damage.
End of Turn 1
Turn Two

Brennan rolled for reserves and both Stealth Teams came in, but the Commander and Sunshark stayed home. He dropped one team down behind my Lootas, and the other behind my Looted Wagon. The Piranhas moved away from the Deffcopta towards the Battlewagon. Once again, Longstriked did the truffle shuffle.

The Marker Drones again fired at the Battlewagon and again only got one hit. The other squad of Fire Warriors lit up the lone Deffcopta and easily destroyed it, netting Brennan First Blood. The Kroot, Sniper Drones and Broadsides all fired into the Boyz on the left flank, and managed to kill almost half the squad. The first Stealth Team Fired into the Lootas, who went to ground and killed 3, but they held. The other squad fired at the Looted Wagon, and thanks to him missing with his Fusion Blaster only managed one glancing hit. Both Piranhas fired into the Battlewagon, but one missed entirely, and the Bid Mek's Forcefield protected the clanking vehicle from the second. Longstrike fired at the Battlewagon as well but failed to do any damage. The Orks were still relatively unscathed.

With the roar of its engine, the Dakkajet flew onto the field, far enough away that the Quad gun didn't have the range to shoot it. The Battlewagon moved up and the Meganobz lead by the Warboss and Big Mek hopped out, right in front of the Fire Warriors led by the Cadre Fireblade. Both units of Boyz ran forward, and the Warbikes moved up too. Firing its Boomgun, the Looted Wagon shot its payload at the Piranhas again, but did no damage. The Meganobz and the Warboss fired their Kombi-Skorchas over the wall into both units of Fire Warriors, killing all but two and the Cadre Fireblade in one squad, and 6 in the other, and causing the Fireblade's squad to break.
Poor Fire Warriors

The Battlewagon shot its Big Shootas into the Kroot and killed one, and the Boyz on by the objective added their fire, killing another. The Bikes Turbo Boosted forwards, hoping to get in and cause some havoc, and the other squad of Boyz ran. The Lootas fired into the Kroot and did a bit of damage as well, and the Dakkajet fired at the other ones, killing all but the Fusion Blaster suit, which held.
End of Turn 2
Turn 3

With the flare of Jetpacks, the Commander and his retinue dropped right behind the damaged unit of Boyz, but thanks tot he quick thinking of the Meganobz who had recently come into possession of a Quad-Gun, one of the bodyguards took a wound. The Fireblade's unit continued to flee, but remained on the table. Rightfully deciding that the Bikers needed to be dealt with before they could do any harm, the Broadsides and Fire Warriors unleashed their weapons into the Warbikers, destroying them utterly.

The Piranhas fired once again into the Battlewagon, and finally managed to blow it up, though the resulting explosion didn't manage to wound anything. Longstrike took aim at the Meganobz bearing down on him and fired, getting a precision hit on the Big Mek that blasted the unfortunate Ork to smithereens. The Kroot also fired into the Meganobz, but thatnks to the hardening properties of the Iceblood River, didn't manage to do anything. Meanwhile, the Commander and his Bodyguard began roasting Orcs with their flamers, and blasting them apart with their guns, killing all but a handful and the nob, who managed to hold their ground. The Stealth Suits fired into the lootas again, but only managed to kill two more. The other suit fired its Fusion Blaster into the Looted Wagon and managed to blow off the Boomgun.

The Meganobz, eager to deal with the Kroot, moved right up to get into combat at last. Both Boyz squads moved to get nice and close to the Commander and his Crisis team. The Looted Wagon turned its attention to the last remaining Stealth Suit, and the Dakkajet banked hard to get the Commander in its sights.

Amidst the sound of the Greenskins' mighty WAAAGH!!!, the Dakkajet unloaded it's Supa-Shootas into the Comander and his Bodyguards, chewing up the two faithful Crisis Suits in a storm of fire. Both units of Boyz fired everything they had into the Beefcake Commander but only managed to put one wound on him. The Lootas turned around and blasted away two of the Stealth Suits, and caused the last to flee. The Looted Wagon fired its Big Shootas at the Fusion Suit but failed to even hit the elusive Tau warrior.

Finally, the Meganobz and their Warboss fired their Shootas into the Kroot and killed a couple before charging in. The Kroot's Shaper issued a challenge to the Warboss, and was almost immediately cut down by the monster. The rest of the Kroot fared little better, and none managed to wound any of the Meganobz. They fled and managed to escape, but didn't get very far.

The small Shoota Boy squad attempted to charge the Commander, but lost all but the Nob to overwatch, and the Nob began to flee. The other sqaud was luckier and easily made it into combat. All of their attacks failed to do any damage, until the Nob stepped up with his Power Klaw. The Commander managed to pulp a boy with his gauntlet before being carved up by the squad's Nob giving me Slay the Warlord.
End of Turn 3
Turn 4

Flying gracefully onto the field came the Sunshark Bomber, who dropped its payload on the Meganobz, but was unable to wound them. The heroic sacrifice of the Commander caused the Fireblade to rally his squad, and he left them to join the larger squad on the objective. The Stealth Suit continued to flee, as did the Kroot. Opening fire with their Fusion Blasters, the Piranhas manged to kill a Meganob, and Longstrike finished another with his Heavy Rail Cannon. The Broadsides and Sniper Drones fired at the remaining squad of Boyz and killed a bunch of them. The Lone Stealth Suit managed to wreck the battered Looted Wagon.

The lone Nob failed to regroup and fled off the board. Hoping to take out a few targets at once, the Warboss split from his remaining Meganob to go after the Piranhas. The Meganob moved forward to deal with the fleeing Kroot and the Boyz ran forward in a desperate attempt to get to the objective. The Dakkajet cruised up towards the Fire Warriors.

Firing its Supa-Shootas, the Dakkajet managed to kill a bunch of Fire Warriors, and they fled, along with the Fireblade. The Lootas took their shots at the two remaining Fire Warriors and managed to kill them as well. The Meganob charged the fleeing Kroot and cut them down, consolodating back towards his Boss, who managed to fail to wreck either Piranha, managing only to break off a Fusion Blaster.
End of Turn 4


Turn 5

With the Game nearing its end and him in the lead, Brennan moved his Sunshark over the Boyz and dropped its bomb on them, killing a handful. The wounded Piranha moved away from the Warboss. The Broadsides fired at the remaining Boyz and easily wiped them out. The Piranha fired into the Meganob, but the Fusion Blaster missed and the rest of the fire was ineffective. Lonstrike also fired into the Meganob, but missed. The Interceptor Drones that the Sunshark had dropped off blew up the Dakkajet.

The Warboss joined back up with his Meganob and together they ran towards the objective behind the defense line. The Lootas fired everything they had into the Stealth Suit, but it Survived. In a last ditched effort to get to the objective the Meganob and Warboss ran, getting the 6" they nedded to get there. The Sabotaged objective exploded but didn't kill either of them.

We roll to see if it continues...

End of Turn 5
And its a victory for the Orks!

Post-Game Thoughts

That ended up being a very close and intense game. I think Brennan got really unlucky, in his usual style I might add, managing to miss with the majority of his Fusion Blaster shots, and even Longstrike a couple of times. I also managed to get pretty Much everything I could have to give me an advantage. The river making the Meganobz re-roll their saves made them nigh indestructable, and his Sunshark not coming in till late also allowed my Boyz and Dakkajet to run rampant until it was too late.

I think I probably should have turbo-boosted the first turn with my Warbikes instead of hoping to get an unlikely first blood against the Piranha with a 2+ cover save. It might have allowed me to get them into combat. I also should maybe have targeted the Broadsides a little more with my Lootas, as they really did a number on me, though killing all of his troops was really all that allowed me to win.

I'm not totally sure what Brennan could have done to change the outcome of this game. I think his target priority was pretty good, and I would have done most things the same. I would probably have shot the Piranhas into the Meganobs instead of the Battlewagon on Turn 3, as the Fusion Blasters would have ignored the Nobz's armour saves, and the Battlewagon wouldn't have been as big of a threat. Really, I think that the dice deserted him in some very critical spots.

So thanks for reading and make sure you remember to comment and let me know what we could do better, or what we're doing well.

Wednesday 20 November 2013

Warhammer 40k Battle Report Slaanesh Marines V.S Iron Hands/Tau

The insane and bizarre worshipers of Slaanesh have invaded an Imperial World in the hopes of stealing away a precious piece of Pre-Heresy technology. The Iron Hands, with some unexpected help from a small force of Tau, are attempting to stop them and recover the technology for Mechanicum study.

In this 1550 point battle I brought a Slaanesh Chaos Space Marine army against Todd's Iron Hands with Tau allies. The Mission was the Relic with Dawn of War deployment.
The Board
The Armies

Slaanesh Cult

HQ:
- Sorcerer with Mark of Slaanesh, 3 Mastery Levels, Sigil of Corruption, Gift of Mutation (Nothing)
   and Melta Bombs (Warlord) - 165 

- Chaos Lord with Mark of Slaanesh, Jump Pack, the Black Mace, Sigil of Corruption, GIft of
   Mutation (Hammer of Wrath), and Melta Bombs - 185

Troops:
- 10 Noise Marines with 2 Blastmasters, 7 Sonic Blasters, Icon of Excess, and Champion with Power
   Sword and Melta Bombs - 321

- 10 Cultists - 50

Fast Attack:
- Heldrake with Baleflamer - 170

- 10 Raptors with 2 Meltaguns, Mark of Slaanesh, Icon of Excess and Veterans of the Long War - 270

Heavy Support:
- Defiler with Reaper Autocannon and Heavy Flamer - 195

- Defiler with Reaper Autocannon and Heavy Flamer - 195 

Total: 1551
 
My Army

This was a fun list using units that I don't take out to play but really enjoy. My plan was basically to try and bury Todd under a weight of blast markers while the Cultists ran up and took the objective and the Raptors jumped up and beat some face. Unfortunately, Todd's list was very unfriendly to my poor daemon crab-engines, and so I knew it was going to be an uphill battle right from the get go.

Iron Hands/Tau

HQ:
- Captain with Iron Halo and Power Weapon (Warlord) - 105

- Cadre Fireblade (Allies) - 60

Elites:
- 3 Crisis Suits, one with Drone Controller, Comand and Control Node and 2 Gun Drones, one with
   Missile Pods, Gun Drone and Shield Drone, and one with 2 Missile Pods and 2 Gun Drones (Allies)
   - 231

Troops:
- 10 Tactical Marines with Grav-Gun, Lascannon, Sergent with Combi-Grav, and a Rhino - 220

- 5 Scouts with Sniper Rifles and one Heavy Bolter, and Land Speeder Storm with Cerberus
   Launcher and Heavy Bolter - 113

- 12 Fire Warriors (Allies) - 108

- 10 Fire Warriors (Allies) - 90

Heavy Support:
- Predator with Twin-Linked Lascannons and Lascannon Sponsons - 140

- Predator with Twin-Linked Lascannons and Lascannon Sponsons - 140 

- Predator with Twin-Linked Lascannons and Lascannon Sponsons - 140 

- Hammerhead with Ion Cannon - 125

Fortification:
- Aegis Defence Line with Icarus Lascannon emplacement - 85 

Total: 1557

Right away I knew this list was going to give me a hard time. The Predators would make short work of my Defilers, and once they were dead, they could focus fire down my troopers. The Fire Warriors, while not hugely potent on their own would likely be able to gun down my Raptors if they went in unsupported, and I didn't have a whole lot that would be able to support them. There was also no LoS blocking terrain on my side of the field to hide behind.

The Game

Todd won the roll to decide which side of the table he wanted, and smartly chose the side with the two LoS blocking buildings. I won the roll for first turn and deployment, and figuring that First Blood would probably be instrumental to winning the game for me, chose to go first.

My Deployment

I deployed my Raptors and Noise Marines in some forests to get some cover from the Ionhead and deployed both Defilers behind a low wall for the cover against the Las-Preds. I didn't feel too great about my deployment, and maybe should have swapped the position of the Noise Marines and the Raptors, but I didn't really know where he was going to put his tanks or defence line.
Todd's Deployment
Todd put down his Defence Line right in the center of the board and deployed everything behind it, with the exception of his Predators. His Scouts went into reserve and the Rhino was actually placed behind the leftmost building. I forgot to get a picture of our actual deployment, but there was very little movement first turn anyways.

Turn 1

My Noise Marines began by moving up a bit into the forest, though the Blastmasters didn't move, allowing them to fire their blasts into something. The Defilers stood still, not wanting to break cover with all those Predators were still alive, as I was hoping for first blood, and if I didn't get it first turn, I didn't want him blowing up a Defiler and getting it himself. I also decided tohold back the Raptors, as I figured that jumping them up into the teeth of the Fire Warriors would basically be suicide.

With a whine that build into a deafening cruscendo, the Noise Marines unleashed their Blastmasters into the crisis suits, shaking one and a few drones to pieces. The Defilers both lobbed their Battle Cannons into the Suits as well but only managed to blow apart the remaining drones. Unfortunately the Battle Suits held.

Responding the Tactical Marines drove their Rhino from behind the building, ready to cruise forwards and grab the objective. The Battle Suits moved forwards a bit to try and get a few potshots off at the Raptors.

The first Predator opened fire with its Lascannons on the left Defiler, and though it hit 3 times, it only managed to get one shot through the blocking wall. Unfortunately that shot also disabled the Battle Cannon, effectively neutering the Defiler. Figuring it was probably out of the fight, the other two predators fired everything they had into the second defiler, and managed to stun it and bring it down to one hull point. The Hammerhead's Ion Cannon targeted the noise marines, but thankfully scattered badly and only managed to kill two of them. Shooting from the Fire Warriors and Battle Suits proved a little better and they managed to down two of the Raptors.
End of Turn 1
Turn 2

Well, First Blood was still a possibility for me, so I decided to try and seize it. The Heldrake and Cultists both failed to come in, which was a bummer, as I was hoping to toast some Fire Warriors and rush up the Raptors this turn. The Defiler missing its cannon moved out around the baricade, while everything else held position.

The Defiler, missing its Cannon, fired a salvo of rounds from its Reaper Autocannon and miraculously managed to blow up the Space Marine's Rhino, earning me First Blood!, The Blastmasters once again activated their strange weaponry, this time targeting the nearest Fire Warriors, and managed to down a bunch of them, but the Space Marine Captain's will kept them from fleeing. The stunned Defiler attempted to damage the Icarus Lascannon with its Reaper Autocannon, but failed, despite getting a hit. The powers of the Warp managed to heal the Stunned Defiler of one hull point.

Wary of being bunched up around so many potentially lethal blasts, the Space Marines Spread out a bit. The Crisis Team moved up again to try and fire at the Raptors. Firing all they had, two of the Predators managed to wreck the stunned Defiler, while the last one only managed to strip the other one down to one hull point. Firing from the Fire Warriors and Suits managed to kill almost all of the Raptors, and the Hammerhead once again fired on the Noise Marines, scattered, and only managed to down one or two.
End of Turn 2 on My Side
End of Turn 2 Todd's Side
Turn 3

Dodging the hasty shot of the captain from his Lascannon, the Heldrake finally screamed onto the battlefield, streaking straight towards the Tactical Marines and Predators, while the Cultists, insane with the ecstasy of Slaanesh charged forwards towards the Relic. The Raptors, tired of being reduced to nothing but target practice, finaly leapt into the air towards the Crisis Team.

The Blastmasters fired once again into the Fire Warriors with the Captain, hoping to kill the Space Marine and get Slay the Warlord, but only killed Fire Warriors, leaving one left with the Captain. The Heldrake opened its maw wide and belched a torrent of flame into the Marines, killing several. Meanwhile, the Cultists and Raptors ran forwards. The remaining Defiler peppered the Icarus Lascannon with bullets, but failed to damage it.

In response, the Tactical Marines moved forwards and one of the Predators blew the lone injured defiler to pieces, releasing the tormented daemon within. The other two Predators targeted the fast-moving Heldrake, but were unable to hit it. The Hammerhead finally hit its mark and killed all but 3 Noise Marines, leaving the Sorcerer untouched. The Fire Warriors and Crisis Suits blasted the Lord and his last remaining Raptor apart, effectively neutralizing the threat to his Fire Warriors.
End of Turn 3, and the Remnants of my Army
Marines at the End of Turn 3
Turn 4

Swooping down upon wings of death, the Heldrake exploded the green Predator. The Cultists, desperate to please their masters, waded through the river of Industrial Ooze at a frantic pace. Finding himself quickly running out of meat to hide behind, the cowardly sorcerer detached himself from the Noise Marines to go and hide behind the smouldering shell of the wrecked Defiler. 
The Heldrake engulfed the remaining Fire Warrior, the Captain, the Icarus Lascannon, and Several Fire Warriors from the second squad in burning warp fire, immolating all the Fire Warriors, and wounding the Captain, but leaving the Lascannon untouched. The Noise Marines fired into the Captain, but his Iron Halo protected him, and once again, the Lascannon proved immune to damage. The Cultists continued to run, and finally make it into contact with the Relic

Streaking onto the battlefield came the Scouts in their Land Speeder. The Marines all hustled forwards towards the Relic, and the Crisis Suits start moving forwards as well. The remaining Predators turn to take aim at the Heldrake decimating their back lines. Firing from the two Predators proves unable to hit the Heldrake, and the Captain misses again with his Lascannon.The Hammerhead decides to fire at the Noise Marines again, and kills one with the Blast Master. The Rest of the fire proves ineffective.
End of Turn 4

Turn 5

Slowing down to hover mode, the Heldrake turned around and moved towards the Marines. The Cultists push forwards towards the Relic, but have a hard time making it through the ooze. The Blastmaster fired into the Landspeeder, but only manages to take a hull point off it, and manages to kill a Marine. Hoping to wreck the Speeder, the Heldrake spewed its flame all over the Marines, killing all but the Lascannon, and failing to damage the Landspeeder. The Cultists run and manage to make it to the Relic.

The Landspeeder rushes forwards, hoping to get another turn to get the Relic. The lone Marine jogs forward. Shooting begins with both the Predators blowing the Baleflamer off the Heldrake. The Captain misses. Again. The lone Space Marine takes a potshot with his Lascannon and manages to blow the Heldrake out of the sky. The Hammerhead blasted into the Cultists, killing them to a man, the few who attempted to go to ground in the ooze melting like butter.

We roll to see if it goes on and...
End of Turn 5
Turn 6

With the Cultists dead and the Heldrake down, I had only one hope left. Blow up the Landspeeder and hope the Scouts die or get pinned. Unfortunately, the Landspeeder only gets wrecked, and the Scouts disembark onto the Relic.

Claiming the Relic, everything that can shoot, shoots at my Noise Marines, wiping them out, leaving me with just my Sorcerer left.

We roll to see if it goes on...

And its a Space Marine Victory!

Post-Game Thoughts

Well that was a fun game, even if it did go poorly for me. I think that I probably should have deep-striked my Raptors, as they ended up doing nothing except die. I do think I did a pretty good job, considering what I was up against, but I didn't manage to kill all of his Troops, due partly in fact to the fact that his Scouts didn't come in until late in the game, and also that my Heldrake failed to destroy it when it did. I have to give props to Todd on this one. He played his list well, and I can't think of anything he did really wrong.

In the end I think this one really boiled down to list design. I really had no reliable way to counter his wall of AV 13, and I took a lot of things in my army that ended up being completely useless to me. I never ended up using any of the sonic blasters or the Icon of Excess on my Noise Marines, and so they ended up eating something like 71 points with useless upgrades. Really, the majority of my army did nothing, with only the one Defiler, the Heldrake, and the Blastmasters doing any damage whatsoever. Everything else was basically just really expensive fodder. On the other hand, against a more infantry based list, I think this army would have performed much better. The Defilers could have done some serious damage, and I think the Raptors would have had a better chance of being useful too.

As always thanks for reading, and remember to comment and laugh at me and tell me that my list was horrible and that I didn't play the game well!

Tuesday 19 November 2013

D&D: The Benefits of Running Away

Hey everyone. I'd like to talk about one of my favorite games today. Dungeons and Dragons, and specifically why you should always consider fleeing as a very viable tactic.

I've been playing D&D 3.5 for quite a few years now, and a bit of Pathfinder as well, but in this time, our group has never ran away from many fights. Only when it was very clear to us that we were out matched have we ever ran away, and often only after we've lost a party member or two. Most likely this is because at least a couple characters are either overly prideful, or don't want to give up any potential loot, or sometimes both.

Recently this has changed. In one of our current campaigns, we have a very practical and guerrilla-type party made up of a Druid, Ranger, Scout, Monk and Barbarian. So far, loot has been of secondary concern for us, and the one prideful character in the party (a now deceased Human Hexblade) was killed in a battle with an Atach. This party, being very goal oriented (that goal right now being largely bringing down a corrupt organization) tends to not get drawn into fights that could easily be avoided and as a consequence, we've ended up fleeing from engagements that we may have even emerged victorious from.

This has meant that we have missed some loot, but luckily our DM has rewarded us for playing in character, and playing a smart game by giving us some good stuff on the occasions where we do end up fighting something. He has also been giving us experience for bypassing encounters, as if we had completed them, as we have technically dealt with them and come through successfully, even if it was by sneaking past, running away, or setting up a fortified area and using our generally superior range to pepper the enemy with arrows until they get close enough for the Barbarian, Monk and Wildshaped Druid to pounce

Running away has also allowed us to consume far fewer resources than standing and fighting would have. Talrin, our Elf Druid almost always still has spells left at the end of the day, The Kindler, my Human Ranger has been able conserve arrows fairly well, despite shooting 3 a turn when in combat, and Wayne Rockpile, our Dwarf Barbarian, has only come close to death once, despite being our only real tank and having a  measly 16 AC when raging. Because we tend to only fight when at an advantage, we have been able to expend less resources then a conventional kick down the door party.

So next time your party is walking along and come upon a group of Orcs, consider weather or not you really need to be fighting them before you rush in. After all, one might have class levels and it may end up being a tougher fight then you anticipated. Who knows, the life you save may be your own.

Tuesday 12 November 2013

40k Apocalypse: D-Weapons

So with a game of Apocalypse coming up this weekend I'd like to talk about D-Weapons and their impact on the game. Any D-Weapon, particularly one that uses any sort of blast template can be so powerful that it has the potential to immediately change the game. For those of you unfamiliar with D-Weapons, when a vehicle is hit by one you roll on a table. A 1 is an automatic penetrating hit, a 2-5 is an automatic explosion on a regular vehicle and D3+1 Hull Points off a Super Heavy, and a 6 is a D6+6 Hull Points off a Super Heavy. Against infantry, a 1 is no wound, a 2-5 is D3+1 wounds, and a 6 is D6+6 wounds. All D-Weapons also ignore all saves, including invulnerable saves, as well as negating any Reanimation Protocols or Feel no Pain.

So obviously these weapons have the potential to be extremely powerful, and as such all possible effort really should be made to even out the distribution of D-Weapons between two armies or teams. For example, if I were to bring a list capable of firing 5 D-Weapon shots, the opposing force should probably have no more than about 6 or 7, and no less than 3 or 4. If you don't regulate this and you had one army with 5 D-Weapons against an army with no D-Weapons, the battle would likely be over before it really began, especially when you consider that the things carrying these guns are usually Super-Heavies, Titans, Gargantuan Creatures, or Apocalypse formations, which are generally pretty hard to bring down, especially en mass.

This brings us to building a list for an Apocalypse game. This can be tricky, as really the point of the game is for everyone to have fun, and I know that if I were to take a big scary Death Star (say the Lords of the Black Crusade formation) only to have it immediately blown off the table in one shot from a D-Weapon, I'd be a little discouraged, particularly if it was from something like an Eldar Lynx, where the formation it just one-hitted was easily double its points. Because of this I think its important to make sure that you have an alternate list or two. If you get to the game and realize that you're the only one who brought a whole bunch of Titans and Super-Heavies, it may be prudent to talk to the other players, especially your opponents, and as them if they're ok with facing such an intimidating force. If they're not, it might be best to have a backup list that you can pull out with fewer of these units, or even none at all to help even the playing field and make the game more fun for everyone.

The alternative is to warn everyone before hand that you are going to be spamming D-Weapons, and to bring as much of their own scary stuff as they can. People are less likely to feel like they just showed up only to pick up their models and go home if they had an opportunity to prepare against what they knew was going to be a tough fight, and it also helps to avoid having people who have invested their time and money into buying or building their own Titans/Super Heavies feel like "That Guy" for bringing their big scary models.

Its also important if you don't have any D-Weapons of your own to try and not get too upset when these things start causing you to remove entire units from the field at a time, often with no way to prevent it. This is Apocalypse, and the whole point is really to sit around with some friends, or maybe some strangers at your local store, talk smack, and enjoy this wonderful hobby of ours. My final advice to the people out there that don't have access to any formations, D-Weapons or Super-Heavies would be to set yourself a goal. Maybe try to get one of your characters into single combat with something, or aim to blow up that Baneblade before the end of the game. By giving yourself an objective, you can feel good about your army, even if most of it (or even all of it) gets wiped out by chasing around smaller goals and objectives.

Thursday 7 November 2013

Warhammer 40k Battle Report Khorne v.s Space Marines

Kharn the Betrayer has been spotted in Imperial space and seems to be attempting to open some warp games on a backwater world. Belial and his first company have been sent alongside Kor'sarro Khan's third company to stop him, and prevent the world from falling to Khorne.

In this 1550 point game I played a Khorne themed Chaos Space Marine list with Chaos Daemon allies against Todd's Dark Angels Deathwing drop with White Scar allies. The mission was the Emperor's Will with the Hammer and Anvil deployment type.
The Board
The Armies


Khorne's Army

HQ:
- Kharn the Betrayer (Warlord) - 160


- Daemon Prince of Khorne with Wings, Power Armour, a Boon of Mutation (Crusader) and the Axe
   of Blind Fury - 265

- Bloodthirster (Allies) with one Greater Gift (Corpulescence) and one Exalted Gift (Warp Tether)
   -300

Troops:
- 14 Chaos Cultists with Close Combat Weapons and Mark of Khorne - 94

- 9 Khorne Berzerkers with Champion with Melta Bombs and Power Sword - 220

- 10 Bloodletters (Allies) - 100

Fast Attack:
- Heldrake with Baleflamer - 170

Heavy Support:
- Chaos Landraider with Dozer Blades and Dirge Caster - 240

Total: 1549
My Army


I designed this list for one purpose and one purpose only. To go take some skulls. My plan was essentially to just rush him and try and kill as much as possible with the FMCs, Kharn and Friends, and the Heldrake, while my cultists took a home base objective and the bloodletters warped to the opponent's side and took his. Really it was just a fun list that would really make Todd worry about how he was going to deal with my wall of in your face death.

Dark Angels/White Scars

HQ:
- Belial (Warlord) with Thunderhammer and Storm Shield - 190

- Librarian with two Mastery Levels (Vortex of Doom, and Forwarning) - 90

- Kor'sarro Khan  on Moondraken - 150

Elites:
- Vernerable Dreadnought with Multi-Melta, Powerfist with Heavy Flamer, and Deathwing Vehicle in   Drop Pod - 180

Troops:
- 5 Deathwing Terminators, Sergent with Thunderhammer and Storm Shield, 3 with Storm Bolter and
   Powerfist, and 1 with Assault Cannon and Powerfist - 245

- 5 Deathwing Terminators, Sergent with Thunderhammer and Storm Shield, 3 with Storm Bolter and
   Powerfist, and 1 with Assault Cannon and Powerfist - 245

- 5 Tactical Marines with Plasma Gun in Drop Pod - 120

- 5 Space Marine Bikes (Allies) with 2 Meltaguns - 125

- 5 Space Marine Bikes (Allies) with 2 Meltaguns - 125

Fast Attack:
- Ravenwing Darkshroud - 80

Total: 1550

This force was awesome for me. He was deepstriking all of his Terminators, the Dreadnought and the Tactical Marines, and most of his force was only going to do substantial damage in melee, which is where I wanted to be in the first place. With him dropping down into my back lines, I wasn't going to have to trek up the board eating bullets the whole way, as I was initially expecting, which was a big plus for me. The main danger is that he would keep a bike squad hanging around his objective, or drop in the Tacticals, making it more difficult for me to take it with my Bloodletters, who would likely be unsupported. He also had a lot of troops for me to deal with, which meant that he could theoretically hold both the objectives at the same time, even taking losses.

The Game

We were using the Hammer and Anvil deployment. I won the roll of to choose which side I wanted, and I took the side with the small building in the hopes that my cultists could hide behind it. He won roll off for first turn and decided to give first turn to me. I was ok with this as it would allow me to get my FMCs into the air right away before he could shoot at them, making them much harder to kill.
My Deployment
I deployed my force pretty centrally, with the Landraider hiding a bit behind a small cluster of trees, the Bloodthirster in the middle, and the Daemon Prince in on the right. The Berzerkers and Kharn went into the Landraider and the Cultists, Bloodletters, and Heldrake went into reserve.
Todd's Deployment
In response, Todd deployed up as far as he could on my left flank, thinking it would be a bit safer than the right where my Daemons could get to him faster. Personally I would have deployed farther back, but maybe he had a cunning plan...

Turn 1

Eager to get to grips with the hated traitors, the Bikes and Darkshroud gunned their engines forwards in their scout move, moving their whole force as far forward as possible. I was practically laughing at this point, as he had inadvertently moved hiss bikers into range to be completely slaughtered by Kharn and his buddies first turn! Kharn's command Landraider rumbled forward, and lowered its assault ramps, disgorging its bloodthirsty occupants almost right into the White Scars' lines. The Bloodthirster and Daemon Prince took off into the air, moving up to get as close as possible to the bikes. The Bloodthirster cracked his whip at Khan's squad, but failed to wound. Meanwhile, the Landraider opened fire with it's Lascannons and Heavy Bolter onto the Darkshroud, and despite having a fantastic cover save, it's grav-engine was destroyed, causing it to crash to the ground impotently.

Firing their pistols in berserk fury, Kharn led his squad into the Bike squad on the right. Though the Aspiring Champion attempted to call out the Biker's Sergent, but the Emperor's cowardly lapdog was suspiciously absent. In a remarkable display of martial skill, Kharn layed into the Bikers, slaughtering them to a man, and when that was not enough to sate his blood he turned on one of his own, killing an unfortunate Berzerker. With first blood under my belt this game was already looking up.

With a crackle of energy Belial and his team of Terminators teleported to the surface of the doomed world. His second squad materialized to the flank of the Landraider only moments later, accompanied by the Dreadnought's Drop Pod splashing into the river. The Dark Angels had arrived. Opening fire with the remaining Bike Squad, the Dreadnought, and Belial's squad, all of Kharn's retinue were gunned down mercilessly, and Kharn himself took a wound. The other Terminator squad set its sights on the Daemon Prince swooping through the air, though the quick-moving beast proved too elusive for their targeters.

In a bold Gambit, Kor'sarro Khan led his bikes in a charge against Kharn the Betrayer, who cried out a challenge to the Biker. Though Kharn managed to wound Khan, Moonfang struck true, and Kharn fell, gaining Todd Slay the Warlord. Unfortunately, caught up in the excitement as I was, I forgot to take a picture at the end of the turn. Hopefully I'll get better about this!

Turn 2


Gliding down, the mighty Bloodthirster descended towards Belial's squad, eager to add the proud first captain's skull to Khorne's throne. The Daemon Prince turned his sights to Khan and his Bikers, and descended upon them. The cultists, apparently unaware of their master's demise took to the field, running towards the warp gate in order to protect it. On the other side of the board, a unit of Bloodletters strode through another tear in reality, ready to defend it with their lives. The Landraider, moved over a little bit, it's Dirge Caster wailing , distracting both Belial and Khan from the incoming Daemons.
Holding the Objective

The Landraider's Lascannons were unleashed upon the Venerable dreadnought, damaging its thick armour and Destroying its legs. The Bloodthirster attempted to whip the nearest Terminator, but its attack was blocked by its shield. Their defenses lowered, the Bloodthirster charged into Belial's retinue and issued a bold challenge to the puny Sergent who stood in his way. Balking at the idea of facing such a beast, the Sergent attempted to slink away, but after a flurry of attacks from the Bloodthirster's might axe was hacked to pieces, along with another of his battle-brothers who had strayed to close, and though the creature took a few hits from the Terminators' Powerfists, the protection afforded him by Khorne stopped the blows inches from its body. The Daemon Prince issued his challenge to the Sergent of the Bikers, and this one decided to accept. His skull was promptly claimed and his body hacked to pieces by the towering Daemon. His sacrifice was not in vain, however, as the distraction his body caused allowed Khan and his Bikes to boost away to safety.

The Terminators moved towards the Landraider, determined to destroy it, while Khan's bikers drove off towards the cultists, and away from the Daemon Prince. Splitting their fire, the Deathwing fired their Bolters ineffectually at the Landraider's thick armour plating, while the Terminator with the Assault Cannon fired at the enraged Daemon Prince, causing a wound. Opening fire on the Daemon Prince with his Multi-Melta, the Venerable Dreadnought but yet another wound on the Prince. Over by the warp gate, the Bikers fired their Bolters into the cultists, gunning down 4 of them.

Following up their torrent of fire the White Scars charged into the Cultists , easily slaughtering the pathetic heretics. The eager Terminators charged into the Landraider, but only glanced its armour twice. The Bloodthirster again issued a challenge, and this time Belial accepted. Thanks to some cunning parries managed to survive the onslaught, though he didn't manage to wound the beast in return.
End of Turn 2
Turn 3

With a blood-curdling screech the Heldrake streaked through the sky, swooping down to pluck an unfortunate biker into the air and crushing him between its talons. The Landraider backed away from the Terminators pound on its side, and the Daemon Prince jumped forward to engage the Terminators. The Bloodletters restlesly continued to guard the second warp gate.
Still Holding
Craning its neck around, the Heldrake unleashed a torrent of flame into the remaining bikers, burning them all to ash. The Landraider fired its Lascannons into the Terminators, the concentrated beams of light easily burning through their thick armour, and killing two.

Bellowing its hatred, the Daemon Prince crashed into the remaining Deathwing, easily slaughtering them all with its axe. Belial, still battling for his life, managed to parry a pair of blows aimed at his neck by the Bloodthirster, but this left him open. Pressing its advantage, the Greater Daemon of Khorne delivered a punishing kick to the Captain, before leaping upon him. Seeing his imminent death, his retainers back on his battle barge activated his teleporter, warping him back to the ship moments before the Bloodthirster's axe swung down where his neck was only moments before.

Streaking down from the sky, the Tactical Squad's drop pod splashed into the river near to the warp gate near Khan. Khan himself decided to boost his bike back towards the Bloodthirster, hoping to help out the Terminators before it was too late. Channeling the powers of the Warp, the Dark Angel's librarian summoned a warp vortex, engulfing the Daemon Prince and banishing from the material realm. The Dreadnought fired its Multi-Melta at long range into the Landraider, but it was unable to harm it. Khan charged into the Landraider before realizing he had to way to harm it.Bellowing in fury at having its prize taken from him, The Bloodthirster turned on the remaining two Deathwing, but they managed to evade its wild swings, further fueling its rage.
End of Turn 3
Turn 4

Driving forward, the Landraider attempted to get the new arrivals in its sights, hoping to kill them before they could disrupt the gate. The Heldrake banked around towards the Tactical Marines. Unleashing another burst of flame, the Heldrake immolated 3 of the Tactical Marines, and wounded the Librarian. The Landraider following suit, fired one Lascannon and its Heavy Bolter into the marines, killed the remaining two, leaving the Librarian all alone. The Bloodthirster, finally caught up to the remaining Deathwing and slaughtered them, taking their skulls for Khorne.

The Librarian, now all alone, moved forward and tried to summon a new Vortex on the Landraider, but miscalculated, the Vortex instead landing right on top of the Bloodthirster. Luckily, Khorne's blessing continued to hold out and the Vortex failed to do any damage. In a desperate last gambit, Khan charged the Bloodthirster, but before Moondraken could even be lifted in defence, the Mighty Daemon's axe removed the unfortunate Captain's head from his shoulders, all but ensuring victory for the Dark Gods. With the Bloodletters holding the objective on Todd's side, and with him having no way to either remove them or capture mine, We declare it a Chaos victory!

Chaos - 6 (One Objective, Slay the Warlord, First Blood, Linebreaker)

Space Marines - 2 (Slay the Warlord, Linebreaker)
End of the Game
Post Game Thoughts

Well that was a really fun game, even though it was pretty one-sided. I think Todd made a HUGE mistake by deploying his bikes so far forward, and then scouting them even farther forward, right into charge range. Because of that, he practically handed me First Blood, which in this mission type is basically game winning. Besides that, I also would have dropped the Librarian and the Tactical Marines back by my Bloodletters and tried to kill them with Bolter Fire and Vortex. I'm also not sure I would have taken second turn, as it allowed me to start out flying with my MCs.

If I were to do something differently, I definitely wouldn't have challenged Todd's bike squad with my Daemon Prince, as he was unlikely to challenge me in return and I likely would have slaughtered them then and there. Also, this is a game where I don't think the dice were really a factor, as we both got some good rolls and some bad rolls in roughly equal proportion.

As always, any comments are greatly appreciated! Thanks for reading!

Wednesday 6 November 2013

40k: Knowing Your Opponent

Hey everyone. So today I want to talk about an aspect of the game that I feel a lot of people don't think about too much. Knowing your opponent. Now obviously if you're going to your local gaming store for a random pickup game, this might not always be possible, but for the sake of argument here we're going to assume that you have a fairly regular gaming group that you play with.

So first thing's first, lets talk about what I mean when I say know your opponent. What I mean by this isn't knowing what units they  have access to, or even what armies they play (though that is of course a big factor). I'm talking about their tactics. What kind of player are they? Are they aggressive? Defensive? Are they generally going to just try and wipe out your whole army, or play a more subtle objective based game? These are the things that you should be thinking about when building your army and playing against certain people.

For example, I know that Todd tends to overextend himself by sending his fast units right at me quickly, which allows me to concentrate fire on them and bring them down relatively easily. Now this may be because he's a new player to the game, and rightly wants to see some bloodshed, or it may be because he likes to play a little more aggressively, the thing that does matter is that it tends to happen at some point in the game, and I can use this to my advantage. There is a chance that I can throw out a cheap unit, something that won't hurt me too much to lose in order to bait him forward even more, or pull a previously supported unit away from it's friends in order to isolate and destroy it. Think something like a unit of Rangers. They're practically guaranteed to be killed in the initial charge, and can be used to pull something scary, like maybe some Assault Terminators out of a Landraider close to my firing base all alone, where I can jump them with some Fire Dragons and/or Dire Avengers and kill the unit.

Now obviously this isn't going to work all the time. He might not take the bait, and instead continue on his path forward. He might read this post and become more cautious because of this, but the fact that I know he tends to do these things gives me an inherent advantage right from the get go.

Now lets use Brennan as an example. There are certain units that I know Brennan loves to use, most predominantly the Defiler. We often have games that we call "Crab Battles" where we each take a Defiler or two and run them up the board at each other blasting away with our Battle Cannons, and sometimes even making it to assault. It's quite likely that if I'm playing Brennan and he's bringing Chaos, there will be a Defiler in the mix somewhere. So because I know this about Brennan I can make sure that I'm really remembering to spread my models out to mitigate any incoming blasts, and try and keep any of my weaker armour in the best cover I can. I also need to make sure that I have a reliable answer to a Defiler in my list. Something a little more potent than plasma, maybe some Meltaguns, maybe some Obliterators. Whichever units I choose to use, I need to make sure that I'm prepared in both my deployment and my list building to face what he can throw at me.

Another important note is regarding the so-called "netlist". I see lots of people on various forums preaching that certain units and certain lists are the only things worth taking, or saying that certain other units aren't worth their cost. Try not to fall into the trap of blindly agreeing to this mentality. It's important to take the advice that you read and try to apply it to your own gaming group. The Chaos Daemon Flying Monstrous Creature spam list may be very popular on the internet right now, but if you tend to face lots of Tau with Missilesides and skyfire everywhere, it's probably not going to work out for you too well. Knowing your metagame and your opponent will do wonders for you both when designing a list and when playing the game, so make sure to keep it in mind.

Tuesday 5 November 2013

Warhammer 40k Battle Report Eldar vs Space Marines/Tau

The forces of the Mon-Keigh have stumbled upon a precious artifact of Eldar origin. The craftworld Alaitoc has sent a force to sieze the relic and bring it safely back to the craftworld. 

This is a battle report of a 1750 point game between my craftworld Alaitoc Eldar vs Todd's White Scars with Tau allies. The mission was the Relic with Dawn of War deployment. 
The Game Board with Deployment

The Armies

Craftworld Alaitoc

HQ:
 - Farseer with Doom, Guide, and Prescience (Warlord) - 100

Elites:
- 5 Fire Dragons in a Wave Serpent with Scatter Lasers, a Shuriken Cannon and Holo-Fields - 255

Troops:
- 10 Dire Avengers with Exarch  in a Wave Serpent with Scatter Lasers, a Shuriken Cannon and
   Holo-Fields - 285

- 10 Rangers - 120

- 6 Rangers - 72

- 6 Rangers - 72

- 3 Windrider Jetbikes with one Shuriken Cannon - 61

Fast Attack:
- 5 Warp Spiders with Exarch with Twin-Linked Death Spinners and Fast Shot - 120

Heavy Support:

- Fire Prism with Holo-Fields - 140

- Fire Prism with Holo-Fields - 140

- Wraithknight with Scatter Laser, Suncannon and Scattershield - 300

Fortification:
- Aegis Defence Line with Icarus Lascannon - 85 

Total: 1750

This is an unusual list for me. Normally I wouldn't take this many Rangers, but I thought I'd try 'em out and see how they did. Unfortunately the mission was the Relic so having lots of scoring units wasn't hugely helpful, and with the low damage output that Rangers tend to have, I wasn't feeling super confident in my list. Luckily, Everything in my army had the potential to bypass the Terminators' armour so that was a bit of a plus. I also got lucky and rolled Doom for one of my powers, so that would be a big help too, so long as he doesn't deny the witch too much.

White Scars/Tau

HQ:
- Korsaro Khan on Moondraken - 150
- Chapter Master with Emperor's Wrath (Warlord) - 150
- Cadre Fireblade (Allies) - 60

Elites:
- 5 Assault Terminators with Thunderhammers and Storm Shields in Landraider - 475

Troops:
- 5 Bikes with 2 Meltaguns - 125
- 5 Bikes with 2 Melatguns - 125

- 12 Fire Warriors (Allies) - 108

- 11 Fire Warriors (Allies) - 99

Heavy Support:
- Predator with Twin-Linked Lascannons and Lascannon Sponsons - 140

- Predator with Twin-Linked Lascannons and Lascannon Sponsons - 140
- Thunderfire Cannon - 100
Fortification:
 - Aegis Defence Line with Icarus Lascannon - 85

Total:  1757

I wasn't overly afraid of most of this army. The Terminators' Landraider having Scout thanks the the White Scars doctrines was a bit of a problem, but with any luck my Fire Prisms would be able to deal with it before it got too close. The other thing I was worried about was the Thunderfire Cannon. Firing four blasts a turn that could be ignoring cover was a big threat to all of my rangers, though the fact that it was only AP 6 when he fired with the shots that ignored cover helps a bit.

The Game
We Deployed using the Dawn of War deployment. Todd deployed first and set up his defence line pretty centraly, putting his fire warriors and both Predators behind it with the Bikes and Landraider on his right flank.
Todd's Deployment

Todd's Deployment 2
In response I decided to refuse flank a bit. I sent up my defense line on my right flank with all my tanks and the big squad of Rangers behind it. The Warp Spiders went into reserve to deepstrike, and the other squads of rangers went into the forest on my left and into the little tower on my right respectively. The Wraithknight stood to the far right, ready to come in and counter charge his Terminators or just jump forwards and stomp his Firewarriors.
My Deployment
Turn One
He started by scouting up his Bikes and Landraider towards my lines. I failed to seize the initiative and there was no night fighting, which allowed him to rush up unimpeded. On his turn he moved up his bikes and Landraider even more, trying to get into my lines before I got a chance to blast him off the table. His two Predators opened fire on the Wraithknight, and between the two of them brought it down to 3 wounds. His Fire Warriors were largely out of range, so they didn't do much, but his Chapter Master decided to take advantage of my clustered deployment, and called in an Orbital Bombardment. Though he managed a direct hit on a couple Rangers and both Wave Serpents, ones were abound, and when the dust settled, only one Ranger lay dead. His squad of Bikes without Khan fired at my Rangers in the forest, but thanks to the cover of the forest, none were killed. Khan's Bike squad Turbo-Boosted further up the flank, and the Landraider Turbo-Boosted into the middle forest. His Thunderfire Cannon fired on the Rangers in the building but only managed to kill 4. The other 2 held.
Poor Rangers
He then attempted to assault my Rangers in the forest, but failed. Luckily for him my Rangers also failed to do anything with their overwatch, despite getting 4 hits.

I began my turn by casting Guide and Prescience on the two Fire Prisms, and I Doomed Khan's Bikes. The Wraithknight Jumped up into the river, and the Fire Prism behind the building moved out and around to get a shot off  at the Landraider. All the other tanks shuffled around slightly in order to take advantage of their Holo-Fields. The Rangers in the forest moved back, right up against the defence line, hoping to put some distance between themselves and the Bikes. The Rangers opened by firing with their pistols on Khan's bike squad, but didn't manage to do any damage. The Fire Prism near the Wraithknight shot its lance into the Landraider, blowing a track clear off and immobilizing it.
My big ranger squad fired into Khan's bike squad and took one down, before the Dire Avenger Wave Serpent blasted the squad with the Scatter Lasers, the Shuriken Cannon and its Shield, killing the remaining 4 bikes. The Fire Dragon Wave Serpent then fired the Scatter Lasers and the Shuriken Cannon into Khan, downing the legendary Bike Lord.
What Bikes?
The Wraithknight then fired its weapons into the second Bike squad, killing all but the two Meltagunners, who held. A punishing turn for the Eldar!
End of Turn 1

Turn Two
With the Landraider immobilized, and the Bikes mostly gone, Todd decided to jup the Terminators out and move them as quick as he could towards the Eldar battle line. His remaining bikes moved forward, ready to melta and assault my rangers. His Predators began firing by shooting at my Fire Prism outside of the defence line, but the pilots skill allowed him to jink away most of the damage and it only suffered a destroyed Shuriken Catapult. The Fire Warriors, desperate to kill the Wraithknight opened fire upon the monster, but even with the Cadre Fireblade's direction only managed to do two wounds to it. Luckily, the Landraider still had its Lascannon to fire, and it managed to destroy the wraith construct. The Thunderfire Cannon started blasting at the big squad of Rangers, wounding the Farseer, and killing two more Rangers, who held their position. The two Bikers opened again on the squad in the forest, but couldn't seem to find the elusive Rangers. He attempted to charge, but ran out of gas and only rolled a 3.

With the Space Marines done, it was time for the Eldar fusillade to begin anew. The Farseer once again Guided and Prescienced the Fire Prisms, and this time Doomed the Terminators. I rolled for reserves, and both the Jetbikes and the Warp Spiders came in. The Warp Spiders attempted to Deep Strike behind the Predator on the hill, but got a little confused and landed right by the building holding the rangers. All the vehicles shuffled around, and a few of the Rangers were forced to move over to get back into coherency. The Wave Serpent with the Dire Avengers moved across the river, ready to disgorge its cargo near the Relic. The Jetbikes drove up and killed one of the bikers, and the Rangers in the forest finished them off. One of the Fire Prisms shot the Terminators with a focused blast and killed two. Both Wave Serpents opened up on the Terminators and killed the other 3 under a torrent of fire.

The Warp Spiders ran forward, eager to get into the enemy deployment zone and hopefully wreak some havoc. The Large Squad with the Farseer, and the small two man squad of Rangers both fired at the Fire Warriors with the Fireblade, hoping to pin them down, and while they managed to kill a couple, the discipline instilled in them by the Fireblade kept them from being pinned. The last Fire Prism shot its lance into the Predator on the hill again, this time immobilizing it. The Jetbikes assault moved, and the Warp Spiders activated their Jetpacks and jumped forwards.
End of Turn 2
With his forward force decimated, Todd decided to try and rush the relic with his Chapter Master and the Fire Warriors he  was accompanying. The Landraider turned its Lascannon on the Jetbikes, but failed to wound. Its machine spirit enraged by its immobilization, fired the other Lascannon at the damaged Fire Prism and managed to blow it up. The two predators fired everything they had into the Dire Avengers' Wave serpent, but due to some impressive jinking, it only sustained a single glancing hit. Trying to get closer to the Relic, the Chapter Master and his retinue ran forwards. The Thunderfire Cannon then set its sights on the Jetbikes, but due to some bad scatters didn't manage to do any damage.

With the Eldar force still very intact, the Farseer, Guided the remaining Fire Prism, cast Prescience on his squad and attempted to Doom the Chapter Master's squad, but their iron willpower prevented it. The Wave Serpent carrying the Dire Avengers moved forwards and dropped them off, the lead Avenger seizing the Relic for Alaitoc.
Taking the Relic
The Warp Spiders moved up, but tragically lost one of their member to the warp, whilst the rest of the tanks shuffled around and the Jetbikes moved to the Fire Warriors' flank. The Dire Avengers, wishing to eliminate the threat to their possession of the Relic, opened up on the Fire Warriors through the forest, killing a few, and the Wave Serpent added the weight of its scatter lasers to the fire. The Fire Prism tried to finish off the immobilized Predator, but once again its cover saved it. The remaining Wave Serpent , joined by the Rangers behind the defence line and in the Forest all fired into the Fire Warriors, killing all but two, and wounding the Chapter Master once. The Jetbikes added their fire and killed another Fire Warrior. The Chapter Master's precense allowed the lone tau warrior to keep his nerve though, and the squad did not run. The Warp Spiders continued to run forwards, before assault leaping again. The Jetbikes declared an assault against the Chapter Master, and no wounds were taken by either side.
Assaulting the Chapter Master
With so little left to contest my hold on the objective, and with me having first blood as well, Todd conceded the game for a final score of Eldar 4, White Scars and Tau 0. An overwhelming Eldar victory!
End of the Game
Post Game Thoughts

Well that battle went very well for me, despite my list not being hugely capable for the mission type. The main thing that went my way was Todd's failing that first assault against my Rangers. Him failing the charge there allowed me to bring my entire army to bear on the Bike squads and gave me First Blood. Immobilizing the Land Raider was also a huge deal, as it meant that his Terminators never made it near my lines.

The dice really favored me this game as well. Todd managed to do no damage at all on my Wave Serpents and only killed one Ranger with his Orbital Bombardment, which was uncanny, and even his Thunderfire Cannon was scattering like crazy. My Jink saves were also going very well for me.

I think that he made a mistake deploying all of his Bikes and his Landraider on one side, as it allowed me to buy some more time with my deployment by simply deploying on the other end from him. I do think that I should have deployed my Rangers with the Farseer and the Icarus on the other side of the Defence Line, so that I could have more rapidly deployed my Dire Avengers. I also found myself a little unsure of what to do with all my Rangers, as I didn't want to deploy them too far up where they would just get eaten by his Fire Warriors or Bikes, and so they ended up mostly just sitting back the whole game. Not sure I would bring that many again.

Anyways, thanks for reading, and as always, any comments are appreciated!