Character Name: Zargor Thune Played By: Alex
Race: Chaos Space Marine Archetype: Chosen
Background
Zargor Thune was born on Olympia not long before the Primarch Perturabo was given control of the Iron Warriors legion, and the planet himself. His childhood, therefore was in the midst of many great changes to the planet, as old Tyrants were replaced and thrown down by Perturabo and his Iron Warriors. Life on Olympia was always hard, and for Zargor it was doubly so. His father was killed before he was born in a factory accident, and his mother died from a plague when he was very young. With no one to turn to, Zargor was forced to eke out an existence on a ruthless planet inhabited by a ruthless people.
Perhaps it is thanks to this early hardship that he was chosen by the Iron Warriors to join their ranks. The boy Zargor had joined a gang known for their reckless ferocity, and was arrested for his involvement in a riot. Rather than execute the young boy, the Legion decided to put him through their trails. If he proved strong enough to survive, he would be a useful asset in the conquests to come, and if not, it was a death sentence anyways. Luckily for the young boy, a lifetime of beatings, fights, and petty crime had done an excellent job honing him into a perfect candidate for the legion. His senses, physique, and ferocity was already far above the average student, and he quickly surged to the head of the class.
Training was extremely hard, and the discipline harder, but Zargor found great satisfaction in the exercises and drills of the IV legion, and though he was often chastised for his temper and recklessness, his instructors could not deny that he was quickly becoming an efficient and effective warrior. After many years, he had finally earned the right to join the legion proper. It was a great honour to be implanted with a gene-seed, and though the process killed many applicants, Zargor was not concerned. He was by far the largest and strongest boy to be chosen, with a fortitude unmatched. His confidence was not misplaced, and after a grueling period of implementation he was finally ready.
Thus began many years of fighting in the IV legion, during which time he was put into an assault squad, having made a name for himself as a fearless and ferocious close combat fighter, more than willing to throw himself through any breach in defenses. However, due to the nature of the assignments of the Iron Warriors, Zargor often became bored with the endless siege operations, and was often chastised for his temper and insistence on a frontal assault. During this time, his resentment of the other legions, the Imperial Fists in particular, festered and grew, along with that of the rest of the legion. When Perturabo announced his siding with Horus, Zargor was more than ready to throw off the shackles of the Imperium and begin to tear down what they had striven to achieve.
So it was that Zargor found himself on Terra, tirelessly working to batter down the defenses of the Imperial palace, so arrogantly defined by their creators as impregnable. When the innermost walls were breached, Zargor was among the first in the legion to pour through. During the mad assault, Zargor slew scores of enemy marines, mostly of the hated Imperial Fists legion. When Horus was defeated and the traitors went into retreat, Zargor had to be bodily pulled away from the battle by his brothers, such was his fury and bloodlust. For his actions on Terra, and undying loyalty to the IV legion, Zargor was promoted to Brother Sergent, taking command of the remnants of his old assault squad.
During the millenia that followed, Zargor's rage and battle fury only intensified, and though he was at times unpredictable, his loyalty to the legion was unshakable. Because of his reputation and unswerving loyalty, Zargor was sent to the Screaming Vortex, alongside a Tech Adept from the legion to seek out potential allies to the legion, as well as gather any lost technology that might lie within.
Appearance
Zargor is large, even for a space marine, and monstrously strong. He wears a suit of ancient power armour painted in the colours of the Iron Warriors, with the distinctive hazard stripes on the left shoulder pad, and his right shoulder pad a bright red, to mark him out as an assault specialist. His armour has also been modified with a chain loincloth to protect his lower extremities even further from damage. He carries at all times his ancient chainsword, bolt pistol, bolter, combat knife, and many frag grenades for driving enemies into or out of cover as he needs. Underneath his armour is large muscular body, criss-crossed with countless scars of old wounds. He keeps his head shaved completely bare, in the event that his helmet is ever damaged or knocked off, to prevent the enemy from getting any handholds in close quarters. His skin is quite pale, and his eyes have taken on a red hue that burns brighter when his temper rises.
Personality
Zargor is extremely aggressive, with a quick temper, and an impatient streak that heavily contradicts his legion's usual combat doctrines. Though he may seem like a wild berzerker, Zargor is by no means stupid, and is more than capable of thinking tactically when he needs to. Zargor is also notoriously arrogant, especially when it comes to matters of strength or melee combat. His disdain for anyone he deems unskilled in combat shows readily, and when fighting such a foe, he often will take his time wearing them down before finally decapitating them in a glorious fountain of blood. Against foes he deems worthy he is more cautious, and will use any advantage to defeat his foe, including distracting them, disarming them, or simply bearing them to the ground and smashing their face in with his massive fists.
Tactics
While Zargor is skilled with all types of weaponry, his favorite are always the ones that allow him to kill up close. While he is more than capable of grinding down a foe under a barrage of heavy weapons fire, or trading pot shots in a prolonged shootout, his favored method of taking down an enemy is always a frontal assault. His martial pride often drives him to issue individual challenges to opponents that look to be skilled enough to warrant his time, even those that may outclass him, but he is more than happy butchering hordes of petty adversaries as well.
Thursday, 11 September 2014
Warhammer 40k Black Crusade
Hey folks! So me and my gaming group have recently become interested in trying out the Black Crusade RPG from Fantasy Flight games. In case you're unfamiliar with it, this is an RPG in which you play a Chaos Heretic to the Imperium of man, either as a Human, or a Chaos Space Marine. After having read up on the rules, we are almost ready to play, with the last touches of Character creation being finished up. As a good portion of my regular RPG group doesn't play Warhammer 40k or have much interest in its history or universe, there is only going to be a few of us playing. Brennan, Todd, Ryan, and Myself. I will be starting as GM, but may swap out in the future. Because there are only 3 players, I've decided to run the first "adventure" along with a GMPC in order to help shore up their numbers a bit and give them some help in combat.
So, why should you care? Excellent question! You should care because I will be bringing the action to you! We'll start with a page for each character, detailing their history, appearance, personality, fighting style, relationships, and any other information that may become relevant. These pages will be edited whenever something changes, so you may want to check them out as the story progresses as well.
The other thing I will be doing is writing up detailed recaps of the sessions as they happen. Sort of like battle reports, but a bit more intimate. These will include the story, the actions the PCs make, as well as some GM notes from myself, talking about things that may be interesting of fun to know, such as strange inter-party debates, or amazing dice rolls (whether for good or ill)
Now, keep in mind that this is our first time playing this system, and while we are all quite experienced with RPGs (D&D 3.5/Pathfinder being our games of choice) we aren't completely familiar with this system yet, so mistakes almost certainly will be made.
So with this in mind, I urge you to stay tuned, and if you like what you see, maybe try this or one of the other RPGs out for yourself. Make sure to leave comments and suggestions to help us become better players, or make the story more interesting!
Warhammer 40k Battle Report: Tzeentch V.S Nurgle
Led by Ahriman, a retinue of Thousand Sons, along with a mighty Daemon Prince of the Architect of Fate clash violently with Typhus and his army of Plague Zombies.
This was a 1750 battle between my Thousand Sons Chaos Space Marines, and Brennan's Nurgle Chaos Space Marines. We played a Crusade with a Hammer and Anvil deployment.
The Armies
Tzeentch
HQ:
- Ahriman -230
- Daemon Prince of Tzeentch with Power Armour, Wings, the Murder Sword, Level 3, Spell Familiar, Gift
of Mutation - 355
Troops:
- 10 Cultists with Autoguns and Mark of Tzeentch - 70
- 5 Thousand Sons with Meltabombs in a Rhino with Dozer Blades - 195
- 5 Thousand Sons with Meltabombs in a Rhino with Dozer Blades - 195
Heavy Support:
- Predator with Twin-Linked Lascannons and Lascannon Sponsons - 140
- Vindicator with Siege Shield and Combi-Bolter - 135
- 5 Havocs with 4x Autocannons, Meltabombs and Mark of Tzeentch - 130
Formation:
- Mayhem Pack - 300
Total: 1750
For this list I wanted to have some fun. Originally this wasn't what I was going to take, but Brennan told me he'd be bringing a Nurgle army, and I thought it would be interesting to do the rivalry thing, so with that in mind I built everything to have the Mark of Tzeentch if it could. I also decided that since Brennan's Daemon Prince had the Black Mace that I couldn't have it as well, so I took the Murder Sword instead. Seeing as this army could generate some major power dice as well, and with Daemon Princes being the most reliable daemon summoners in the game (thanks to spell familiars) I decided that I would be summoning in as many Tzeentch Daemons as possible.
Nurgle
HQ:
- Typhus - 230
- Daemon Prince of Nurgle with Power Armour, Wings, the Black Mace, Level 3, Spell Familiar, Gift of
Mutation - 355
Elites:
- 3 Chaos Terminators with Mark of Nurgle, 3x Combi-Meltas, 2x Lightening Claws, 1 Chainfist - 151
Troops:
- 25 Plague Zombies - 110
- 20 Plague Zombies - 90
Heavy Support:
- Predator with Twin-Linked Lascannons and Lascannon Sponsons - 140
- Predator with Twin-Linked Lascannons and Lascannon Sponsons - 140
- Defiler with Dirge Caster, Powerfist, and Power-Scourge - 225
Formation:
- Mayhem Pack - 300
Total: 1751
This list has some pretty obvious advantages over my list. First of all, it has a lot of bodies (pun fully intended) to try and blast through, and really, Thousand Sons tend to struggle in that aspect (5 of them costs more than 25 zombies), and his list really has counters for everything that I have, but more of them. His Preds are more than capable of dealing with my vehicles, not to mention his Termies and Brutes coming in wherever he wants while the Defiler will be able to mince my Havocs and possibly the Sons as well. Hopefully the addition of some summoned Daemons can swing the tide in my favour.
The Game
We rolled our many powers. Ahriman came up with Tzeentch's Firestorm, Psychic Shriek, Dominate, Shrouding and Invisibility. The Tzeentch Prince got Tzeentch's Firestorm, Summoning, Iron Arm, and Infernal Gaze. My first Aspiring Sorcerer got Tzeentch's Firestorm and Iron Arm, and the second got Tzeentch's Firestorm and Flame Breath. Brennan's Daemon Prince got Nurgles Rot, Iron Arm, Life Leech, and Inferno. Neither of us got anything good with our Gifts of Mutation. We then roll for sides and I win, picking the side with the hills. Brennan then wins the roll for deployment, and chooses to go first and deploy first.
Brennan's Deployment was simple. The Predators went in the forest in the middle, with the Daemon Prince as far forward as possible. The Defiler and big Zombie unit went on my left flank, while the other unit went on the right. The Terminators and Typhus went in reserve, along with the Mayhem Pack
Mine was hardly more complex. The Vindicator went on the right flank, hiding behind the forest, with the Havocs halfway up the hill. Both Rhinos went in the center, and the Predator on the left flank. The Daemon Prince went in the back right side. Cultists and Mayhem Pack go into reserve.
Turn 1
Brennan starts the movement phase by flying up his Daemon Prince towards the Predator. The Defiler and Zombies both move up as fast as they can. In the Psychic phase, the Prince manages Iron Arm, despite me throwing 10 dice at it. Oh well. Shooting begins with both Predators unloading everything into the Vindicator who fails all its saves and takes a glance and gets itself stunned. The Defiler takes aim with its Battlecannon at the Havocs, and kills the champion.
In my movement phase the Rhinos start to push forward a bit, and the Daemon Prince takes off towards the small Zombie squad. In the Psychic Phase, the Prince summons a unit of Horrors, casts Iron Arm, and the Aspiring Sorcerer in the lead Rhino casts Tzeentch's Fireball into the zombies, blowing some apart. In the Shooting Phase, the Havocs shoot into the Defiler and do 2 hull points to it. The Predator manages a 3rd, but it survives.
Turn 2
Seeing an opportunity, the Mayhem Pack is teleported in, but scatter a little bit. The Defiler and Zombies all continue to move forward, and the Daemon Prince drops down to glide mode, ready to do some assaulting. Brennan attempts to cast some powers and this time I deny Iron Arm. Shooting this turn is awful. All but 1 Helbrute miss their targets, and the one that hits only shakes the Predator. The Lascannons from the Predators all target the Vindicator, but it survives unscathed. The Defiler targets the Havocs again and manages to kill another, causing them to flee. In the assault the Zombies try and assault the Horrors, but fail their distance.
Responding to the new threat, my Helbrutes drop in, with one scattering over a predator, and right beside another Predator, one scattering from rear ark to side ark on a Helbrute, and finally the last locking on. The Havocs fail to regroup, but only run 2 inches. My Daemon Prince moves off into the center of the board whilst the Horrors back off a bit. Both units of Sons jump out to target the Daemon Prince, and the Predator moves over the hill to get some cover.
In the Psychic phase, the Daemon Prince fails to summon more Daemons, but the Horrors summon another squad, using the Icon to keep them from scattering. With that dealt with, the Vindicator blasts into the Zombies, but only kills a couple. The Havocs snap fire into the rear of one of the Helbrutes and glances it, while the Predator snap fires into its front armour and blows off the Multi-Melta. The first Helbrute fires into the Defiler and blows its sky high, killing a few Zombies in the explosion. The second Helbrute blasts apart one of the Nurgle walkers with its Multi-Melta as well, but the third is a little less lucky and only takes off the turret from one of the Predators. Finally, all of the Sons shoot everything they have into the Daemon Prince but fail to wound it, thanks to it jinking with Shrouded for a 2+ save, though a lucky Combi-Bolter shot gets a wound through.
Turn 3
With the Tzeentch army having more troops than it began the game with, Typhus picks his time to enter the field, deep striking in with his retinue of terminators right next to a Helbrute. The Zombies shamble forward some more, and the unharmed Predator pivots to unleash its weapons on the Helbrute. The Mayhem Pack rolls a fire frenzy and is unable to move this turn.
In the Psychic Phase, the Daemon Prince gets Iron Arm off again, despite me throwing all my dice at it. Uh Oh. Shooting begins with the wounded Predator trying to wreck the Vindicator, but it misses. The other Predator does better and blows the Helbrute threatening it to pieces. The Terminators manage to destroy another brute with their Multi-Meltas, whilst the last Brute that can shoot immobilizes the Rhino.
In the assault the big Zombie squad assaults the Helbrute to tie it up, whilst the other goes for the Horrors again, and this time they make it. The Nurgle Prince assaults Ahriman's squad and challenges the Sorcerer. The small squad of zombies manages to massacre the Horrors, taking no casualties in return, while the Helbrute smashes down a couple Zombies. The Daemon Prince easily dispatches the Sorcerer, as well as another couple of Sons.
With things starting to turn sour, the Havocs continue to flee. The squad of Sons hop back into their Rhino and move off towards the Zombies that just destroyed the Horrors. The Daemon Prince turns and heads back towards the Nurgle Prince, and the remaining Horror squad moves up the hill a bit to get away from the Zombies. In the psychic phase the Horrors cast the Flickering Fire on the Zombies and kill one or two, whilst the Sorcerer blasts them with Tzeentch's fireball. The Daemon Prince summons some more Horrors, but they are misplaced and land in the back corner near the Helbrute.
The Vindicator turns around to try and pulp Typhus and his buddies with its Demolisher Cannon. It fires and two termies are killed. The Predator shoots at the wounded Predator but its shots are stopped by the trees. The Havocs snap fire at Typhus, but they miss all their shots. In the assault, Ahriman steps forward, only to be smashed down by the Black mace before he can swing, thanks to the Daemon Prince's Iron Arm.
Turn 4
With victory close at hand the Zombies move towards the next squad of Horrors. Typhus splits from his remaining bodyguard and heads towards the Havocs, while the Terminator stays put. The Helbrute moves over to beat up the other Horrors, and the other moves to beat up the Rhino and Vindicator. The Daemon Prince attempts Iron Arm, but this time is denied. In the shooting phase, both Predators unload on the Rhino and blow it up, though no Sons are harmed in the explosion. In the assault the Zombies wipe another squad of Horrors off the table, while the Daemon Prince finishes off the unit he's been working on. The Helbrute Multi-Charges the Sons and the Vindicator, blowing up the tank and killing a son, only to be wrecked by the Sorcerer's Melta-Bomb. Typhus fails his charge against the Havocs.
Things are starting to look desperate, but the Tzeentchians aren't done yet. The Cultists finally show up, and the Havocs regroup. The Daemon Prince moves back to the center of the board and the objective, and the Predator drives forward. The Daemon Prince summons another unit of Horrors, and while they scatter a bit, it isn't a problem this time. shooting is lackluster, and nothing really happens. In the assault, the Helbrute crushes some more Horrors, and my Brute continues to pulp Zombies.
Turn 5
With the enemy on the ropes, the Daemon Prince rushes off to try and help the Zombies with the Helbrute to free them up. The other Zombies move down towards the Cultists and their Objective, while the Terminator moves to head off the Thousand Sons. Typhus moves right up to the Havocs. Once again Iron Arm is denied, and Typhus casts Nurgle's Rot, only to kill a bunch of Zombies. With that done, the Predators finish of their rival, wrecking it. Typhus charges the Havocs and murders them. The Helbrute finishes off the Horrors, and the Daemon Prince opts instead to try and take down my Prince, but fails his charge. The Terminator champion charges the Sons and slays their sorcerer.
With my options dwindling quickly, a plan forms. The Horrors move onto the Objective, while the Prince moves over to guard them. In the psychic phase the Daemon Prince fails to summon more Horrors, and the plan takes a turn for the worse. The Cultists unload on Typhus, but he feels no pain. With no other shooting, its on to the assault phase where the Sons and the Terminator have a slap fight.
We roll to see if it goes on...
Turn 6
The Zombies and Typhus move over to the Objective and the Cultists, while the Helbrute heads towards the crippled Rhino. The Daemon Prince goes around my Tzeentch prince to deal with the Horrors directly. No powers of consequence are cast this turn, and the Predators fail to harm the Daemon Prince. In the Assault, Typhus and the Zombies kill the Cultists, and the Nurgle Prince kills the Horrors.
Luckily, my Daemon Prince is a Horror making machine and jumps away, spawning more Horrors to replace the ones that died, only to fail its assault on the Predator holding the Objective.
We roll to see if it goes on...
Turn 7
The Nurgle prince is getting annoyed now, faced with yet more hated daemons. He assaults them, but surprisingly enough, one or two survive.
The Tzeentch Prince summons one last squad, who drop right onto the Objective, taking it from the Nurgle Prince, before running off and wrecking th wounded Predator.
Total Points
Tzeentch: 5 - (One Objective, Line Breaker, First Blood)
Nurgle: 5 - (One Objective, Slay the Warlord, Line Breaker)
Post-Game Thoughts
My god, that was a brutal match. I really felt like I was just getting ripped apart the whole game. I think the major reason for this mostly comes down to army composition. Thousand Sons are just such an expensive unit that it really leaves you with no leeway if the dice turn bad, or you have to deal with Hordes. Compound that with the fact that Horrors are about the worst unit I could have been summoning that game, and you can see why it was a rough match up.
So lets talk tactics here. I think Brennan played a really good tactical game here. He placed his Predators well in the back and out of the way, but also on an objective and with a good line of fire. He did very well choosing his targets for his deep strikers, even if he did a bad job with his melta. Tying up the Helbrute also worked out very well for him, though honestly, if he hadn't I'm sure it would have just been blasted by Lascannon fire, and it did mean that he had one of his two Objective Secured units bogged down, which ended up working in my favour as well.
As for me, I think I made a few mistakes that could have cost me the game. Number one I think was putting the Helbrute next to the Defiler. I really should have put it in front instead to keep away from the Zombies. Number two was that I wasn't as agressive with my Prince as I should have been. I got so focused on keeping it free to summon stuff that I didn't want to drop it down to actually go fight things. My third mistake was not as much a mistake as a stylistic choice, but it should be mentioned. I really should have been summoning Daemonettes over Horrors. Whilst Horrors give me more psychic dice, the Daemonettes would have been infinitely more useful in the game, as there was nothing the Brennan had that they wouldn't have been able to deal with. Thankfully, summoning anything at all is extremely potent, and its only thanks to this that the game wasn't just a complete massacre.
This was a 1750 battle between my Thousand Sons Chaos Space Marines, and Brennan's Nurgle Chaos Space Marines. We played a Crusade with a Hammer and Anvil deployment.
 |
| The Board |
Tzeentch
HQ:
- Ahriman -230
- Daemon Prince of Tzeentch with Power Armour, Wings, the Murder Sword, Level 3, Spell Familiar, Gift
of Mutation - 355
Troops:
- 10 Cultists with Autoguns and Mark of Tzeentch - 70
- 5 Thousand Sons with Meltabombs in a Rhino with Dozer Blades - 195
- 5 Thousand Sons with Meltabombs in a Rhino with Dozer Blades - 195
Heavy Support:
- Predator with Twin-Linked Lascannons and Lascannon Sponsons - 140
- Vindicator with Siege Shield and Combi-Bolter - 135
- 5 Havocs with 4x Autocannons, Meltabombs and Mark of Tzeentch - 130
Formation:
- Mayhem Pack - 300
Total: 1750
For this list I wanted to have some fun. Originally this wasn't what I was going to take, but Brennan told me he'd be bringing a Nurgle army, and I thought it would be interesting to do the rivalry thing, so with that in mind I built everything to have the Mark of Tzeentch if it could. I also decided that since Brennan's Daemon Prince had the Black Mace that I couldn't have it as well, so I took the Murder Sword instead. Seeing as this army could generate some major power dice as well, and with Daemon Princes being the most reliable daemon summoners in the game (thanks to spell familiars) I decided that I would be summoning in as many Tzeentch Daemons as possible.
 |
| Ahriman's Cabal |
HQ:
- Typhus - 230
- Daemon Prince of Nurgle with Power Armour, Wings, the Black Mace, Level 3, Spell Familiar, Gift of
Mutation - 355
Elites:
- 3 Chaos Terminators with Mark of Nurgle, 3x Combi-Meltas, 2x Lightening Claws, 1 Chainfist - 151
Troops:
- 25 Plague Zombies - 110
- 20 Plague Zombies - 90
Heavy Support:
- Predator with Twin-Linked Lascannons and Lascannon Sponsons - 140
- Predator with Twin-Linked Lascannons and Lascannon Sponsons - 140
- Defiler with Dirge Caster, Powerfist, and Power-Scourge - 225
Formation:
- Mayhem Pack - 300
Total: 1751
This list has some pretty obvious advantages over my list. First of all, it has a lot of bodies (pun fully intended) to try and blast through, and really, Thousand Sons tend to struggle in that aspect (5 of them costs more than 25 zombies), and his list really has counters for everything that I have, but more of them. His Preds are more than capable of dealing with my vehicles, not to mention his Termies and Brutes coming in wherever he wants while the Defiler will be able to mince my Havocs and possibly the Sons as well. Hopefully the addition of some summoned Daemons can swing the tide in my favour.
 |
| Typhus' Horde |
The Game
We rolled our many powers. Ahriman came up with Tzeentch's Firestorm, Psychic Shriek, Dominate, Shrouding and Invisibility. The Tzeentch Prince got Tzeentch's Firestorm, Summoning, Iron Arm, and Infernal Gaze. My first Aspiring Sorcerer got Tzeentch's Firestorm and Iron Arm, and the second got Tzeentch's Firestorm and Flame Breath. Brennan's Daemon Prince got Nurgles Rot, Iron Arm, Life Leech, and Inferno. Neither of us got anything good with our Gifts of Mutation. We then roll for sides and I win, picking the side with the hills. Brennan then wins the roll for deployment, and chooses to go first and deploy first.
Brennan's Deployment was simple. The Predators went in the forest in the middle, with the Daemon Prince as far forward as possible. The Defiler and big Zombie unit went on my left flank, while the other unit went on the right. The Terminators and Typhus went in reserve, along with the Mayhem Pack
 |
| Deployment after movement |
Mine was hardly more complex. The Vindicator went on the right flank, hiding behind the forest, with the Havocs halfway up the hill. Both Rhinos went in the center, and the Predator on the left flank. The Daemon Prince went in the back right side. Cultists and Mayhem Pack go into reserve.
 |
| Tzeentch deployment |
Turn 1
Brennan starts the movement phase by flying up his Daemon Prince towards the Predator. The Defiler and Zombies both move up as fast as they can. In the Psychic phase, the Prince manages Iron Arm, despite me throwing 10 dice at it. Oh well. Shooting begins with both Predators unloading everything into the Vindicator who fails all its saves and takes a glance and gets itself stunned. The Defiler takes aim with its Battlecannon at the Havocs, and kills the champion.
In my movement phase the Rhinos start to push forward a bit, and the Daemon Prince takes off towards the small Zombie squad. In the Psychic Phase, the Prince summons a unit of Horrors, casts Iron Arm, and the Aspiring Sorcerer in the lead Rhino casts Tzeentch's Fireball into the zombies, blowing some apart. In the Shooting Phase, the Havocs shoot into the Defiler and do 2 hull points to it. The Predator manages a 3rd, but it survives.
 |
| End of Turn 1 |
Seeing an opportunity, the Mayhem Pack is teleported in, but scatter a little bit. The Defiler and Zombies all continue to move forward, and the Daemon Prince drops down to glide mode, ready to do some assaulting. Brennan attempts to cast some powers and this time I deny Iron Arm. Shooting this turn is awful. All but 1 Helbrute miss their targets, and the one that hits only shakes the Predator. The Lascannons from the Predators all target the Vindicator, but it survives unscathed. The Defiler targets the Havocs again and manages to kill another, causing them to flee. In the assault the Zombies try and assault the Horrors, but fail their distance.
Responding to the new threat, my Helbrutes drop in, with one scattering over a predator, and right beside another Predator, one scattering from rear ark to side ark on a Helbrute, and finally the last locking on. The Havocs fail to regroup, but only run 2 inches. My Daemon Prince moves off into the center of the board whilst the Horrors back off a bit. Both units of Sons jump out to target the Daemon Prince, and the Predator moves over the hill to get some cover.
In the Psychic phase, the Daemon Prince fails to summon more Daemons, but the Horrors summon another squad, using the Icon to keep them from scattering. With that dealt with, the Vindicator blasts into the Zombies, but only kills a couple. The Havocs snap fire into the rear of one of the Helbrutes and glances it, while the Predator snap fires into its front armour and blows off the Multi-Melta. The first Helbrute fires into the Defiler and blows its sky high, killing a few Zombies in the explosion. The second Helbrute blasts apart one of the Nurgle walkers with its Multi-Melta as well, but the third is a little less lucky and only takes off the turret from one of the Predators. Finally, all of the Sons shoot everything they have into the Daemon Prince but fail to wound it, thanks to it jinking with Shrouded for a 2+ save, though a lucky Combi-Bolter shot gets a wound through.
 |
| End of Turn 2 |
With the Tzeentch army having more troops than it began the game with, Typhus picks his time to enter the field, deep striking in with his retinue of terminators right next to a Helbrute. The Zombies shamble forward some more, and the unharmed Predator pivots to unleash its weapons on the Helbrute. The Mayhem Pack rolls a fire frenzy and is unable to move this turn.
In the Psychic Phase, the Daemon Prince gets Iron Arm off again, despite me throwing all my dice at it. Uh Oh. Shooting begins with the wounded Predator trying to wreck the Vindicator, but it misses. The other Predator does better and blows the Helbrute threatening it to pieces. The Terminators manage to destroy another brute with their Multi-Meltas, whilst the last Brute that can shoot immobilizes the Rhino.
In the assault the big Zombie squad assaults the Helbrute to tie it up, whilst the other goes for the Horrors again, and this time they make it. The Nurgle Prince assaults Ahriman's squad and challenges the Sorcerer. The small squad of zombies manages to massacre the Horrors, taking no casualties in return, while the Helbrute smashes down a couple Zombies. The Daemon Prince easily dispatches the Sorcerer, as well as another couple of Sons.
With things starting to turn sour, the Havocs continue to flee. The squad of Sons hop back into their Rhino and move off towards the Zombies that just destroyed the Horrors. The Daemon Prince turns and heads back towards the Nurgle Prince, and the remaining Horror squad moves up the hill a bit to get away from the Zombies. In the psychic phase the Horrors cast the Flickering Fire on the Zombies and kill one or two, whilst the Sorcerer blasts them with Tzeentch's fireball. The Daemon Prince summons some more Horrors, but they are misplaced and land in the back corner near the Helbrute.
The Vindicator turns around to try and pulp Typhus and his buddies with its Demolisher Cannon. It fires and two termies are killed. The Predator shoots at the wounded Predator but its shots are stopped by the trees. The Havocs snap fire at Typhus, but they miss all their shots. In the assault, Ahriman steps forward, only to be smashed down by the Black mace before he can swing, thanks to the Daemon Prince's Iron Arm.
 |
| End of Turn 3 |
With victory close at hand the Zombies move towards the next squad of Horrors. Typhus splits from his remaining bodyguard and heads towards the Havocs, while the Terminator stays put. The Helbrute moves over to beat up the other Horrors, and the other moves to beat up the Rhino and Vindicator. The Daemon Prince attempts Iron Arm, but this time is denied. In the shooting phase, both Predators unload on the Rhino and blow it up, though no Sons are harmed in the explosion. In the assault the Zombies wipe another squad of Horrors off the table, while the Daemon Prince finishes off the unit he's been working on. The Helbrute Multi-Charges the Sons and the Vindicator, blowing up the tank and killing a son, only to be wrecked by the Sorcerer's Melta-Bomb. Typhus fails his charge against the Havocs.
Things are starting to look desperate, but the Tzeentchians aren't done yet. The Cultists finally show up, and the Havocs regroup. The Daemon Prince moves back to the center of the board and the objective, and the Predator drives forward. The Daemon Prince summons another unit of Horrors, and while they scatter a bit, it isn't a problem this time. shooting is lackluster, and nothing really happens. In the assault, the Helbrute crushes some more Horrors, and my Brute continues to pulp Zombies.
 |
| Super Blurry Turn 4 |
With the enemy on the ropes, the Daemon Prince rushes off to try and help the Zombies with the Helbrute to free them up. The other Zombies move down towards the Cultists and their Objective, while the Terminator moves to head off the Thousand Sons. Typhus moves right up to the Havocs. Once again Iron Arm is denied, and Typhus casts Nurgle's Rot, only to kill a bunch of Zombies. With that done, the Predators finish of their rival, wrecking it. Typhus charges the Havocs and murders them. The Helbrute finishes off the Horrors, and the Daemon Prince opts instead to try and take down my Prince, but fails his charge. The Terminator champion charges the Sons and slays their sorcerer.
With my options dwindling quickly, a plan forms. The Horrors move onto the Objective, while the Prince moves over to guard them. In the psychic phase the Daemon Prince fails to summon more Horrors, and the plan takes a turn for the worse. The Cultists unload on Typhus, but he feels no pain. With no other shooting, its on to the assault phase where the Sons and the Terminator have a slap fight.
We roll to see if it goes on...
 |
| End of Turn 5 |
The Zombies and Typhus move over to the Objective and the Cultists, while the Helbrute heads towards the crippled Rhino. The Daemon Prince goes around my Tzeentch prince to deal with the Horrors directly. No powers of consequence are cast this turn, and the Predators fail to harm the Daemon Prince. In the Assault, Typhus and the Zombies kill the Cultists, and the Nurgle Prince kills the Horrors.
Luckily, my Daemon Prince is a Horror making machine and jumps away, spawning more Horrors to replace the ones that died, only to fail its assault on the Predator holding the Objective.
We roll to see if it goes on...
 |
| End of Turn 6 |
The Nurgle prince is getting annoyed now, faced with yet more hated daemons. He assaults them, but surprisingly enough, one or two survive.
The Tzeentch Prince summons one last squad, who drop right onto the Objective, taking it from the Nurgle Prince, before running off and wrecking th wounded Predator.
 |
| End of Turn 7 |
Tzeentch: 5 - (One Objective, Line Breaker, First Blood)
Nurgle: 5 - (One Objective, Slay the Warlord, Line Breaker)
Post-Game Thoughts
My god, that was a brutal match. I really felt like I was just getting ripped apart the whole game. I think the major reason for this mostly comes down to army composition. Thousand Sons are just such an expensive unit that it really leaves you with no leeway if the dice turn bad, or you have to deal with Hordes. Compound that with the fact that Horrors are about the worst unit I could have been summoning that game, and you can see why it was a rough match up.
So lets talk tactics here. I think Brennan played a really good tactical game here. He placed his Predators well in the back and out of the way, but also on an objective and with a good line of fire. He did very well choosing his targets for his deep strikers, even if he did a bad job with his melta. Tying up the Helbrute also worked out very well for him, though honestly, if he hadn't I'm sure it would have just been blasted by Lascannon fire, and it did mean that he had one of his two Objective Secured units bogged down, which ended up working in my favour as well.
As for me, I think I made a few mistakes that could have cost me the game. Number one I think was putting the Helbrute next to the Defiler. I really should have put it in front instead to keep away from the Zombies. Number two was that I wasn't as agressive with my Prince as I should have been. I got so focused on keeping it free to summon stuff that I didn't want to drop it down to actually go fight things. My third mistake was not as much a mistake as a stylistic choice, but it should be mentioned. I really should have been summoning Daemonettes over Horrors. Whilst Horrors give me more psychic dice, the Daemonettes would have been infinitely more useful in the game, as there was nothing the Brennan had that they wouldn't have been able to deal with. Thankfully, summoning anything at all is extremely potent, and its only thanks to this that the game wasn't just a complete massacre.
Sunday, 27 July 2014
July Painting Update
Hey everyone! With the new Ork Codex, I've been going totally crazy trying to get my Orks painted up. So basically since the end of June, I've gotten almost 60 Boyz painted, as well as a Battlewagon, with a unit of Gretchin well on its way.
So I've gotten pretty quick at painting up batches of Ork Boyz, and counting the Boyz I already had painted, I have around 100 Boyz painted now. So here's the new ones.
![]()
Unfortunately, my pictures aren't the best, but as you may be able to tell, these Boyz are painted up to be Evil Suns, with red shirts for all.
Next up is the Battlewagon.
I'm really quite happy with how this turned out. Painting vehicles isn't really my forte, but I think it turned out pretty well. I plan on trying to do some conversions or scratch builds to get some more Battlewagons as well, as I think that they will be by far the most effective way to run Boyz if you want them to actually be able to do anything.
So I've gotten pretty quick at painting up batches of Ork Boyz, and counting the Boyz I already had painted, I have around 100 Boyz painted now. So here's the new ones.
 |
| Squad Number 1 |
 |
| Squad Number 2 |
Next up is the Battlewagon.
 |
| Battlewagon Front |
 |
| Side Arc |
 |
| The Rear |
 |
| And the Other Side |
Thursday, 24 July 2014
Warhammer 40k Battle Report: Orks V.S Chaos Space MarinesChaos
With the brutal Orks of the Evil Suns tribe invading a Chaos held planet, the Sorcerer of Slaanesh rallies his forces and prepares for the assault.
![]()
This is was a 1500 point battle between my Orks, and Brennan's Chaos Space Marines. The mission was Crusade with a Hammer and Anvil deployment.
 |
| The Board |
The Armies
Orks
HQ:
- Warboss with Da Finkin' Kap, Power Klaw, Bosspole, and 'Eavy Armour - 104
- Warboss with Gazbag's Blitzbike, Power Klaw, and Bosspole - 125
- Big Mek with Mega Forcefield, Warbike, and Power Klaw (Allies) - 160
Troops:
- 19 Slugga Boyz with Nob with Power Klaw and Bosspole - 154
- 20 Slugga Boyz with Nob with Power Klaw and Bosspole - 160
- 10 Gretchin with Runtherd with Grabba Stikk and Squig Hound (Allies) - 40
Fast Attack:
- 8 Warbikers with Nob with Power Klaw - 179
- 5 Warbuggies with Twin-Linked Rokkit Launchas - 125
- 5 Deffcoptas with Twin-Linked Rokkit Launchas - 150
Heavy Support:
- Battlewagon with 4 Rokkit Launchas, Boarding Planks, and Deff Rolla - 155
- Battlewagon with 4 Rokkit Launchas, Boarding Planks, and Reinforced Ram - 150
Total: 1502
With the codex still so new to me, most stuff is still quite experimental, but I've taken a list full of the stuff that I think will end up being most useful in the new book. The Battlewagons are a real must, as they're the only way I can see to get the Boyz nice and stuck in where they want to be. The Big Mek is there to provide a 4++ bubble to the Battlewagons and themselves. The Buggies will outflank, and hopefully the deffkoptas with their scout move will be able to take some first turn pot shots.
 |
| Da Orks |
Chaos Space Marines
HQ:
- Sorcerer with 3x Mastery Levels, Mark of Slaanesh, Sigil of Corruption, Spell Familiar, Melta Bombs,
and Gift of Mutation - 180
- Daemon Prince with 3x Mastery Levels, Mark of Slaanesh, Power Armour, Wings, Spell Familiar,
the Black Mace, Gift of Mutation - 360
Elites:
- 10 Noise Marines with 2x Blastmasters, 7x Sonic Blasters, Champion with Melta Bombs, Icon of Excess,
Rhino with Dozer Blade and Combi-Bolter - 341
Troops:
- 10 Cultists - 50
- 10 Cultists - 50
Fast Attack:
- 3 Chaos Bikers with Mark of Nurgle, 2x Meltaguns, Champion with Melta Bombs - 113
- Heldrake with Baleflamer - 170
Heavy Support:
- 3 Obliterators with Mark of Nurgle, and Veterans of the Long War - 237
Total: 1501
Oh jeez, of course it would be Noise Marines. This list could pose some major problems for me. With 2 level 3 Psykers, he was going to be completely dominating the psychic phase as well. If I can get to his lines without my Battlewagons going up in flames then I should be ok, even if I am taking horrific overwatch fire from them. The Daemon Prince could be a problem as well, given the right powers, but I'm less concerned about it. The Heldrake could be a problem as well, but the Big Mek could help offset that as well.
 |
| Chaos Space Marines |
The Game
We rolled Warlord Traits and my Warboss got Bellowing Tryant and Divide and Conquer. Brennan got Legendary Fighter on his Sorcerer. Brennan rolled his Powers and got Iron Arm, Endurance, and Fire Shield on his Sorcerer, and Smite, Warp Speed, and Enfeeble on the Daemon Prince. We then roll for table sides and he wins and takes the side with the big hill. He also wins the roll for first turn and decides to go first.
Brennan deploys his Bikes on my right flank behind a building, his Prince out of sight behind the big hill, the first Cultist squad next to the Bikes with the Obliterators behind the Cultists, the Noise Marines in the center, with their Rhino next to them, and the other squad of Cultists next to it.
 |
| Chaos Deployment |
To counter this, I place my Bikes in the center, with a Battlewagon on either side and the Deffkoptas on the right flank. The Grots go in reserve, as do the Buggies. No night fighting this game, or initiative stealing either.
 |
| Orks Deployment |
Turn 1
Brennan starts his turn by hopping the Cultists into the Rhino and driving forward. The Daemon Prince flies directly forward and the other Cultists move towards the Koptas. The Bikes drive around the side of the building they're hiding behind.
In the psychic phase, the Prince casts Enfeeble on the Deffkoptas, as well as smite, but they jink. The Sorcerer casts Endurance on his own squad to give them Relentless.
Shooting begins with the Cultists blasting into the Deffkoptas and doing a wound to them. The Noise Marines take their turn and kill all but 1 and leave another with a single wound. They begin to fall back and lose the hurt one to dangerous terrain. The Obliterators open up with their Lascannons on the Warboss' Battlewagon, but they can't get through its thick front armour. The Bikes and Rhino Turbo-Boost.
The Deffkopta continues to flee, but I manage to roll low, so it stays on the board. Both Battlewagons and the Bikes zoom forwards as fast as they can, going flat out in the shooting phase. One Warbiker is lost to terrain, but other than that, nothing more happens.
 |
| End of Turn 1 |
Turn 2
With the Orks closing in fast, the Noise Marines move back, while the Melta Bikers move to get a good side ark on the Battlewagon. The Daemon Prince flies over the Warboss' Battlewagon but does nothing with the Vector Strike, and the Rhino continues to move down the flank, hoping to go and claim the objective in my back field.
In the psychic phase, the Daemon Prince Enfeebles the Bikes, and casts Sensory Overload on them as well, but their Forcefield protects them. The Sorcerer casts Fire Shield on the Cultists, and Endurance on himself again.
Shooting is largely ineffective this turn, with a Blastmaster killing a single Biker. The Bikes fire their Melta into the Battlewagon's side, but both shots miss. The Obliterators attempt to get some results with their assault cannons, but again, fail to get through the thick armour plates bolted to the front. Again, the Rhino boosts forward. The Bikes attempt to charge, the Battlewagon but get a snake eyes and fail the charge.
With a mighty WAAAGH!!!, the Boyz leap from their Battlewagons and start to head towards the Noise Marines, Cultists, and Obliterators. The Bikes stay put in order to try and deal with the Daemon Prince. The lone Deffkopta fails to regroup again and flies off the table for first blood.
Shooting starts with the Boyz unloading their pistols to no effect. The Battlewagons also whiff pretty badly, though one wound is dealt to the Bikes, but they jink. The Warbikers on the other hand do some good work, blasting the Daemon Prince down to a single wound, but the beast stays in the air.
Assault is a little hard on both sides. Overwatch from the Noise Marines takes out about 4 boyz, and a multi-assault against the the Cultists and the Obliterators. They lose a bunch of Boyz to dangerous terrain, and some more to overwatch. The close combat goes a little better. All but 3 Cultists go down, and the Obliterators take a wound, for a few more Boyz in return. Unfortunately, both squads hold. The Noise Marines fare little better. The Warboss chalenges and super-Murders the Noise Champion, and though the Noise Marines fight back, the Boyz kill over half the squad.
 |
| End of Turn 2 |
Turn 3
With most of his army locked in Combat, there isn't lots to do. The Daemon Prince goes to glide mode and jumps over behind the big rock, while the Bikes get right up to the Battlewagon. The Rhino continues its course.
Psychic phase this round is particularly devastating. Brennan manages to get Endurance, and Iron Arm off, as well as Enfeebling the Boyz.
Shooting from the Bikes manages to get a glance and a shaken result on the Battlewagon with their Meltaguns, and the Rhino fires into the Bikes and kills one.
In the assault, the Bikes assault the Battlewagon, but fail to harm it. The Sorcerer issues a challenge, and the Nob accepts, only to get cut down. Unfortunately, his earlier cowardice earned him the scorn of Slaanesh, and so his "boon" is Spawnhood. Another boy or two is killed in the assault, before the Warboss swings and kills all but the Icon. The other fight goes less well for the Orks. They manage to wipe out the Cultists, but can't hurt the Obliterators, and combat is tied.
With the Cultists getting close to the objective, the Buggies come bouncing into the fight right behind the Rhino, whilst the Gretchin are herded on towards the objective. The Battlewagon on my left moves over to target the Prince with its Rokkits, and the other moves up to take some shots at the Spawn. Finally, the Warbikers move up to engage the Bikes.
Unleashing their Rokkits on the Rhino easily wrecks the vehicle, forcing the Cultists to disembark. The first Battlewagon gets a wound through on the Prince, but his Daemon save keeps him alive. The other Wagon fires into the Spawn and gets a wound on it. Lastly, the Warbikers shoot the Bikes and kill one, and they run away.
The Warbikers try to charge the cowardly bikes, but fail the long charge. The Boyz and Warboss finish off the last Noise Marine, and the other Boyz are killed by the Obliterators.
 |
| End of Turn 3 |
Turn 4
Finally having wakened from its nap, the Heldrake comes onto the board, ready to toast some Boyz. The Bikes rally, and again move to deal with the Battlewagon. The Cultists move towards the Gretchin, and the Daemon Prince hops over the rock to attack the Buggies.
Warp Speed is cast in the psychic phase, and thats it.
In the shooting phase, the combined fire of the Obliterators and the Bikes kill the Battlewagon. The Heldrake fires into the Boyz, and kills all but 4 and the Warboss, who manages to keep them alive, thanks to his Warlord Trait. With all shooting done, the Cultists run to try and get closer to the Objective.
In the Assault, the Spawn charges, and whiffs its attacks, only to be killed by the Warboss. The Prince charges the Buggies and wrecks one and stuns another.
With the Enemy on the ropes, and the pesky Obliterators still shooting me up, The Boyz with the Warboss head towards the Oblits, as well as the Bikers. The Buggies move a bit to get some shots at the Cultists, as do the Grots.
Once again, the Battlewagon fires into the Prince, and this time gets two wounds, but again, he saves it away. The buggies manage to take down a pair of Cultists, and the Grots get another, but they hold. All shooting from the Warbikers and Boyz does nothing.
In the Assault, the Boyz and Bikes both assault the Obliterators and manage to take them down, losing a single Biker in the process. The Gretching charge the Cultists, and though the Runtherd kills the Champion, the Grots lose combat badly and are overrun.
 |
| End of Turn 4 |
Turn 5
With not much left to do, the Heldrake goes to hover mode and back up. The bikes move towards the other Battlewagon, ready to blow it up. Again, the Cultists move towards the Objective.
In the psychic phase, the Daemon Prince gets a Perils of the Warp, and is banished back into the Warp.
The Bikes start shooting and blow off a Rokkit Launcha, while the Heldrake kills a Warbiker, thanks to the Big Mek's Mega Force Field. The Cultists run.
Assault, and the Bikes assault the Battlewagon and stun it.
In the Ork turn, its time to do cleanup. the Boyz get up the hill to try and kill the Heldrake, while the Warbikers turn to kill the Bikes. The Buggies move to kill the Cultists.
In the Shooting phase, the Warbikers murder the Bikes, and the Buggies whiff and hit no Cultists.
Assault and the Boyz and Warboss wreck the Heldrake.
At this point we decide to call it, as there's no way Brennan can pull a win.
Total Points:
Orks: 8 (2 Objectives, Linebreaker, and Slay the Warlord)
Chaos: 6 (1 Objective, Linebreaker, First Blood, and One Character Killed)
Post-Game Thoughts
That game was a really close battle throughout. Overall, I have to give the reason for my win to the fact that Brennan can't seem to crack armour 14. His Bikes missing both Meltaguns and then failing the charge turn 2 really hurt him, as it allowed my Boyz a lot more movement, and a turn 2 assault. I think I made a big mistake by being so aggressive with my Deffkoptas right away. I should have kept them back, more out of range of the Noise Marines, or maybe put them on the other flank to deal with the Rhino right away. On the other hand, my strategy of keeping the Big Mek in Forcefield range of the Battlewagons worked out very well. The 4++ it affords you can really help to get your Battlewagons up close and personal with the enemy. I also think that the large squads of Boyz worked very well, even though they had to take a lot of damage from overwatch and dangerous terrain on the way in, they still performed admirably. I didn't get much chance to see how the Deffkoptas worked, but the other two Fast Attack choices I brought have been very solid in the games I've played so far. The Bikes can dish out a ton of firepower, and have been fairly low priority up to this point, allowing them to do what they need to do, and the Buggies outflanking with Rokkits have done a very good job as well.
This was a really enjoyable game, and I can't help but feel like if a few rolls had been different, Brennan would have been able to pull off a win. Some Bad saves on his prince, along with his Sorcerer getting spawned and the Bikers missing left and right with their Meltas really hurt him this game, and I think he played a pretty tactically solid game. The only thing I would have done differently in his shoes would have been to move up his Obliterators turn 1 and 2 to try and get into Multi-Melta Range. Even if he had been able to pop one Wagon, it could really have changed the game. I could lose a lot of boyz in the explosion, and have a 50/50 chance to be pinned, or beating up my own guys.
Anyways, as always, thans for reading. I hope to have up some full reviews on the new Ork Codex, as well as WAAAGH!!! Ghazghull and The Red WAAAGH!!! soon. Maybe a 3 part series, so stay tuned.
Tuesday, 8 July 2014
Warhammer 40k Battle Report: Iron Warriors V.S Death Guard
Fighting over a strategically important planet within the Eye of Terror grows intense between a Warp Smith of the Iron Warriors legion, and a mighty Daemon Prince leading a contingent of Death Guard. In an attempt to put down the Death Guard once and for all, the Warpsmith calls upon all the Daemon Engines and Helbrutes at his disposal.
This was a 2100 point game between my Iron Warriors Chaos Space Marines, and Brennan's Death Guard Chaos Space Marines. The mission was the Scouring with a Spearhead deployment
The Armies
Iron Warriors
HQ:
- Warpsmith with an Aura of Dark Glory - 125
Heavy Support:
- Defiler - 195
- Defiler - 195
- Defiler - 195
- Defiler - 195
- Maulerfiend - 125
Formations:
- Helcult - 236
- Helbrute with Powerfist and Multi-Melta - 100
- 19 Cultists - 86
- 10 Cultists - 50
- Helfist Murderpack - 535
- Helbrute with Powerfist and Reaper Autocannon (Champion) - 105
- Helbrute with Powerfist and Plasma Cannon - 110
- Helbrute with Powerfist and Plasma Cannon - 110
- Helbrute with Powerfist and Plasma Cannon - 110
- Helbrute with Powerfist and Multi-Melta - 100
- Mayhem Pack - 300
- Helbrute with Powerfist and Multi-Melta - 100
- Helbrute with Powerfist and Multi-Melta - 100
- Helbrute with Powerfist and Multi-Melta - 100
Total: 2101
This list was kind of an experiment. I realized that between Brennan and I we had 9 Helbrutes and 4 Defilers, and just really wanted to see them all on the tabletop at once. I also thought that it would be interesting to play, as if he was able to bring enough anti-tank he would more than likely be able to completely crump all my walkers right away before they ever made it anywhere near his lines. Because I didn't want it to just end up a slaughter, I also gave Brennan a heads up about the nature of this list so that he wouldn't be completely unprepared.
Death Guard
HQ:
- Daemon Prince of Nurgle with Wings, Power Armour, Gift of Mutation, 3x Mastery Levels, Spell Familiar,
and the Black Mace - 365
Elites:
- 3 Chaos Terminators with Mark of Nurgle and 3x Combi-Melta - 130
- 10 Plague Marines with 2x Plasma Gun, with Melta Bombs and Power Axe (Champion) in a Rhino with
Dozer Blades - 330
- 10 Plague Marines with 2x Plasma Gun, with Melta Bombs and Power Axe (Champion) in a Rhino with
Dozer Blades - 330
Troops:
- 10 Cultists with Mark of Nurgle and Autoguns - 80
- 10 Cultists with Mark of Nurgle and Autoguns - 80
Fast Attack:
- 3 Bikers with Mark of Nurgle, and 2x Meltaguns - 108
Heavy Support:
- 3 Obliterators with Mark of Nurgle - 228
- 3 Obliterators with Mark of Nurgle - 228
- 3 Obliterators with Mark of Nurgle - 228
Total: 2107
This list is cool because it includes a really scary element in the 9 Obliterators, and the Flying Daemon Prince, while still having some extremely sub-optimal choices in the Mark of Nurgle Cultists. What I was going to have to really worry about was absolutely going to be the Oblits, and if he got Iron Arm, the Prince as well. The Bikes could be a problem if I can't take them out before they get into melta range, and the Terminators could also be bad news if they don't scatter. I think it will be very interesting.
The Game
We rolled Warlord traits, and I think both of us got dumb stuff. Brennan then rolled his powers and got pretty much the worst things possible. Enfeeble, Life Leech, and Smite. Suddenly, his Daemon Prince got a whole lot less scary. Brennan won the roll for Corners and picked the corner with the forest in it, to deny me more cover. He also won the roll for first turn and opted to go first and deploy first.
Brennan deployed with his Cultists on his back objective in the back of his deployment zone, and with the Prince in the forest next to them. His other Cultists went far forward, ready to grab a more central objective. Beside the Cultists, he put one Rhino, and the other Rhino went on his left flank. A Squad of Obliterators accompanied the Bikes on his right flank, and finally, the other two Obliterator squads went in the middle and a bit to the left.
To counter him, I used my amazing strategic prowess and pretty much just stretched out across the table as far forward as possible. The Maulerfiend went on my far right with two Defilers. A third Defiler held the Center with the Helfist Murderpack hiding behind a building. The Helcult took up my left flank along with the last Defiler, and the Mayhem Pack went into reserve.
We flip do random objective values and I have the 1 with my Cultists, a 2 on my right hill, a 3 on my left hill, a 2 by my center Defiler, the 4 in the center forest and a 2 with his Cultists in the back. We roll for Night Fighting and it is dark. I roll to steal the initiative and manage to steal it.
Turn 1
I start by moving my whole force forwards. The Maulerfiend runs behind the hill to its right the Defilers begin to move forwards, as does the Murderpack. the Defiler goes left to shoot at the Bikes. The Helcult moves forwards.
The Defilers unleash their Battlecannons and Reaper Autocannons into the central Cultists, and kill a couple. The leftmost Defiler shoots into the Bikes and kills the Champion, and, feeling less than confident against the massive Defiler, the remaining Bikes flee off the table, gaining me First Blood and a point for killing a Fast Attack choice. Everything else just runs.
With the Bikes gone and the walkers closing in, the Death Guard begin to try and do some damage before its too late. The Rhinos both move forward, the one on the flank moving up behind the hill, and the other moving into the forest. The Obliterators shuffle around some to try and get some decent lines of fire and the Nurgle Prince flies forward.
In the psychic phase, Brennan gets a 4 for his psychic dice and begins casting powers. He starts by casting Life Leech on the Cultists and kills one. He then tries to cast smite, but I deny.
Shooting begins with a squad of Obliterators firing Lascannons at the Maulerfiend, as well as the Plasma Guns from the Plague Marines, but the darkness and the hill prevent any damage. The next squad of Oblits shoot at one of the Defilers and manage to take a hull point off of it. Realizing that the Maulerfiend will be able to do some serious damage if it survives, and so he fires his last unit of Obliterators into it and it explodes.
Turn 2
Crashing down from the sky comes the Mayhem Pack, one lands directly behind the Rhino, one scatters a bit behind the Cultists, and one mishaps and gets placed in my back corner facing the wrong way. With the Maulerfiend dead, the Defilers move forwards to try and get to grips with the enemy themselves. the third Defiler on the flank moves around the hill to get a better line of sight. The Helfist Murderpack moves toward the Rhino, ready to hopefully blow it up and then assault the guys inside. The Cultists shuffle forward a bit to try and shoot the Daemon Prince with their pistols
Shooting starts with the Murderpack shooting everything at the Rhino, and only getting one glancing hit through, with one of the Plasma Cannons getting hot and giving a Helbrute a hull point. Next the Helbrute behind the Rhino fires its Multi-Melta but only manages to stun the Rhino. Finally, a Defiler shoots the Rhino and wrecks it. The Defiler closest to the Obliterators shoots everything into them, but their armour protects them from harm. The last two defilers both fire everything into the now exposed Plague Marines and manage to kill half the squad. Finally, the Cultists shoot their pistols into the Daemon Prince, hoping to knock it out of the sky, but they fail to harm it. The Helbrute in my corner runs towards the Helcult to try and get back into the fight.
With a daemonic bellow, the Defiler charges the Obliterators and manages to completely pulp one, but takes a hull point in return for its trouble. Luckily, I immediately make my It Will Not Die roll and it regenerates the damage.
With one squad of Obliterators tied up, and a pair of Helbrutes directly in their midst, the Death Guard move to deal with the wall of walkers coming their way. The two units of Obliterators each move to target a Helbrute, while the Rhino moves towards a Defiler to try and hurt it with plasma fire. The unit of Plague Marines begins to try and move away from the Murderpack, and the Daemon Prince flies right over the Helcult, but fails to harm the Helbrute with its Vector Strike.
In the psychic phase, the Prince casts both Smite and Life Leech on the Cultists, and kills a couple, but other than that, there's not much to be done.
Shooting starts with both units of Obliterators destroying the Helbrutes, thanks to the twin-linked Meltaguns they can sprout. The Plague Marines manage to take a hull point off the Helbrute Champion, and the ones in the Rhino take a point off a Defiler, though one of the Plague Marines is killed by his gun.
In the assault, the Defiler does a couple wounds, but they're saved away by the Obliterators' Daemon save. They swing back and do a hull point to the Defiler.
Turn 3
With the Obliterators running amok, the Defiler on my left flank moves up the hill, while the one in the middle goes straight forward. The last Defiler moves towards the Rhino, hoping to charge it this turn. The Murderpack moves up towards the Plague Marines, hoping to kill them this turn, and the remaining Mayhem Pack brute gets mad and has a firing frenzy. The Helcult moves to target the Daemon Prince again.
Shooting from the Murderpack is largely unneffective this turn with 2 Plasma Cannons overheating, and the Multi-Melta missing, and only one Plague Marine goes down. The Defiler on the hill fares little better and misses completely with its Battle Cannon, but takes one down with the Reaper Autocannon. The center Defiler blasts into the Cultists again and kills a couple, but they hold. The last Defiler shoots at the Rhino but doesn't hurt it. All the shooting from the Cultists and Helbrutes proves innefective and the Daemon Prince remains unharmed.
In the assault phase things go poorly. The Defiler fails its charge against the Rhino, even with fleet, and the Murderpack fails its charge on the Plague Marines. Lame. In the combat between the Oblits and the Defiler, the Defiler smashes down another Obliterator and takes another hull point leaving it on its last one.
Seeing their time to strike, the Terminators teleport right next to the Murderpack, hoping to cook some Helbrutes with their Combi-Meltas. The Daemon Prince switches to gliding mode to try and assault the Helcult, and the Cultists by the forest move forward to claim the objective. The two squads of Obliterators move around to get some shots on things. Finally, the Rhino rams the Defiler, but neither engine takes any damage.
In the psychic phase, the Daemon Prince enfeebles the large squad of Cultists with the Warpsmith in it, and then casts Leech Life, getting a precision hit on the Warpsmith, which then fails to wound.
The center Obliterators fire Assault Cannons into the Murderpack, and with an incredible roll manage to kill the Champion and the Helbrute standing behind it!. The other Obliterators do much worse and fail to do any damage to the Defiler, as do the Plague Marines in the Rhino. The Terminators fire their Combi-Meltas, but only get one glance on a Helbrute.
Finally, the Defiler manages to crush the last Obliterator, and runs off towards the other squad on that flank, ready to beat some more of them up.
Turn 4
Seeing a new threat, the Murderpack turns towards the terminators, ready to punch them into a pulp. The Defiler on the hill moves right up onto the objective on the top of the hill. The Center Defiler moves right up to the edge of the forest, hoping ot assault the Cultists within, whilst the wounded Defiler moves even closer to the Obliterators. All the Cultists turn to fight the Daemon Prince, and the lone Helbrute moves forward as well.
Shooting starts with 2 squads of Cultists firing everything into the Daemon Prince and taking off 3 wounds from it! the Defiler shoots at the Rhino and gets a couple glancing hits but doesn't wreck it. The other Defilers fail to hurt the Obliterators with their shooting and the center defiler kills a couple Cultists with its weapons.
In the assault the Murderpack charges into the Terminators killing 2, and the third runs and gets away. The small Cultist squad and the Helbrute charge the Daemon Prince, with the Champion challenging. The Prince murders the Champion and a bunch of Cultists, but takes a wound from the Cultist's massed attacks. The Defiler in the middle assaults and kills all the Cultists in the forest, and the Defiler on the flank assaults the Rhino and blows it up, killing 3 Plague Marines in the explosion. The last Defiler assaults the Obliterators and kills one and regenerates a hull point.
With most stuff locked in combat, there's not much left to do. The remaining Obliterators fire into the Defiler in the forest, but fail to do anything, while the lone Terminator moves to contest the objective of the Defiler on the hill.
In combat, the Obliterators knock off another point from the Defiler, and the Daemon Prince gets a glance on the Helbrute.
Turn 5
With the Death Guard on the ropes, the Iron Warriors make their final push. The Murderpack moves towards the remaining Plague Marines, and the Defilers and Helbrute prepare their final assaults.
In the assault, the flank Defiler charges the Plague Marines and take a hull point from overwatch, before smashing down 4 Plague Marines. the Defiler fighting the Obliterators kills an Obliterator and then gets punched down finally. The Defiler on the hill smashes into the terminator and murders him before consolidating back to the objective. The Murderpack kills the other 2 Plague Marines, and the Lone Helbrute and Helcult Brute take down the Daemon Prince. At this point, Brennan concedes.
Total Points:
Iron Warriors: 11 (8 for Objectives, 1 Fast Attack Kill, First Blood, Warlord)
Death Guard: 2 (Objective)
Post-Game Thoughts
Wow, I had no idea that this list would have been so tough to beat. Even with quite a bit of anti-tank in his army, Brennan had a really hard time dropping the walkers in my army, though he did manage to kill 6 of them. I think this really goes to show how much better vehicles got in this edition, as they're much harder to just blow up then they were before.
There were some really unlucky moments on both sides this game. Brennan had terrible luck with his melta (as, of course, is tradition) and really only managed to kill the two deep striking brutes thanks to twin-linking. He also got really unlucky with his psychic powers, as if he had gotten Iron Arm I would have been in deep trouble. For me, I had a hell of a time making charges. In total I failed 4 charges, 3 of which were in the same turn, and when I got into combat, Brennan's invulns were very tough to get through.
Tactically, I think my game probably could have been a little better, but honestly, it was more about just rushing up all those walkers and trying to smash face, and I guess that plan ended up working out pretty well. In the end, it was a really fun game, with lots of back and forth moments with the dice, and for awhile there it was looking like I was going to get crushed, though the points don't really reflect that.
As always, thanks for reading, and remember to leabe a comment with your feed back below.
This was a 2100 point game between my Iron Warriors Chaos Space Marines, and Brennan's Death Guard Chaos Space Marines. The mission was the Scouring with a Spearhead deployment
The Armies
Iron Warriors
HQ:
- Warpsmith with an Aura of Dark Glory - 125
Heavy Support:
- Defiler - 195
- Defiler - 195
- Defiler - 195
- Defiler - 195
- Maulerfiend - 125
Formations:
- Helcult - 236
- Helbrute with Powerfist and Multi-Melta - 100
- 19 Cultists - 86
- 10 Cultists - 50
- Helfist Murderpack - 535
- Helbrute with Powerfist and Reaper Autocannon (Champion) - 105
- Helbrute with Powerfist and Plasma Cannon - 110
- Helbrute with Powerfist and Plasma Cannon - 110
- Helbrute with Powerfist and Plasma Cannon - 110
- Helbrute with Powerfist and Multi-Melta - 100
- Mayhem Pack - 300
- Helbrute with Powerfist and Multi-Melta - 100
- Helbrute with Powerfist and Multi-Melta - 100
- Helbrute with Powerfist and Multi-Melta - 100
Total: 2101
This list was kind of an experiment. I realized that between Brennan and I we had 9 Helbrutes and 4 Defilers, and just really wanted to see them all on the tabletop at once. I also thought that it would be interesting to play, as if he was able to bring enough anti-tank he would more than likely be able to completely crump all my walkers right away before they ever made it anywhere near his lines. Because I didn't want it to just end up a slaughter, I also gave Brennan a heads up about the nature of this list so that he wouldn't be completely unprepared.
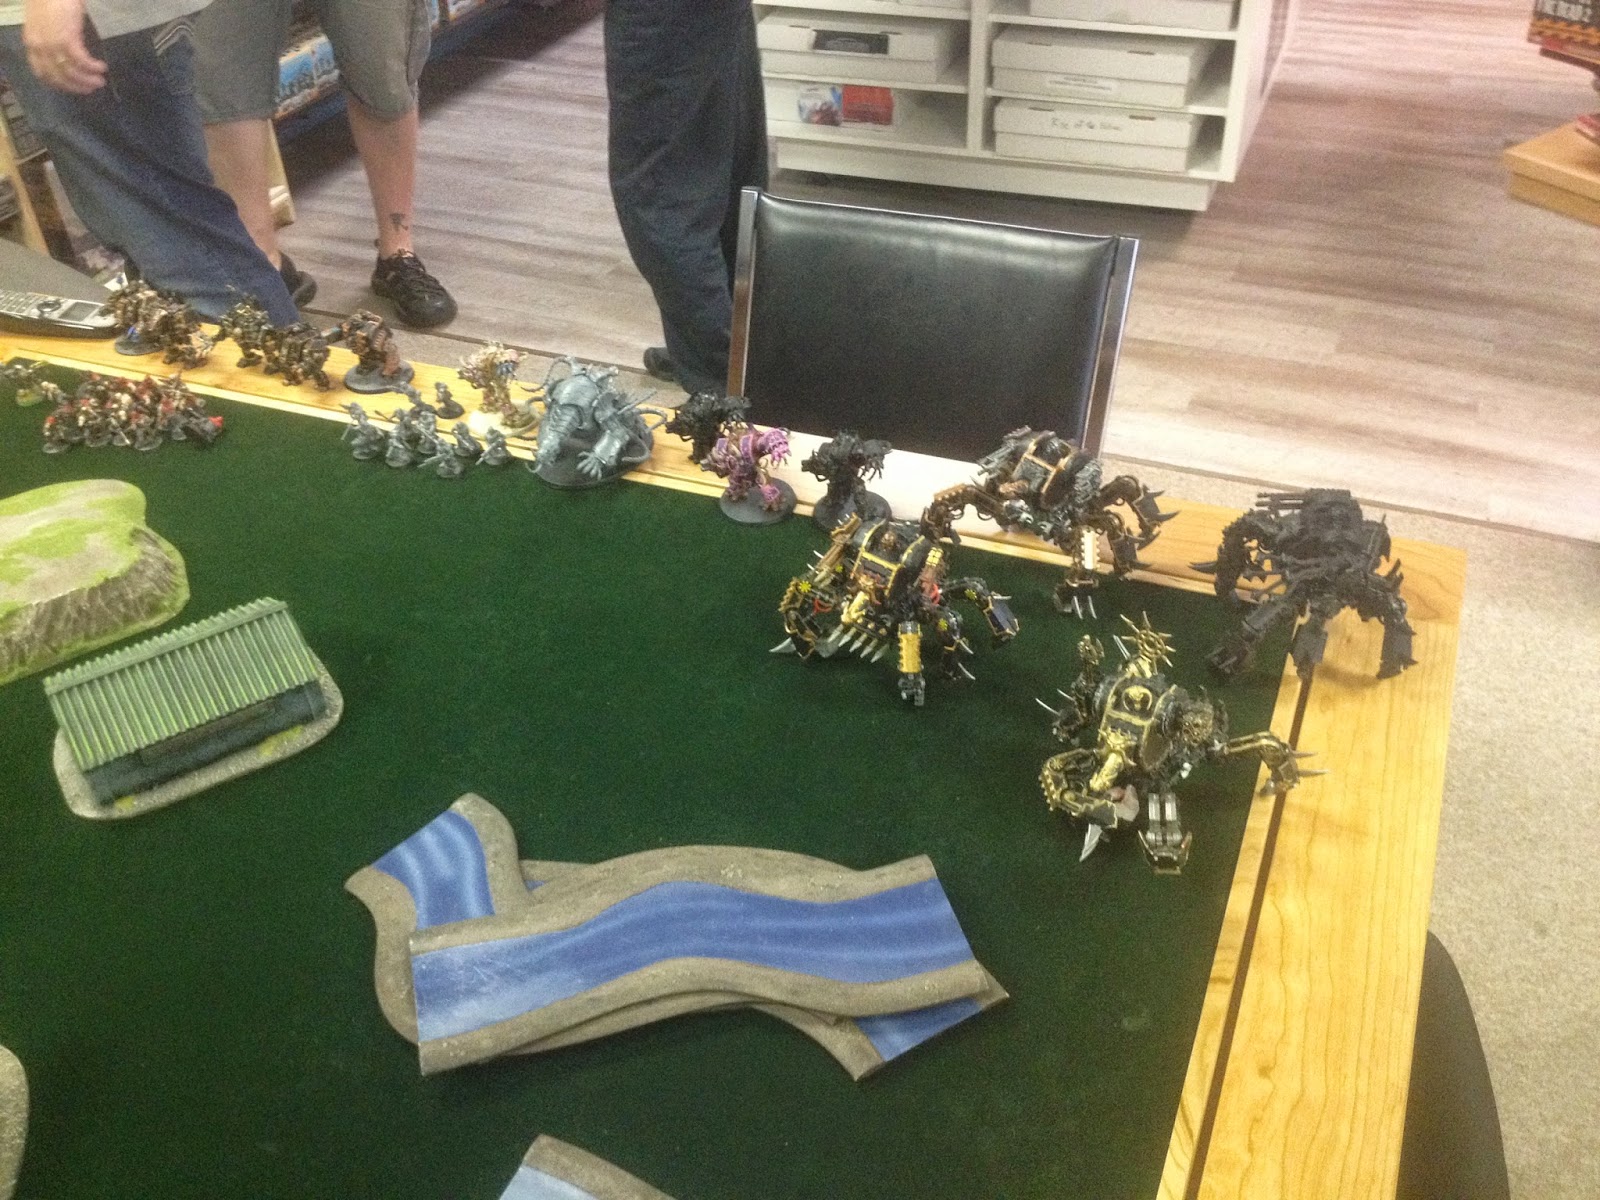 |
| Walkers! |
Death Guard
HQ:
- Daemon Prince of Nurgle with Wings, Power Armour, Gift of Mutation, 3x Mastery Levels, Spell Familiar,
and the Black Mace - 365
Elites:
- 3 Chaos Terminators with Mark of Nurgle and 3x Combi-Melta - 130
- 10 Plague Marines with 2x Plasma Gun, with Melta Bombs and Power Axe (Champion) in a Rhino with
Dozer Blades - 330
- 10 Plague Marines with 2x Plasma Gun, with Melta Bombs and Power Axe (Champion) in a Rhino with
Dozer Blades - 330
Troops:
- 10 Cultists with Mark of Nurgle and Autoguns - 80
- 10 Cultists with Mark of Nurgle and Autoguns - 80
Fast Attack:
- 3 Bikers with Mark of Nurgle, and 2x Meltaguns - 108
Heavy Support:
- 3 Obliterators with Mark of Nurgle - 228
- 3 Obliterators with Mark of Nurgle - 228
- 3 Obliterators with Mark of Nurgle - 228
Total: 2107
This list is cool because it includes a really scary element in the 9 Obliterators, and the Flying Daemon Prince, while still having some extremely sub-optimal choices in the Mark of Nurgle Cultists. What I was going to have to really worry about was absolutely going to be the Oblits, and if he got Iron Arm, the Prince as well. The Bikes could be a problem if I can't take them out before they get into melta range, and the Terminators could also be bad news if they don't scatter. I think it will be very interesting.
 |
| Nurgle! |
The Game
We rolled Warlord traits, and I think both of us got dumb stuff. Brennan then rolled his powers and got pretty much the worst things possible. Enfeeble, Life Leech, and Smite. Suddenly, his Daemon Prince got a whole lot less scary. Brennan won the roll for Corners and picked the corner with the forest in it, to deny me more cover. He also won the roll for first turn and opted to go first and deploy first.
Brennan deployed with his Cultists on his back objective in the back of his deployment zone, and with the Prince in the forest next to them. His other Cultists went far forward, ready to grab a more central objective. Beside the Cultists, he put one Rhino, and the other Rhino went on his left flank. A Squad of Obliterators accompanied the Bikes on his right flank, and finally, the other two Obliterator squads went in the middle and a bit to the left.
 |
| Death Guard Deployed |
 |
| Iron Warriors Battle Line |
Turn 1
I start by moving my whole force forwards. The Maulerfiend runs behind the hill to its right the Defilers begin to move forwards, as does the Murderpack. the Defiler goes left to shoot at the Bikes. The Helcult moves forwards.
The Defilers unleash their Battlecannons and Reaper Autocannons into the central Cultists, and kill a couple. The leftmost Defiler shoots into the Bikes and kills the Champion, and, feeling less than confident against the massive Defiler, the remaining Bikes flee off the table, gaining me First Blood and a point for killing a Fast Attack choice. Everything else just runs.
With the Bikes gone and the walkers closing in, the Death Guard begin to try and do some damage before its too late. The Rhinos both move forward, the one on the flank moving up behind the hill, and the other moving into the forest. The Obliterators shuffle around some to try and get some decent lines of fire and the Nurgle Prince flies forward.
In the psychic phase, Brennan gets a 4 for his psychic dice and begins casting powers. He starts by casting Life Leech on the Cultists and kills one. He then tries to cast smite, but I deny.
Shooting begins with a squad of Obliterators firing Lascannons at the Maulerfiend, as well as the Plasma Guns from the Plague Marines, but the darkness and the hill prevent any damage. The next squad of Oblits shoot at one of the Defilers and manage to take a hull point off of it. Realizing that the Maulerfiend will be able to do some serious damage if it survives, and so he fires his last unit of Obliterators into it and it explodes.
 |
| End of turn 1 |
Turn 2
Crashing down from the sky comes the Mayhem Pack, one lands directly behind the Rhino, one scatters a bit behind the Cultists, and one mishaps and gets placed in my back corner facing the wrong way. With the Maulerfiend dead, the Defilers move forwards to try and get to grips with the enemy themselves. the third Defiler on the flank moves around the hill to get a better line of sight. The Helfist Murderpack moves toward the Rhino, ready to hopefully blow it up and then assault the guys inside. The Cultists shuffle forward a bit to try and shoot the Daemon Prince with their pistols
Shooting starts with the Murderpack shooting everything at the Rhino, and only getting one glancing hit through, with one of the Plasma Cannons getting hot and giving a Helbrute a hull point. Next the Helbrute behind the Rhino fires its Multi-Melta but only manages to stun the Rhino. Finally, a Defiler shoots the Rhino and wrecks it. The Defiler closest to the Obliterators shoots everything into them, but their armour protects them from harm. The last two defilers both fire everything into the now exposed Plague Marines and manage to kill half the squad. Finally, the Cultists shoot their pistols into the Daemon Prince, hoping to knock it out of the sky, but they fail to harm it. The Helbrute in my corner runs towards the Helcult to try and get back into the fight.
With a daemonic bellow, the Defiler charges the Obliterators and manages to completely pulp one, but takes a hull point in return for its trouble. Luckily, I immediately make my It Will Not Die roll and it regenerates the damage.
With one squad of Obliterators tied up, and a pair of Helbrutes directly in their midst, the Death Guard move to deal with the wall of walkers coming their way. The two units of Obliterators each move to target a Helbrute, while the Rhino moves towards a Defiler to try and hurt it with plasma fire. The unit of Plague Marines begins to try and move away from the Murderpack, and the Daemon Prince flies right over the Helcult, but fails to harm the Helbrute with its Vector Strike.
In the psychic phase, the Prince casts both Smite and Life Leech on the Cultists, and kills a couple, but other than that, there's not much to be done.
Shooting starts with both units of Obliterators destroying the Helbrutes, thanks to the twin-linked Meltaguns they can sprout. The Plague Marines manage to take a hull point off the Helbrute Champion, and the ones in the Rhino take a point off a Defiler, though one of the Plague Marines is killed by his gun.
In the assault, the Defiler does a couple wounds, but they're saved away by the Obliterators' Daemon save. They swing back and do a hull point to the Defiler.
 |
| End of turn 2 |
Turn 3
With the Obliterators running amok, the Defiler on my left flank moves up the hill, while the one in the middle goes straight forward. The last Defiler moves towards the Rhino, hoping to charge it this turn. The Murderpack moves up towards the Plague Marines, hoping to kill them this turn, and the remaining Mayhem Pack brute gets mad and has a firing frenzy. The Helcult moves to target the Daemon Prince again.
Shooting from the Murderpack is largely unneffective this turn with 2 Plasma Cannons overheating, and the Multi-Melta missing, and only one Plague Marine goes down. The Defiler on the hill fares little better and misses completely with its Battle Cannon, but takes one down with the Reaper Autocannon. The center Defiler blasts into the Cultists again and kills a couple, but they hold. The last Defiler shoots at the Rhino but doesn't hurt it. All the shooting from the Cultists and Helbrutes proves innefective and the Daemon Prince remains unharmed.
In the assault phase things go poorly. The Defiler fails its charge against the Rhino, even with fleet, and the Murderpack fails its charge on the Plague Marines. Lame. In the combat between the Oblits and the Defiler, the Defiler smashes down another Obliterator and takes another hull point leaving it on its last one.
Seeing their time to strike, the Terminators teleport right next to the Murderpack, hoping to cook some Helbrutes with their Combi-Meltas. The Daemon Prince switches to gliding mode to try and assault the Helcult, and the Cultists by the forest move forward to claim the objective. The two squads of Obliterators move around to get some shots on things. Finally, the Rhino rams the Defiler, but neither engine takes any damage.
In the psychic phase, the Daemon Prince enfeebles the large squad of Cultists with the Warpsmith in it, and then casts Leech Life, getting a precision hit on the Warpsmith, which then fails to wound.
The center Obliterators fire Assault Cannons into the Murderpack, and with an incredible roll manage to kill the Champion and the Helbrute standing behind it!. The other Obliterators do much worse and fail to do any damage to the Defiler, as do the Plague Marines in the Rhino. The Terminators fire their Combi-Meltas, but only get one glance on a Helbrute.
Finally, the Defiler manages to crush the last Obliterator, and runs off towards the other squad on that flank, ready to beat some more of them up.
Turn 4
Seeing a new threat, the Murderpack turns towards the terminators, ready to punch them into a pulp. The Defiler on the hill moves right up onto the objective on the top of the hill. The Center Defiler moves right up to the edge of the forest, hoping ot assault the Cultists within, whilst the wounded Defiler moves even closer to the Obliterators. All the Cultists turn to fight the Daemon Prince, and the lone Helbrute moves forward as well.
Shooting starts with 2 squads of Cultists firing everything into the Daemon Prince and taking off 3 wounds from it! the Defiler shoots at the Rhino and gets a couple glancing hits but doesn't wreck it. The other Defilers fail to hurt the Obliterators with their shooting and the center defiler kills a couple Cultists with its weapons.
In the assault the Murderpack charges into the Terminators killing 2, and the third runs and gets away. The small Cultist squad and the Helbrute charge the Daemon Prince, with the Champion challenging. The Prince murders the Champion and a bunch of Cultists, but takes a wound from the Cultist's massed attacks. The Defiler in the middle assaults and kills all the Cultists in the forest, and the Defiler on the flank assaults the Rhino and blows it up, killing 3 Plague Marines in the explosion. The last Defiler assaults the Obliterators and kills one and regenerates a hull point.
With most stuff locked in combat, there's not much left to do. The remaining Obliterators fire into the Defiler in the forest, but fail to do anything, while the lone Terminator moves to contest the objective of the Defiler on the hill.
In combat, the Obliterators knock off another point from the Defiler, and the Daemon Prince gets a glance on the Helbrute.
 |
| End of Turn 4 |
With the Death Guard on the ropes, the Iron Warriors make their final push. The Murderpack moves towards the remaining Plague Marines, and the Defilers and Helbrute prepare their final assaults.
In the assault, the flank Defiler charges the Plague Marines and take a hull point from overwatch, before smashing down 4 Plague Marines. the Defiler fighting the Obliterators kills an Obliterator and then gets punched down finally. The Defiler on the hill smashes into the terminator and murders him before consolidating back to the objective. The Murderpack kills the other 2 Plague Marines, and the Lone Helbrute and Helcult Brute take down the Daemon Prince. At this point, Brennan concedes.
 |
| End of Turn 5 |
Iron Warriors: 11 (8 for Objectives, 1 Fast Attack Kill, First Blood, Warlord)
Death Guard: 2 (Objective)
Post-Game Thoughts
Wow, I had no idea that this list would have been so tough to beat. Even with quite a bit of anti-tank in his army, Brennan had a really hard time dropping the walkers in my army, though he did manage to kill 6 of them. I think this really goes to show how much better vehicles got in this edition, as they're much harder to just blow up then they were before.
There were some really unlucky moments on both sides this game. Brennan had terrible luck with his melta (as, of course, is tradition) and really only managed to kill the two deep striking brutes thanks to twin-linking. He also got really unlucky with his psychic powers, as if he had gotten Iron Arm I would have been in deep trouble. For me, I had a hell of a time making charges. In total I failed 4 charges, 3 of which were in the same turn, and when I got into combat, Brennan's invulns were very tough to get through.
Tactically, I think my game probably could have been a little better, but honestly, it was more about just rushing up all those walkers and trying to smash face, and I guess that plan ended up working out pretty well. In the end, it was a really fun game, with lots of back and forth moments with the dice, and for awhile there it was looking like I was going to get crushed, though the points don't really reflect that.
As always, thanks for reading, and remember to leabe a comment with your feed back below.
Wednesday, 25 June 2014
The Humble Chaos Space Marine
Hey everyone! Today I'm going to talk about the humble Chaos Space Marine. This unit is one that is very nearly awesome, but for a few drawbacks, and silly things that really hold them back.
First of all, lets look at their stat line. They've got a standard Space Marine stat line which is pretty decent, but they get no ATSKNF, Combat Tactics, or Chapter Tactics, and are only 2 points less than a standard marine. The thing we do get over our loyalist brethren is that we have lots of options.
So first for our options are the marks of chaos.
- Mark of Khorne - This mark gives you the Rage special rule, so should really only be taken if you're going to be outfitting them for combat. My favorite way to run Khorne Marines is to take a squad of 9 or 10 (depending on if you're bringing a character to go with them) and put them in a Landraider. Swap out their Bolters for CCW for free, give a couple guys Meltaguns and a CCW and of course Meltabombs on your Champion, and maybe throw in an Icon of Wrath in there as well. If you feel like you may be fighting Space Marines you can throw in Veterans of the Long War as well. What you end up with is a unit that gets 4 attacks per guy on the charge at strength 5 with re-rollable charge distances and Hatred (Space Marines) for just over 200 points, plus the cost of your Landraider. A bit pricey, but they will mangle any non-dedicated close combat unit, and can hold their own against tougher things as well. The Landraider will also help them actually make it to the fight.
- Mark of Slaanesh - This mark grants your units +1 Initiative. Now you can do something similar as with the Mark of Khorne, but with this mark, I prefer to use it to open up the option for an Icon of Excess. The Icon is a whopping 30 points, but gives you Feel no Pain, which can make for some tough objective campers. I like to bring either 10 in a Rhino with the Icon, or 15 if you're just going to sit on a back field objective. Of course, with the extra Initiative, you may want to send them into combat, and the Icon is a big help there as well. Mark of Slaanesh is really excellent as it is so versatile.
- Mark of Nurgle - This mark will give your troops +1 Toughness, which makes them ideal for taking or holding objectives. Generally if I want tough troops, I'll just go with Plague Marines, but for the Price of a Landraider you can have 10 of these bad boys in a Rhino with some Plasma Guns to give them some firepower. Not a bad option, but I generally wouldn't take it.
- Mark of Tzeentch - This is really kind of a loser mark. It gives you a 6+ invulnerable save. I don't really see a time when this would be very useful, so I can't give any advice on taking it. A Tzeentch themed army is the only reason I would take it. Seriously, don't bother.
- Icon of Vengeance - This Icon gives you the Fearless special rule. It would almost be good, if it didn't cost so much.as it is, you could get 2 CSMs for the same price, and you wouldn't also lose your ability to go to ground. For 10-15 points it would be good, but as it is, I wouldn't bother.
- Icon of Wrath - This is for units with the Mark of Khorne only and gives them Furious Charge and allows them to re-roll their charge distance. This Icon is one of the better ones in my opinion, at least for your standard marines. It's a little pricey, but not at all bad for what you get. I would take it if I were running Khorne Marines.
- Icon of Excess - This is for units with the Mark of Slaanesh. It gives them Feel no Pain, which of course is awesome! It is the most expensive Icon, at 30 points, but it really can dramatically increase your survivability. Definitely an attractive option
- Icon of Despair - Mark of Nurgle only, this one is garbage. 10 points nets you the Fear special rule for the entire unit. That's it. Fear is such a useless rule, I would never take this Icon.
- Icon of Flame - Tzeentch exclusive, this Icon grants the unit Soul Blaze for any Bolters, Bolt Pistols, or Combi-Bolters in the unit. I've never actually seen Soul Blaze do much, so as far as I'm concerned, this one is just a waste of points.
Next I'll talk about Veterans of the Long War. Not a terrible upgrade for only 1 point per guy, but only really useful against Marines. It gives you +1 Ld and Hatred Space Marines, including all their non-codex buddies like Space Wolves or Dark Angels. Really, it depends on if you think you'll be fighting Marines in close combat.
Now for weapon options. Any Marine can swap their Bolter for a Close Combat Weapon for free, or you can take a Close Combat Weapon for 2 points. I generally would only swap out, as taking both tends to be a bit unnecessary. you also can take a Flamer, Meltagun, or Plasma Gun, and if you have 10 or more guys you can have another of each of those or choose fromaa Heavy Bolter, Autocannon, Lascannon, or Missile Launcher with Frag and Krak Missiles. I'm not really a fan of taking a heavy weapon as it really limits your mobility. I prefer to take either 2 plasmas or 2 meltas. If we could combat squad, I think you would see a lot more Chaos Marines toting Lascannons and stuff, but as it is, it doesn't seem to be worth it.
Honestly, if you're looking for a cheap place holder unit to fill up some troop slots, Cultists are probably the way to go, but outfitted correctly, Chaos Space Marines can pack a punch, and they tend to be better for taking objectives in the mid-field or farther up the board. They also can be taken in big mobs, so if you have lots of these guys kicking around, try playing around with big 20 man squads. They can sometimes be a pain to shift, particularly with a character in there to keep them from running away. If you haven't taken these guys in awhile, try giving them a shot. Sometimes they can do pretty well, especially if the circumstances are right.
Subscribe to:
Posts (Atom)