Battle reports, tactics, and general banter about Warhammer 40k, D&D 3.5/Pathfinder, Malifaux, and Warhammer Fantasy!

Monday, 27 January 2014

Nostalgiahammer - Iron Warriors V.S Emperor's Children

The Emperor's Children Legion are besieging an Iron Warriors outpost. Mustering thier Daemon Engines, the Iron Warriors plan a night attack to take back their territory from the perverse worshipers of Slaanesh.

Brennan and I decided to go back in time on the weekend to play a game of 3rd edition 40k using the old 3.5 Chaos Codex. We decided on 1750 points and rolled up a Night Fight mission. The Mission was a claim ground type deal with the table being divided into table quarters. In order to capture a quarter you had to have a unit above or at half strength, or a still-mobile vehicle (not including HQs) in the quarter and they couldn't have the same. There would also be Night Fighting the whole mission. In order to shoot at a target, the firing unit had to roll 2d6x3 for their spotting distance. If they couldn't see the unit, they couldn't shoot.

The Armies

Iron Warriors

HQ:
- Daemon Prince With Mark of Chaos Undivided, Bolt Pistol, Bolter, Frag Grenades, Dark Blade,
  Terminator Armour, Daemonic Essence, Daemonic Resilience, and Daemonic Flight- 179

Elites:
- 3 Obliterators - 210

- 2 Obliterators - 140

Troops:
- 10 Chaos Space Marines with Mark of Chaos Undivided, 2x Plasma Guns, Frag Grenades, Aspiring
   Champion with Meltabombs and Power Weapon - 208

- 10 Chaos Space Marines with Mark of Chaos Undivided, 2x Plasma Guns, Frag Grenades, Aspiring
   Champion with Meltabombs and Power Weapon - 208

Fast Attack:
- 5 Raptors with Mark of Chaos Undivided, 3x Meltaguns, Aspiring Champion with Power Weapon
  -203

Heavy Support:
- Vindicator with Dozer Blade and Parasitic Possession - 145

- Defiler - 150 

- Defiler - 150 

- Defiler - 150  

Total: 1743

My goal here was pretty simple. Crush Brennan under the sheer weight of fire I was going to be able to bring to the table. Between the Vindicator, Defilers, and 5 Oblits I was pretty confident that any vehicles he brought would be turned to space dust pretty quickly and then my Prince and Marines could sweep in and do the rest.

Iron Warriors

Emperor's Children

HQ: 
- Chaos Lord with Mark of Slaanesh, Daemonic Aura, Daemonic Resilience, Daemonic Strength,
  Daemonic Essence, Combat Drugs, Meltabombs, Dark Blade, Sonic Blaster, Bolt Pistol - 178

- Chaos Sorcerer with Mark of Slaanesh, Daemonic Aura, Daemonic Resilience, Daemonic Strength,
  Minor Power, Power Weapon, Sonic Blaster, Bolt Pistol - 103

Elites:
- 3 Obliterators - 210

Troops:
- 10 Chaos Space Marines with Mark of Slaanesh, Sonic Blasters, x2 Plasma Guns, Frag Grenades,
  Aspiring Champion with Melta Bombs - 279

- 10 Chaos Space Marines with Mark of Slaanesh, Sonic Blasters, x2 Plasma Guns, Frag Grenades,
  Aspiring Champion with Melta Bombs - 279

- 9 Chaos Space Marines with Mark of Slaanesh, Sonic Blasters, x2 Plasma Guns, Frag Grenades,
   Aspiring Champion with Melta Bombs - 255

Heavy Support:
- Dreadnought with Autocannon and Dreadnought Close Combat Weapon with Heavy Flamer - 122

- Predator with Daemonic Possession, Twin-Linked Lascannon, Lascannon Sponsons - 165

- Predator with Daemonic Possession, Twin-Linked Lascannon, Lascannon Sponsons - 165

Total: 1754

Brennan's list didn't scare me too much. I didn't think the Sonic Blasters would be that big of a deal to face, but this was before I realized that rapid-fire weapons were a lot worse in 3rd edition. His Lord was pretty beefcake, which could cause some problems, and the Predators would make short work of the Defilers if given the chance.

Emperor's Children
The Game

Brennan won the roll to pick his side and gave me the table quarter with less cover and took the side with the big hill. He then won the roll for deployment and had me deploy the first unit. It was an "I deploy, you deploy" system starting with Heavy Support, then Elites, Then HQs, then Troops, the Fast Attack. He then also won the roll for first turn and took it.

Iron Warriors Deployment
 I deployed my Vindicator right up  behind a building in order to keep his units back a bit, and also to help it be in range early on. Defilers went next attempting to get as much cover as possible while still having some line of sight. The 2 man unit of Oblits went on my flank, and the 3 man in the center to try and be in a good position regardless of where he deployed. The Marines went in the center to push forwards, while the second squad hid with the Defilers. The Prince went in the Center ready to hop forwards.

Emperor's Children Deployment
Brennan Deployed his Predator up on the hill in order to try and get good line of sight to the rest of the field with it. The second one went next to it to try and line up a shot on the Vindicator. The Dreadnought went on the other flank to support the Marine Squad with the Sorcerer. The Obliterators went on the far end behind his Building, with another Squad of Marines and the Lord. The last squad of Marines went behind the chest high walls to try and get some cover from the Ordnance.

Turn 1

The Emperor's children begin to advance to try and get close enough to fire this turn. Both Predators attempt to shoot at the Vindicator, but are unable to see it in the darkness. The Dreadnought attempts to fire at a Defiler but meets a similar problem. The Obliterators try to shoot at my Obliterators but can't see them either. A real nothing turn.


End of Turn 1 Part 1
The Defilers start to move forwards to try and get eyes on the Dreadnought and the Predators. The Vindicator lies in wait for the Marines to approach. The Obliterators move towards his oblterators, as does my central squad of Marines. The flank Marines move up behind the Defilers to offer their support. The Raptors leap towards the Obliterators, hoping to drop one or two with their meltaguns, and the Daemon Prince jumps up onto a building.

Shooting begins with one Defiler spotting the hulking form of the Dreadnought through the gloom. Opening fire with it's Reaper Autocannon, it manages to wreck it with a lucky penetrating hit. The other Defiler can't see the Predator up on the hill and so just hangs out. The Raptors fire their Meltaguns at the Obliterators, but their Daemonic nature saves them from all harm.

End of Turn 1 Part 2
Turn 2

The Slaaneshi Marines continue to maneuver around to get into position. The Lord's squad comes out from behind the building, hoping to fire on my Marines or the Raptors. The Obliterators move over to get a better shot as well. The Sorcerer's squad rushes over behind the large building in that quarter of the table, hoping to get behind it and hunker down. The last unit of Marines approaches the Daemon Prince a bit, trying to stay out of range of the Vindicator.

Catching a glint of metal in the dark, the Obliterators unleash their Autocannons into the Defiler on the flank, wrecking it. the Marines spot the fast moving raptors and manage to gun down the champion and the mook. Once again, both Predators fail to spot the Vindicator and so don't shoot. The small Marine unit see the Daemon Prince and unload their sonic weaponry on it, causing a wound.

Turn 2 Part 1
Howling in rage, the Daemon Prince takes of from the building towards the Sorcerer's squad, hoping to assault them next turn. One Defiler moves up, while the other opts to stay where it is to try and fire its Battle Cannon. The center Marine unit moves towards the Lord's unit to try and shoot them this turn, as do the Obliterators. The Raptors jump behind the Obliterators to try and fight them.

The defiler that moved manages to catch a glimps of the Predator on the hill and fires it's Autocannon again, and though he gets a glancing hit, the Possessed vehicle shrugs off the damage. The Raptors unleash their Meltaguns once more into the Obliterators and manage to kill one this time. The Large unit of Obliterators fails to spot the Predator on the hill, while the small unit fails to see the enemy Oblits. In a spectacular show of ineptitude, my Marines fail to spot the Lord's unit a mere 12 inches away. Once again the Vindicator can't shoot. The Raptors assault the Obliterators and fail to damage them, but lose one of their own in return.

End of Turn 2 Part 2
Turn 3

The Lord and his unit move towards my Marines, as does the smaller central unit. The Sorcerer moves out to try and shoot the Daemon Prince bearing down on him. Shooting begins with the Lord's squad shooting into my marines and killing 5 of them. The second squad fires at the Obliterators, but fails to do any damage. The Sorcerer's unit has similar luck against the Daemon Prince, who's armour manages to protect him this round. The Predators finally attempt to make themselves useful this turn and fire at the Vindicator. Luckily for me, the Vindicator's armour, coupled with cover from the building keep it nice and safe.

Assault begins and the Lord's unit assaults my Marines. The Lord kills a couple, as well as a few more going down to the Marines themselves. We decided to do challenges for style points, so the Champions square off, but it's just a slap fight. I do no damage in return. The Raptors fail to do any more damage again, and lose another one of their number, leaving only one in combat.

I move my Obliterators over, hoping to stall the advance of the Lord's unit for a turn or two. The large Oblit unit moves off towards the Predators. Both Defilers and the Marines remain where they are again to fire their Battlecannons. The Daemon Prince Jumps over towards the Sorcerer.

Finally presented with a target, the Vindicator launches its payload at the central Marine unit, but scatters badly and only kills two. The Defiler by the tall building fires into the Sorcerer's unit and only kills 1 Marine. The other Defiler can't see in the dark.

My Prince charges into the sorcerer's squad, and after the Sorcerer take a wound off it, manages to kill 2 marines and Crush the Sorcerer himself The Obliterators charge in to see the remnants of the Marine squad cut down, leaving just the two "champions" locked in their duel. The Obliterators only manage to kill two Marines themselves. Brennan's Obliterators finally dispatch of the last of the pesky Raptors

Turn 4

Things are hanging in the balance now. The Obliterators move farther downt the table to escape any possible retribution, while the central Marines hug the wall for the cover save. Shooting this Turn is once again underwhelming with the Predators and Obliterators unable to spot anything in the dark, and the Marines unable to wound the large Obliterator squad.

Assault goes much better for Brennan as his Lord and remaining Marines manage to wipe out the Obliterators, thanks to a slew of failed 2+ saves. The slap fight continues. On the other side of the board, the Daemon Prince kills another couple of marines and they reduce him to only 1 wound.

My Obliterators move towards the Predators hoping to do something to them finally. The Vindicator pivots to get a better shot at the Marines. Both Defilers hang out. Shooting sucks again, but I manage to get 3 Marines with the Vindicator and one Battle Cannon this time, reducing the squad to less than half strength.

In assault the Lord finally gets frustrated with his underling's incompetence and steps in to end my Aspiring Champion. My Daemon Prince continues to do poorly, slowly whittling away at the Marines, but not taking any wounds this turn.

End of Turn 4
Turn 5

Emboldened by his victory against the Marines, the Lord rushes forward to get rid of the Vindicator hammering his other squad. The remaining Marines move around  bit to fire at the Obliterators again. Shooting once again does nothing though this time the Obliterators were able to fire on the Vindicator, but hit the statue in the center of the board. The Lord and his squad assault the Vindicator and finally manage to blow it up. The Daemon Prince punches out a Marine

Hearing the commotion with Daemonic ears, the Defiler that had been hanging back moves back around the building to get in range of the Marines. The Obliterators decide to go after the other Obliterators, hoping to drop them to less than half strength and take that quarter. Flailing with it's Heavy Flamer, the Defiler manages to kill a single Marine before charging in. All other shooting fails.

In assault, the Lord only manages to get one penetrating hit through on the Defiler, but only stuns it, which the beast ignores thanks to its Daemonic nature. The Defiler crushes two marines in retribution, before the Aspiring Champion clamps a Meltabomb to the walker, which also is ignored. Once again, the Daemon Prince punches a Marine to pulp and takes no wounds.

End of Turn 5
Turn 6

With the end of the battle in sight, the Obliterators move towards my Obliterators to try and take them out. The Predator on the hill pivots to shoot at them as well, and the other Predator pivots to shoot my Defiler. His Obliterators unleash their Plasma Guns, and manage to down one of my Obliterators. Luckily the Predator is basically useless.

In assault the Lord manages to wreck the Defiler, which flips over, nearly crushing him and his squad. The Daemon Prince finally kills the Marine squad and consolidates off towards the Predators.

The remaining defiler moves towards the Predator hoping to blow it up this turn. The Marines finally leap into action and move up to shoot at the lord and his squad. The Obliterators move towards their intended target. Shooting begins and the Obliterators fail to do any damage. The Defiler spots the Predator on the hill and peppers its flank with its Reaper Autocannon, wrecking it. The Marines fire at the Lord's Squad and manage to reduce them to only 4 models.

The Obliterators assault, but due to the long distance, only the front two get to attack. He downs one of mine, and I fail to kill his. The Daemon Prince assaults the remaining Predator and manages to wreck it.

End of Game
Total Points

Iron Warriors control 2 Quarters (Marines and Defiler)

Emperor's Children control 1 Quarter (Obliterators)

Post-Game Thoughts

That turned out to be a really close and really tough battle for me. The Night Fight mission definitely had a huge impact on the game, as it basically shut down most of the shooting. Brennan's Predators only got to fire 1 turn the whole game, and I also had turns where I felt like I didn't get to shoot at all.

Tactically I think I could have played a better game. I probably should have had my Obliterators all focus on his Marines with the Lord early on, and I should have held my Raptors back and used their speed to move in and take/contest a quarter at the end of the game. I also underestimated the Sonic Blasters and the flexibility they give you. Brennan was able to move around and fire with much more freedom thanks to the 24" range, while I effectively had 12".

The dice really made a big difference in this game. My Obliterators failing 2 2+ out of 4 rolls was terribad, and my Daemon Prince basically stayed in one combat the whole game. It seemed like every time I needed a 2+ I would roll at least one 1 in there, so it took him forever to get through that unit. Brennan felt it too though. His Predators basically sat around and did nothing all game, and while he cleaned up pretty well in assault, not having that Vindicator there really would have helped him a lot.

In the end though it was really fun to go back to the edition that Brennan and I first started playing in, and looking through the old Codex was a blast. We both agreed we'd have to do more of these retro battles, so stay tuned for some more 3rd, 4th and maybe even 5th edition games of Nostalgiahammer!

Monday, 20 January 2014

Warhammer 40k Apocalypse: No D-Weapons


Hey everyone. So this last weekend I participated in a 2 on 2 10,000 point Apocalypse game with Brennan and I playing our Chaos v.s Todd and a fellow playing Space Marines, supplemented with Brennan's Imperial Guard. In this game we all made a decision to not use any super-heavies or formations that used any ranged D-Weapons (there was a single Stompa that took to the field, but it never made it into assault). So what were our findings from this kind of game?

Well to begin, Superheavy vehicles became MUCH more difficult to destroy with no D-Weapons. With a total of 2 Baneblades, 2 Warhound Titans, a Macharius Vanquisher, a Stormsword, and a Stompa, only the Stompa and both Baneblades were destroyed, with Both Warhounds and the Macharius going down to one hull point each. This was with a considerable amount of firepower being dedicated to bringing these hulking vehicles down. At one point around 3000 points of various Leman Russ tanks fired upon the Stompa, along with at least one of the Baneblades before it finally lost its last hullpoint.


It also meant that the small amount of infantry on the table managed to move around relatively unimpeded, as all the bigger guns were being used to deal with the vehicles. A whole unit of spawn ran around the table for the whole game (which only went to 3 turns, due to time restraints) without taking a single wound, (the accompanying Biker Lord took one from a failed dangerous terrain test though) and all 3 Daemon Princes, the Bloodthirster, and the Great Unclean One rampaging around the board all stayed alive with only minor injury to their persons.

Over all, the game felt much more like a giant game of 40k, and while there was large scale carnage to be sure, it was nothing like the last couple of games which just became a giant pissing contest with whoever could pack in the most D-Weapons being the winner. If you haven't tried an apocalypse game without D-Weapons, I would heartily recommend that you do, as it really was a lot of fun, and way less monotonous, and felt less like you were just putting your guys out there to immediately pick them back up again.


Wednesday, 15 January 2014

Warhammer 40k Battle Report Khorne V.S Imperial Guard

Kharn the Betrayer and a small force of cultists have been spotted on the backwater agri-world or Taar, and seems to be searching for something. The planetary governor has dispatched the local army - the Children of Taar to stop him.

This was a 1500 point game with my Khorne-themed Chaos Space Marines with Daemon allies against Brennan's Imperial Guard. The mission was the Relic with a Hammer and Anvil deployment type.

The Board
The Armies

Khorne Marines

HQ:
-  Kharn the Betrayer (Warlord) - 160

- Daemon Prince of Khorne with Axe of Blind Fury, Gift of Mutation (+1 Attack) , Wings and Power
   Armour -265

- Bloodthirster with Exalted Gift (Regain a wound on a 2+ if he deals a wound in combat), and
   Greater Gift (Feel no Pain  4+) (Allies) - 310

Troops:
- 9 Chaos Space Marines CCW, Mark of Khorne, Icon of Wrath, and Champion with Melta Bombs
   and Gift of Mutation (Shrouded) - 180

- 20 Cultists - 90

- 10 Bloodletters (Allies) - 100

Heavy Support:
- Land Raider with Dozerblade and Dirge Caster - 240

- 2 Obliterators with Mark of Nurgle

Total: 1497

This list was designed for a very basic purpose. To claim skulls for the Blood God. Obviously I was going to try and win by putting on the pressure early and overwhelm him with a bunch of fast melee monsters. I ended up holding my Oblits in reserve to deep strike in and hopefully pop a tank or two, as well as the Bloodletters who could maybe be a threat to his guardsmen or even a vehicle.

Blood for the Blood God!

Children of Taar

HQ:
- Company Command Squad with Company Commander (Warlord - I use lowest Leadership when
   within 12") 2 Plasma Guns, and 4 mooks and a Chimera with Heavy Bolter and Multilaser - 185

Elites:
- Marbo - 65

Troops:
- 10 Grenadiers with 2x Plasma and a Meltagun in Chimera with Heavy Bolter and Multilaser - 195 

- 10 Grenadiers with 2x Plasma and a Meltagun in Chimera with Heavy Bolter and Multilaser - 195 

- 10 Grenadiers with 2x Plasma and a Meltagun in Chimera with Heavy Bolter and Multilaser - 195 

Fast Attack:
- 2 Scout Sentinels with Autocannons - 90

- Hellhound with Meltagun - 155

Heavy Support:
- Hydra Flak Tank with Camo Netting - 105

- Leman Russ Battle Tank - 150 

- Leman Russ Vanquisher with Heavy Stubber - 165

Total: 1500

This list had me a little concerned because all of his guys were in transports. In order to get to his troops I was going to have to first assault the Chimeras, which meant that I was going to take at least two turns of fire per squad of guys, and with that much plasma coming my way I was a bit nervous.

Children of Taar

The Game

I won the roll to pick my side and chose the side with more LoS blocking terrain. He then won the roll for first turn and deployed with his troop Chimeras and his Hellhound in a big cluster with his Battle Tank peekeing from behind a building with his Command Chimera and his Vanquisher on the other side of the table in a little pond. His Hydra and Sentinels went into a forest. Both forests were Brainleafs.

Tanks!
I deployed my Bloodthirster and my Daemon Prince behind a little Barricade and my Kharn Raider behind a building out of sight of the Vanquisher. The Cultists went into reserve and the Oblits and Bloodletters went into deep strike reserve.

Tactical Genius!
Turn 1

I rolled to steal the initiative and managed to steal. We then rolled night fighting and it was in effect. I started by moving up my Landraider 12 and flying my Daemons forwards. The Raider fired on one of the Chimeras and immobilized it and glanced it, while the Daemons ran.

Brennan began by shuffling around a bit to get into position to fire on me. The Hydra opened up first, putting a wound into my Bloodthirster, but it stayed airborne. Combined fire from all the Chimeras and everything they had inside then all fired into the Daemon Prince, and thanks to a whole bunch of 1s on my saves it was killed. First Blood for Brennan! The Vanquisher, Hellhound and Russ fired intot he Land Raider but failed to hurt it.

End of Turn 1

Turn 2

Reserves are rolled but nothing comes on this turn. Losing the Daemon Prince right away was a big blow, but I was hopeful that I could wrest control back. The Raider moved forwards, and Kharn and Friends leapt out towards the Hellhound and Chimeras, while the Bloodthirster went into jump mode to come menace a Chimera and the Sentinels. Firing it's lascannons, the Land Raider managed to explode the wounded Chimera, killing all the special weapons in the squad and leaving only the Sergent and 3 mooks behind.

Emboldened, I declare a multi-assault with Kharn and friends into the Hellhound and the Chimera behind it. Thanks to the re-roll from the Icon they make it in, with no casualties from overwatch (though both plasma gunners are killed by overheating weapons). The Bloodthirster declares a multi-assault on the Chimera and the Sentinals and makes it in as well.

Predictably, Kharn blows up the Hellhound, but also kills a marine. The Marines then wreck the Chimera, and because they blocked the rear hatch the Guardsmen are forced to perform an emergency disembarkation. The Bloodthirtser has less luck, exploding his Chimera and killing a couple mooks, but failing to harm the Sentinels. The Sentinels return the favour in that regard, and the Thirster remains locked in combat.

Brennan Starts his turn by moving his Guardsmen around and setting up some firing lines. He fires his Vanquisher at the Land Raider and explodes it. The Battle Cannon shoots at the Marines but he scatters huge and misses completely. shooting from the Hyrda, Grenadiers, and remaining Chimera kill a couple of Marines, but otherwise don't accomplish too much.

In the combat, the Bloodthirster manages to explode one Sentinel and glances the other, who fails to do any damage back, locking the beast in combat another turn. Damn!

End of Turn 2

Turn 3

I roll my reserves and this time the all come in. The Oblits go behind the Leman Russ and scatter back a bit, while the Bloodletters go behind the Vanquisher and scatter next to it. The cultists begin their long run. Kharn splits from his squad to go beat up some guardsmen, while the Marines go to take the Relic.

Shooting begins with the Obliterators, who are now out of melta range, rapid-firing some plasma-guns into the rear of the Russ, stunning it. Kharn guns down a Guardsman, and the Marines fail to harm the Guardsmen near the Relic with their pistols.

Kharn attempts to assault the larger squad of Guardsmen, but I roll a 4 and fail to get in. The Bloodthirster finally does its job and wrecks the Sentinel.

Brennan begins by moving the Russ away from the Oblits, and moving his Chimera up along with the Guardsmen to start Blasting Kharn. The Vanquisher tries to move forwards but immobilizes itself. Shooting from the big Guardsmen Squad kills Kharn, while the Hydra and Vanquisher put two more wounds on the Bloodthirster, Luckily the Marines remain unharmed.

End of Turn 3


Turn 4

The Cultists move forwards, and the Marines move into contact with the Relic to take it next turn. The Oblits chase the Leman Russ, and the Bloodletters move towards the Vanquisher. The Bloodthirster jumps back towards the squad near the Relic.

Shooting begins and the obliterators fire Multi-Meltas into the Leman Russ, blowing off the Heavy Bolter. The Bloodthirster then whips the meltagunner from the squad. In assault the Bloodthirster kills the Sergent in a challenge before wiping out the fleeing squad and regaining a wound. The Bloodletters charge the Vanquisher and blow it up, losing one of their number in the explosion.

Brennan moves the Russ away from the Obliterators again, and the Guardsmen move Towards them, as does the Chimera. Shooting from the Guardsmen and Chimera manage to kill the Oblits. The Battle Cannon locks onto the marines this time, killing all but one, who goes to ground. The Hydra manages to kill another Daemon or two.

End of Turn 4
Turn 5

With this possibly being the last turn, my lone Marine grabs the Relic. The Bloodletters move towards the Hydra, and the cultists run up. I then make a huge mistake and jump my Bloodthirster into the forest to hopefully get at the Guardsmen. I Fail the Brainleaf check and hit myself 6 times, dropping my own Bloodthirster to one wound! In the assault, the Bloodletters charge the Hydra but only do a single glancing hit, and the Bloodthirster fails its charge.

The Hydra backs away, and the Marines move away from the Bloodthirster. The Russ locks onto my last Marine, but rolls a 1 to wound, leaving it alive. The Guardsmen fire into the Bloodthirster and kill it, and the Hydra and Chimera reduce the Bloodletters to only 5.


Turn 6

I move the lone Marine with the Relic behind the rock in the middle, out of line of sight. The Bloodletters chase down the Hydra, and the cultists move back, so that Brennan doesn't scatter off them into my marine. The Bloodletters kill the Hydra.

Brennan moves around a bit, and fires the Battlecannon into the Cultists who go to ground and only lose 3. The Chimera dashes over, but snap firing fails to hit the Marine. The game ends this turn.

Total Points

Khorne Marines - 4 (3 for the Relic, 1 for Linebreaker)

Children of Taar - 2 (1 for First Blood, 1 for Slay the Warlord)

Post Game Thoughts

That was one of the most fun games I've had in awhile. It ended up being very close and could have ended badly for me if some of the dice had turned up differently. I really like this list, and there's not a whole lot I would change about it.

Tactically I think I played a solid game, and that my Target priority was decent. My only big mistake was forgetting about the Brainleaf forest and jumping into it with my Bloodthirster. That could have lost me the game right there. I also maybe should have left Kharn with the Marines, but I really felt like I needed to deal with those Guardsmen so that they wouldn't be a problem later. Failing charges with Kharn, and then with the Bloodthirster really hurt me, but there's not a lot I could have done about that.

As far as Brennan's game goes I think he played it pretty solidly as well. He had some poor luck with the exploding Chimeras, which managed to almost kill off a whole squad of guys, and he lost a bunch more from random tanks exploding. Such is the life of a Guardsman I suppose. He also forgot he had Marbo, which could have significantly impacted the game. We'll just assume that he had more important things to do than throw a demo charge on some backwater agri-planet. 

As always, thanks for reading and make sure you comment on what you like and don't like.


Monday, 16 December 2013

Warhammer 40k Battle Report Orks V.S Space Marines

A small Ork Warband has arrived uninvited on an Imperial world. The White Scars along with help from Belial and his Deathwing cohort have been dispatched to deal with the alien menace before it can get a foothold on the world.

This was a 1550 game with my Orks against Todd and h is Space Marines. The mission was the Scouring using the Spearhead deployment type.

The Board
The Armies

Orks

HQ:
- Warboss in Mega Armour with Bosspole, Attack Squig, Ammo Runt, Kombi-Skorcha and Cybork
   Body (Warlord) - 138

- Big Mek with Kustom Force Field, Power Klaw, and Bosspole - 125

Elites:
- 10 Lootas - 150

Troops:
- 3 Meganobz with Kombi-Skorchas, in a Trukk with Reinforced Ram and Big Shoota - 175

- 12 Shoota Boyz with Big Shoota and Nob with Power Klaw and Bosspole in a Trukk with
   Reinforced Ram and Big Shoota -157

- 12 Shoota Boyz with Big Shoota and Nob with Power Klaw and Bosspole in a Trukk with
   Reinforced Ram and Big Shoota -157

- 20 Shoota Boyz with 2x Big Shootas and Nob with Power Klaw and Bosspole - 170

Fast Attack:
- Dakkajet with Fighta Ace and additional Supa Shoota - 130

- 7 Warbikers with Nob with Power Klaw and Bosspole - 215

Heavy Support:
- Battlewagon with Deffrolla and 4x Big Shootas - 130

Total: 1547

I decided to give Trukk Boys another go this game, as I hadn't used them for awhile and I wanted to try and make them work. Unfortunately right now I'm having a hard time getting my Boyz to do much of anything unless they hang out in a Battlewagon all game. Either they're too slow on foot, or they aren't able to do anything with their numbers.

White Scars/ Dark Angels

HQ:
- Chapter Master on Bike with Power Fist and Lightning Claw (Warlord) - 190

- Belial with Thunder Hammer and Storm Shield (Allies) - 190

Troops:
- 5 Bikes with 2x Grav-Guns - 135

- 5 Bikes with 2x Grav-Guns - 135

- 5 Deathwing Terminators with 1 Assault Cannon and Sergent with Thunder Hammer and Storm
  Shield (Allies) - 196

- 5 Scouts with Sniper Rifles - 66

Fast Attack:
- Ravenwing Darkshroud (Allies) - 80

Heavy Support:
- Ironclad Dreadnought with Powerfist/Heavy Flamer and Seismic Hammer/Meltagun in Drop Pod
   - 180

- Predator with Autocannon and Lascannon Sponsons - 115

- Predator with Autocannon and Lascannon Sponsons - 115

Total: 1551

This list was going to be bad news. Of course the one time Todd brings Autocannons on his Predators is when I have Orks, with Trukks no less. The Chapter Master I was expecting, though it doesn't make that Orbital Bombardment any less threatening. It's also going to be tough facing two deepstriking units that are going to come in turn 1 and be right in my face immediately. This list was definately a good counter to mine.

The Game 

I won the roll to choose sides and decided to take the side with the big Line of Sight blocking hill, hoping to hide out behind it for a turn so that I could boost my Boyz right up at him immediately. I also won the roll for first turn and decided to make him deploy first.

Todd's Deployment
Todd deployed fairly spread out, relying on his speed to get him to where he needed to go quickly and easily. Belial and his retinue went into reserve along with the Ironclad, ready to drop on my head immediately.

My Deployment
I deployed as behind the hill as possible, with my front arks facing out in the event that his guys tried to deep strike behind me for a chance at my rear armour. The lootas went into the forest, hoping to shoot down his scouts or something so that my Dakkajet could get in unopposed. I was concerned about how clustered up I was, but I was hoping that he wouldn't be able to get line of sight with his Chapter Master.

Turn 1

Todd dropped his Deathwing down right beside the river closest to his side of the board, hoping to get some shots into my Trukk's side armour. The Ironclad came down on the otherside and landed in the river. Even worse, the Chapter Master was able to get line of sight on my Trukk, thanks to the bars on top of it, and dropped his Bobardment right on my head, hitting both Trukks and the Battlewagon exploding both the Boyz's Trukk (which thankfully Ramshackled into a wreck) and the Battleawagon killing 5 of the Boyz.

The Deathwing opened up on the newly disembarked Boyz and killed a couple, and  then the Ironclad let loose with its Heavy Flamer, which killed a bunch more Boyz from the Battlewagon squad, who passed their Leadership check. He then fired his Meltagun into the other Trukk and failed to do anything to it. While the Boyz were getting pummeled behind the rock, the Lootas were getting gunned down by the Scouts, Darkshroud and Predator who all together managed to kill  of them, but they held.

With almost a quarter of my force gone right out the gate I knew that things were going to be rough this game. I started by moving the Trukk Boyz towards the Deathwing, as well as driving both remaining Trukks over to face them as well. The Battlewagon Boyz moved over to try and beat up the Ironclad. The Lootas began by firing with Deffguns into the rear of the Ironclad but I rolled a 1 on their shots, and then failed to hit. Such as it is with Ork shooting I guess. The Meganobs, Trukk Boyz, Boyz formerly known as Trukk Boyz, and both Trukks fired into the Deathwing and killed one whole Terminator.

With that disappointing business done, I decided to issue some charges, first with my Boyz on the Terminators, who made it in fine, and then with the Boyz on the dreadnought who lost a couple to the Heavy Flamer and ran away. Typical. Fourtunately, the Boyz that actually made it to assault didn't get beaten up too bad. The Nob was killed in a challenge, but the Boyz managed to kill another Terminator, and though they lost combat, they stuck it out. What champs!

End of turn 1
Turn 2

With the beginning of turn two and me already in a bad way, the Space Marines pressed their advantage. The Predator by the hill moved over to get a better shot at the Lootas, and both Bike Squads moved forwards. Shooting began with the last of my Lootas being mopped up by the Scouts and Predator. The Ironclad moved towards the Meganobz's Trukk and Exploded it with the Meltagun, but it again Ramshakled into a wreck instead The remaining Predator and Darkshroud manage to kill a Meganob and wound another. The other Bike Squad managed to glance the other Trukk. The combat with the Deathwing went just as one would expect, with the Orks being cut down, almost to an Ork, but one managed to escape to safety.

Seeing the need to Reinforce their friends, the Bikes came on this turn. The Battlewagon Boyz managed to rally as well, and moved back to try and have another go at the Ironclad. The last Trukk moved off towards the Bikes, and the Meganobz went to go beat up Belial and his squad for the Moral victory. The Bikes turbo-boosted up the flank. Shooting from the Big Shoota into the Ironclad does nothing, and the other unit of Boyz does nothing as well. The Meganobs also do nothing. The Meganobz then declare a Charge on the Terminators, and the Boyz manage to make combat with the Ironclad this time.

Combat goes a bit better for me. Though the Ironclad manages to almost destroy the Boyz, the Nob gets a good whack in and manages to blow up the ancient Dreadnought. The Warboss challenges Belial, and in a big brawl of Power Fists, Klaws and Thunderhammers, all of the Meganobz, the Warboss, Big Mek, all the Terminators and Belial are all killed.

End of Turn 2
Turn 3

Todd's first Bike unit moves to the Flank to try and kill the Warbikes while the Darkshroud turns to fire on the Dakkajet. The other Bike Squad moves to try and stay just in range of the last Trukk. Shooting begins with the Darkshroud managing to take off a Supa Shoota. The Bikes and both Predators fire into the Warbikes and kill all but the Nob, who stands his ground. The other Bike Squad Immobilizes the remaining Trukk.

My Dakkajet moves onto the board and gets a locked velocity from the Quad Gun, and the Nob moves to try and Assault a Predator. The Boyz leap from their immobilized ride. The Nob and his last remaining Boy go to beat up the Drop Pod.The  Boyz all fire at the Bikes but fail to do any damage. The Dakkajet fires into the Scouts and kills 3, and the remaining 2 flee off the Board. The Boyz then attempt to assault but don't make it. The Warbiker assaults the Predator and blows it up, and the Nob and his Boy assault the Drop Pod, which explodes and kills the Boy.

End of Turn 3
Turn 4

Todd moves his Bikes up to shoot down my remaining Boyz, and moves his other bikes to claim an objective The Chapter Master breaks off and goes to the Quad Gun to try and bring down the Dakkajet. The remaining predator and Darkshroud manage to kill my last Warbiker, and the Bikes kill off a few Boyz, who run for it. The Chapter Master hits the Dakkajet but only manages to blow off a Supa Shoota.

I move my last Boyz over to hide behind a hill, and the Dakkajet moves up. The Jet fires ineffectually into the Darkshroud. With nothing really left, I decide to concede the game.

End of the Game
Post-Game Thoughts

Well that game could have gone better. Todd managing to get line of sight on my Trukk pretty much spelt doom for me right from the get-go. With all of my mobility effectively neutralized in the first turn, as well as most of my Boyz already dead or on the run, I knew that there wasn't much hope for a victory, unless the dice took a serious turn. They definitely didn't. I really should have deployed a little more spaced out, and maybe should have just taken first turn and tried to boost up right away. I think I made the right choice putting the Bikes in reserve, as if I had had an army left to support them, they could have been a real thorn in Todd's side.

I definitely felt like the dice weren't with me this game. I failed a lot of cover saves, and even lost a Meganob and a half to small arms fire. My shooting also failed spectacularly for most of the game, with the Dakkajet being the only thing that killed ANYTHING with shooting, despite my list being made up of mostly shooty units. I don't think that I will be going back to Trukks any time soon. They're just too fragile, and even if all of your Boys make it to the enemy intact, 12 Boyz is hardly a frightening thing to face. Still not sure what to do with them.

Anyways, thanks for reading. As always, make sure to leave a comment.

Tuesday, 10 December 2013

Eldar Wraithguard: To D-Scythe, or not to D-Scythe?

Hey everyone, so I've been using Wraithguard a bit lately, and I've found an interesting dilemma in using them. Should you bring D-Scythes or just stick with the Wraithcannons? Well from what I've seen, there's pros and cons to both, but overall I think that using them is going to get you a lot of mileage.

The first thing that I think turns most people off is the cost. The D-Scythes are pretty expensive at another third of the base cost of a Wraithguard itself, which is pretty steep when you're already paying a premium for T6 and a 3+ save. However, I'm not too sure that the price is so unreasonable for what you get. First of all these are template weapons, meaning there is no roll to hit, and you ignore cover saves. It also means that a well placed Farseer giving you Guide or Prescience will allow them to re-roll their wounds. Oh, and did I mention that they're also AP 2? With Guide, you're going to be wounding most things on 3s or 4s and re-rolling, with them getting no saves except invuls. That is just nasty, especially if you can cover 4 or 5 guys per template. They also have the Distort Rule which means that on a 6 to wound you inflict instant death, or against vehicles, cause an automatic penetrating hit, so you can threaten basically anything in the game. Assaulting them can also be a big problem, as you're going to be eating a minimum of 5d3 S4 AP2 shots from overwatch.

Their other major con is their short range. You'll have to get right up next to the enemy and fan out if you want to use these bad boys. The best way to get there is to bring yourself a Wave Serpent, and really, that's almost not even a con. It does make them more expensive yet again, but I haven't seen a situation where having another Wave Serpent was a bad thing. With a Wave Serpent, you can cross the board in a single Turn and then get out and destroy something the next.

If you're going to bring these guys, I would also highly recommend a Spirit Seer. These guys make your Wraithguard troops, and with the right powers also can make them extremely difficult to kill. Having a constant 5+ cover save (in the open) is something that you can get no matter what, and if you can get the Protect power as well then you'll have a very tough unit that can essentially wipe out a unit of troops a turn.

Now 5 Wraithguard with D-Scythes fully kitted out with a Spirit Seer and a Wave Serpent is going to be pricey, coming in at just over 400 points, but if used correctly, they can easily take out two units in a game, and soak up a ton of fire before being brought down, if they are killed at all, not to mention that they'll also be able to take objectives if need be.

So, I very highly suggest that you do yourself a big favour and give D-Scythes a go for a few games and see how they work for you. Who knows? They may become one of those units that makes your gaming group quiver in their space boots.

Warhammer 40k Battle Report Chaos Space Marines V.S Space Marines

The marauding forces of Chaos have once more come to menace the men and women of the Imperium of Man. A contingent of Adeptus Astartes of the White Scars and Ultramarines chapters have dug in with their heavy guns, ready to defend the Imperium to their dying breaths from the foul Traitors.

This was a 1550 point game against Todd and his White Scars with Ultramarine allies using my Chaos Space Marines. The mission was Big Guns Never Tire  using the Hammer and Anvil deployment type.

The Board
The Armies

Chaos Space Marines

HQ:
- Chaos Lord with Mark of Nurgle, Bike, Burning Brand of Skalanthrax, Sigil of Corruption, Melta
   Bombs, Veterans of the Long War, and Power Sword (Warlord) - 180

- Chaos Lord with Mark of Slaanesh, Jump Pack, Black Mace, Sigil of Corruption, Melta Bombs,
   and Veterans of the Long War - 175

Elites:
- Hellbrute with Plasma Cannon - 110

- Hellbrute with Plasma Cannon - 110

Troops:
- 5 Plague Marines with 2 Plasma Guns and Melta Bombs in a Rhino with Dozer Blades - 195

- 5 Plague Marines with 2 Plasma Guns and Melta Bombs in a Rhino - 190

Fast Attack:
- 4 Chaos Spawn with Mark of Nurgle - 144

- 10 Raptors with Mark of Slaanesh, 2 Meltaguns, and Veterans of the Long War - 270

- Heldrake with Baleflamer - 170

Heavy Support:
- 3 Obliterators with Mark of Nurgle - 228

Total: 1772

So unfortunately I did to Todd what Brennan did to me last game and accidentally brought 220 points too many. I must have gotten confused while building another list and I thought I had brought the two Hellbrutes, when in fact I had not. Anyways, they made it into this game, and luckily had more of a negative impact on me than on him anyways as you'll soon find out. My plan with this list was to try and overwhelm him with fast units in the for of my Spawn and Raptors supported by the Obliterators and try and clear the way for my Plague Marines to move up onto the objectives. My main weakness was my lack of troops, but I was hoping that the Plague Marines would be tough enough to take some fire, and with any luck maybe he'd be too distracted with my Spawn and Raptors to get much of a chance to beat them up anyways.

Space Marines

HQ:
- Chapter Master on a Bike with Power Fist, and Lightning Claw (Warlord) - 190

- Chapter Master with Power Sword (Allies) - 145

- Command Squad with 3 Veterans with Grav-Guns, Apothecary and Company Champion with
   Power Sword and Combat Shield in Drop Pod (Allies) - 210

Troops:
- 5 Bikers with 2 Grav-Guns - 140

- 5 Bikers with 2 Meltaguns - 130

- 5 Scouts with Sniper Rifles and Sergent Telion (Allies) -  109

Fast Attack:
- Storm Talon with Assault Cannon and Lascannon - 140

Heavy Support:
- Predator with Twin-Linked Lascannon and Lascannon Sponsons - 140 

- Predator with Twin-Linked Lascannon and Lascannon Sponsons - 140 

- Vindicator - 125

Fortification:
- Aegis Defence Line with Icarus Lascannon - 85 

Total: 1554 

The Game

I won the roll to choose sides and for first turn and decided to take the first turn. I decided to choose the side without the ruins on it, as I wanted him to have to move for the objectives.

My deployment
I deployed fairly stretched out across the Board with my Spawn on one flank and my Raptors on the other with one Rhino tucked away behind a building and the other in the forest. I wasn't really sure what to do with my Obliterators, so I decided to just kinda stick em out in the open, as their Invulnerable save is as good as any cover they would get anyways.

Todd's Deployment
Todd put his Defence Line down across the middle of his zone and deployed his Tanks and Scouts behind it, with Telion manning the Lascannon. The Melta Bikers are put with the Chapter Master on the Bike behind the building on the right, and the Grav Bikers on the left. My plan against this list was to just run the Raptors and Spawn up and put the boots to him. Hopefully, the Heldrake would decide to stay off until I could take down Telion and anyone else who could reliably hit it, as it could potentially pose a problem to it.

Turn 1

Once again, the initiative was stolen from me, and so I would be going second. Movement started with his Drop Pod streaking down behind my Obliterators. The Grav-Gun Bikes moved down the flank a bit to start shooting my Raptors and the other Bikes moved to get the Chapter Master into line of sight.

The Command squad opened up with their Grav-Guns into the Obliterators, killing one, moments before the Chapter Master called in an Orbital Bombardment which killed another. The White Scars Chapter Master then called in his Bombardment, but luckily scattered and only killed 3 Raptors. THe leftmost Predator fired his Lascannons into the lone Obliterator and wounded once. The other one fired into the Rhino and Stunned it and took off too Hull Points, before Telion fired the Icarus into it and wrecked it, forcing out the Plague Marines and getting First Blood.

The Spawn began running forward as fast as they could, goaded on by the Lord. The Raptors jumped up the other flank, hoping to assault the Bikes. One of the Hellbrutes moved forwards towards the Tanks, while the other turns its attention to the Command Squad. The lone Obliterator moves over to try and get a lucky shot at the Vindicator. Lastly the other Plague Marines jump out of their Rhino to shoot the Command Squad, and their Rhino moves up to block line of sight to them.

Shooting starts with the Plague Marines firing into the Command Squad and killing all 3 Veterans, followed by the Hellbrute killing off the Apothecary with his Plasma Cannon. The Other Hellbrute fires at the Bikes near the Raptors and kills one. The Spawn run forwards more.

With a cry of hatred, the Raptors charge the Bikes. The Raptor Champion issues a Challenge and slays the Sergent, and gets the Witch Eater boon. The Lord then Kills a couple more bikes with his Mace, and the Raptors whiff hard and do no damage. The lone Bike does nothing, and attempts to flee but gets held in place.

End of Turn 1
Turn 2

Fearing the wrath of the Spwan and Lord, the White Scars Chapter Master moves behind the forest. the Ultramarines Chapter Master moves towards the Plague Marines, and the Predator near the Raptors turns to face the Obliterator.

The Vindicator unleashes its deadly Payload on the Spawn and manages to kill one of the abominations. The Predator next to it fires into the Spawn as well and manages to deal a couple of wounds, and with the Scouts helping out, they manage to bring down another. The Remaining Predator kills my last Obliterator and manages to glance the Hellbrute. The Chapter Master and his Champion charge the Plague Marines and kill the Champion and another marine, but the Champion is killed in retaliaton. The assault with the Raptors goes about as one would expect, with the Lord easily slaughtering the last Biker.

In my movement phase, the Spawn move up again. The Lord with the Jump Pack splits off from the Raptors and goes towards the Vindicator, and the Raptors jump towards the Predator. The Hellbrute moves over to try and fire at the Bikes, and the other rolls a Fire Frenzy.

The Frenzied Hellbrute fires on the Predator that wounded it and manages to get a glancing hit. The Raptors fire their remaining Meltagun at the Predator's side and easily explodes it. The Second Hellbrute fires into the Bikes, but fails to harm them. Finally the Lord unleashes the Burning Brand into the Scouts and kills two and Telion.

The Lord with the Jump Pack charged the Vindicator with his Melta Bombs, and managed to blow it up. The Spawn then charge the remaining Predator and it explodes as well. On the other side of the table the Chapter Master kills one more Plague Marine.

End of Turn 2
Turn 3

The Storm Talon comes on, and flies towards the Spawn. The Bikes move towards the lone Chaos Lord. Firing their Meltaguns, the Bikes turn the Lord into a pile of slag. The Storm Talon and Scouts fire on the Spawn and kill another and wound the last one.  In assault, the Chapter Master kills another Plague Marine and takes a wound in return.

The Raptors jump forwards to support the Spawn, who move towards the Bikes as well. Both Hellbrutes move up. Shooting kills a Bike and a Scout. The Raptors assault the Bikes and once again make it with no casualties. The Spawn and Lord then assault as well. The Raptor Champion Challenges the Sergent and is killed. The Lord challenges the Chapter Master, but no wounds are dealt. The Spawn and Raptors then make short work of the Bikes. The last Ultramarine finally kills off the remaining Plague Marine and consolidates towards the second squad.

The Fight
The end of the Plague Marines

Turn 4

The Storm Talon moves over to try and kill the remaining Plague Marines, and the Ultramarine Chapter Master moves across the river. The lone Scout moves over to try and claim the nearby objective. The Storm Talon fires into the Plague Marines and kills two, and the Chapter Master runs. In assault the Chapter Master on the Bike and Lord again have a bit of a slap fight

The Helldrake finally comes in and Vector Strikes the Storm Talon and blows it out of the sky. The Plague Marines move to shoot at the Chapter Master, and the Hellbrute turns around to shoot at him as well. The Hellbrute fires, but misses, and the second one gets hot and damages itself. The Helldrake uses his Daemonforge and takes a Hull Point but manages to kill the remaining Scout. The Plague Marines then open up on the Chapter Master and manage to kill him in a brutal salvo of bolter and plasma fire. In assault the Chapter Master on the Bike kills the Lord with 3 well placed hits from his Power Fist and uses Hit and Run to get away.

End of Turn 4
Turn 5

The Chapter Master Moves off towards the Hellbrute and assaults it, managing to blow it up and consolidates towards the Plague Marines holding their objective. I shoot everything I can at him in my turn but only do a wound. I then try to assault him with my Hellbrute, who just like it's companion misses all of its attacks and is destroyed, allowing him to consolidate onto the objective We roll to see if the game continues and it ends.

Total Points

Chaos Marines - 5 (2 for Line Breaker, 3 for Killing Heavy Support Choices)

Space Marines - 4 (1 for First Blood, 1 for Line Breaker, 1 for Slay the Warlord, and 1 for Killing
                                Heavy Support Choices)

Post-Game Thoughts

Well though I won according to the score, the fact that I brought two extra units in the form of the two Hellbrutes makes me more inclined to call this one a draw, as its really impossible to tell what would have happened without them. The fact that the Chapter Master was able to slingshot himself across the board by winning assaults against them was definitely a huge detriment to me (though I shouldn't have assaulted him in the first place, and I definitely should have tried rolling better), but killing the Apothecary may have changed some stuff too, as well as taking a couple Lascannon shots off of the one.

Tactically speaking I think I played a pretty good game. My fast units charged in and took the agro quite well, and were able to basically annihilate his whole force on their own, while the Plague Marines did a good job holding their objective and tying up the Command Squad for quite awhile. I think that Todd should have held his bikes back a little more from my Raptors, as I only needed a 7" charge to get to them, and though he did make an effort to kill my Spawn, I think I might have tried to shoot them with the other Predator turn two instead of the Obliterator, as he couldn't have done a whole lot that turn anyways, having blown his Lascannon shot.

In terms of luck, I think it was a bit on my side this game. He did steal the initiative, and his Chapter Master tanking through my Lord and two Hellbrutes with hardly a scratch, but I also made every single charge, some of which were fairly long, and I managed to explode all of his heavy support choices with some decent rolls. I did miss big time in assault with him though, and for the most part it was just my sheer weight of attacks that carried the day for me.

And of course thanks for reading, and hopefully I won't end up cheating next time!

Tuesday, 3 December 2013

Malifaux Battle Report 3 - Ortegas V.S Marcus

The Ortegas are forced to defend their ranch against the ravaging forces of Marcus' beasts.

This was a game with my newly painted Ortega crew, minus Papa Loco, against Todd's beasts. I hadn't played with this crew yet, so I was going in kind of blind, knowing only that if I could shoot him off the table before he could make it to me I would have a chance.

The Crews

This was my first time using the Ortegas, and I was laying against Todd's very fast crew. We did 45 points again, and this time the Strategy was Recoineteur. My Schemes were Assassinate and Frame for Murder (with Francisco being the chump), and Todd's were Cursed Object and Breakthrough (unrevealed).

Ortegas

- Perdita with the Trick Shooting and Aura Ancestral upgrades - 3 SS

- Francisco with the Wade in upgrade - 9 SS

- Santiago - 7 SS

- Niño with the Hair Trigger upgrade - 8 SS

- Guild Austringer - 6 SS

- 2 Guild Guard - 8 SS

Total: 39 SS

This list was very build towards shooting with a little melee capability in the form of Francisco. I figured that since the Strategy meant that we needed to control table quarters, that Todd would rush towards me to try and take mine, since otherwise I could just stand back and shoot at him and more than likely it would end up a draw. This meant I could throw Fransisco in his path to block him a bit, let him die and get the points for that and hopefully cripple him early on with focused fire. I would have to be careful though, as he was easily capable of crossing the board in no more than two turns, and once things got to melee I was going to have a hard time.

The Beasts

- Marcus with the Trail of the Gods and, God's Domain - 2 SS

- Myranda with the Imbued Energies - 9 SS

- Shikome - 8 SS

- 2 Silurid - 14 SS

- Sabertooth Cerberus - 9 SS

- Razorspine Rattler - 7 SS

Total: 45

This was a bit of a different list from what I had faced before but had some pretty heavy hitters in the form of Marcus, the Sabertooth and the Rattler. My main plan would of course have to be try and shoot down as much of his force as possible early on so that I could deal with just a few things in melee later.

The Game

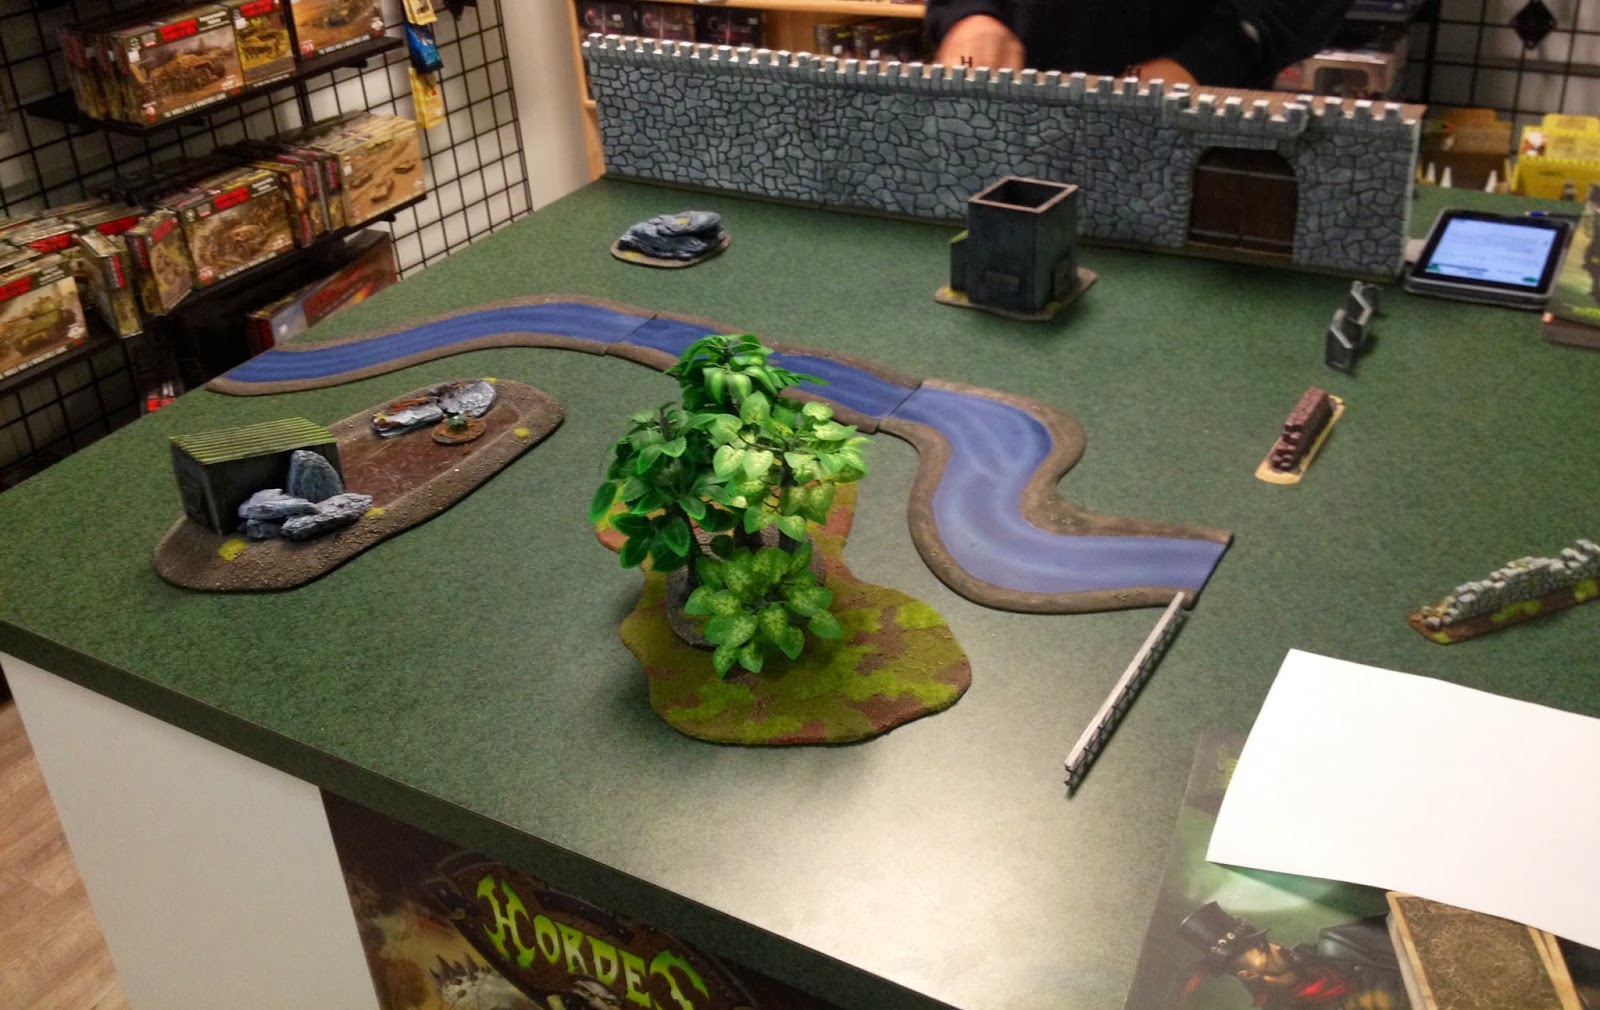
We deployed using Standard deployment this time.We didn't place as much terrain as normal, but we were going for a more thematic board this time. It just so happens that the board layout ended up working in my favour.

The Board
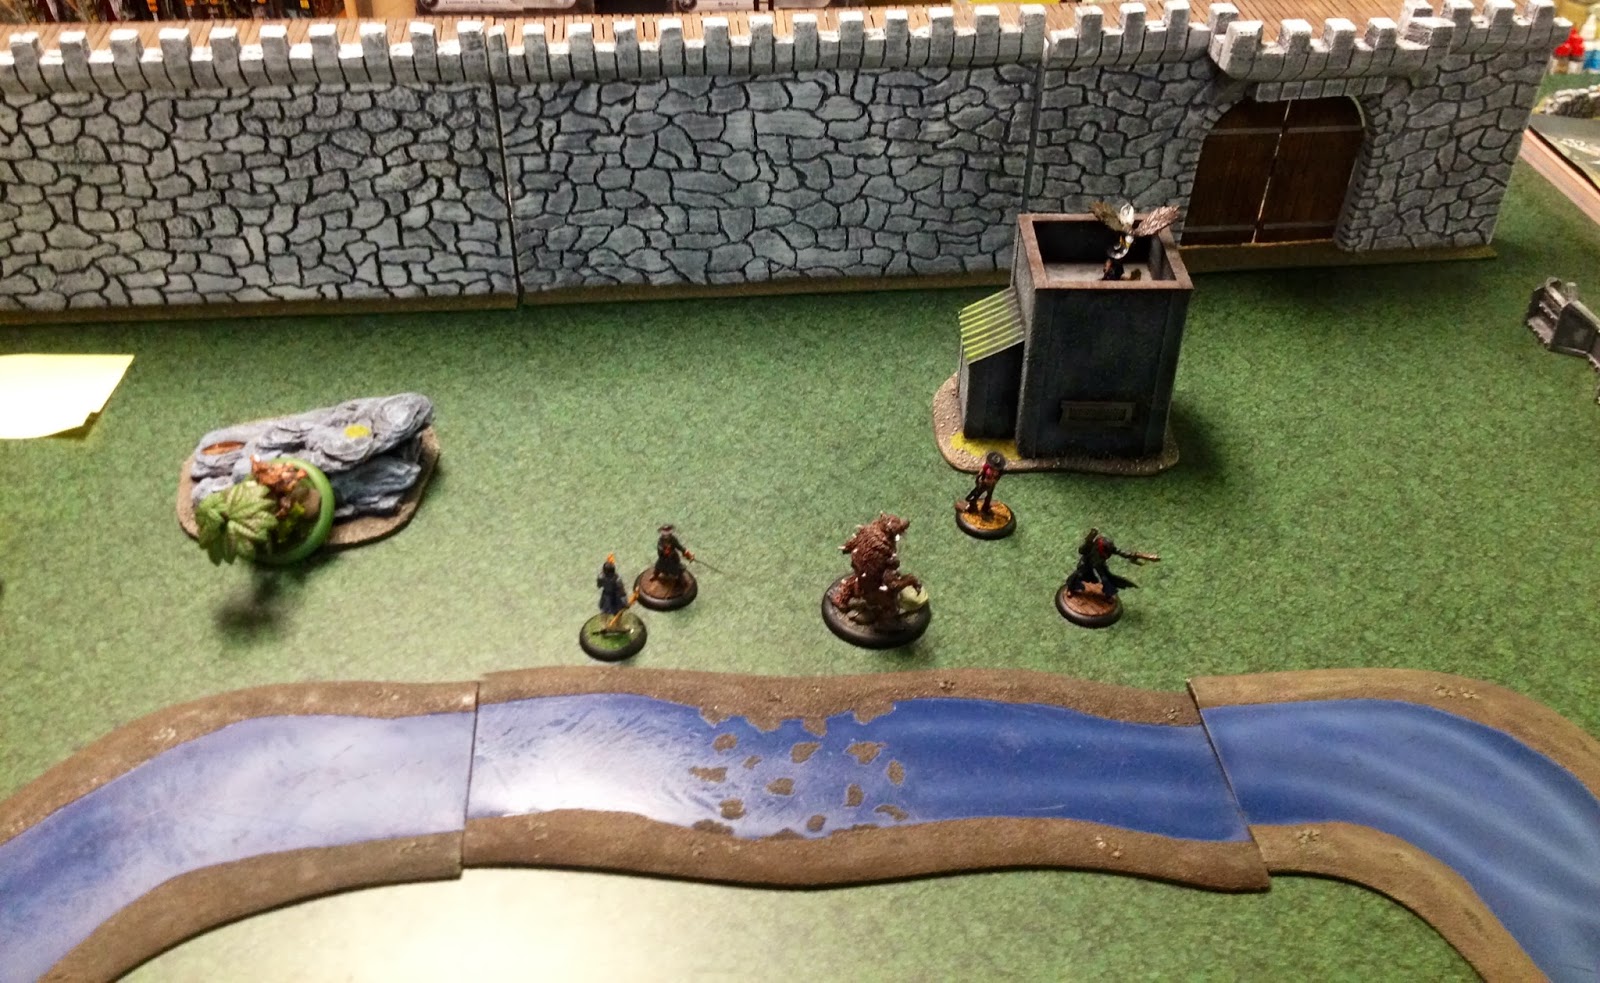
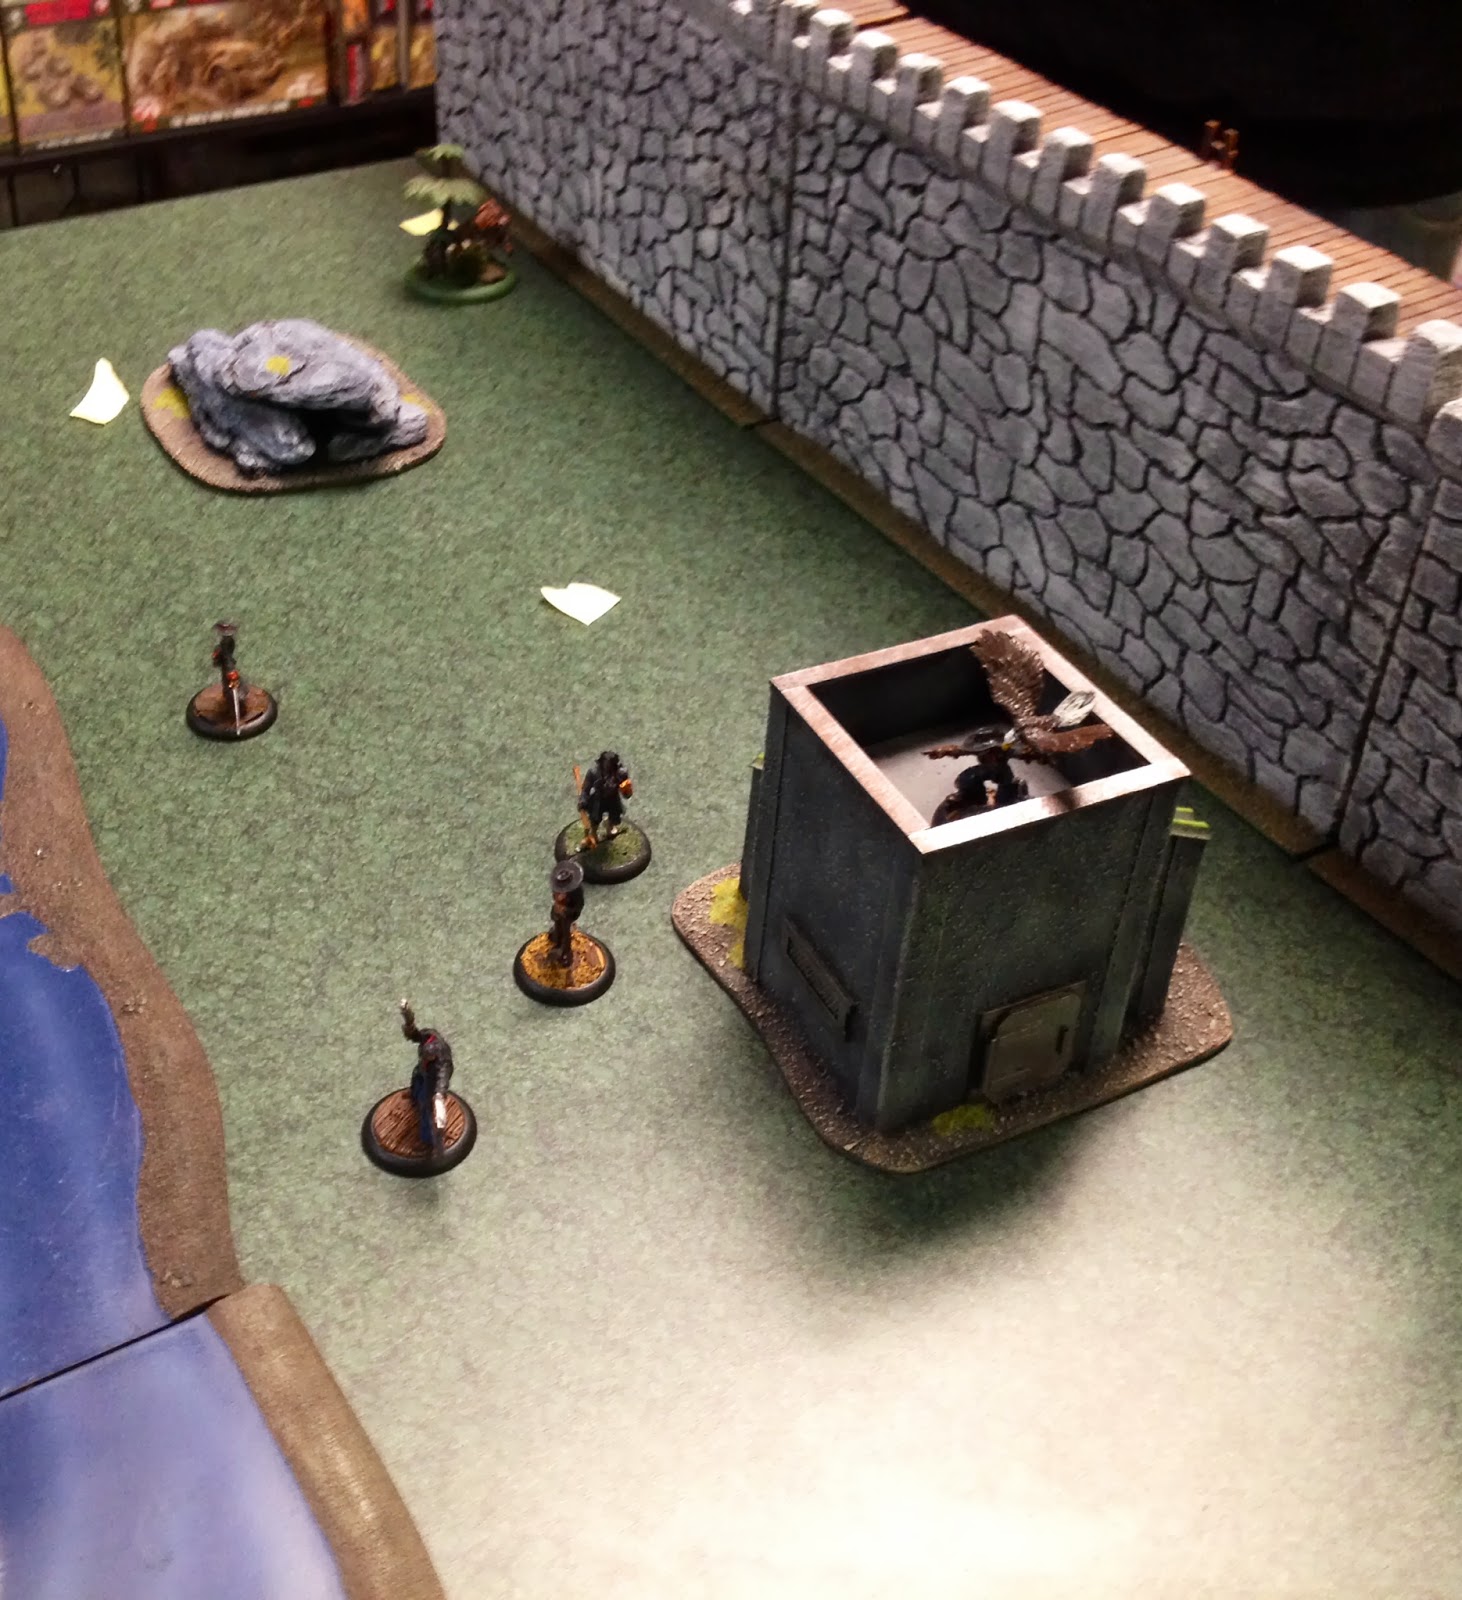
I won the flip to pick sides and deploy first and decided to take the side near the walls. After all, the Ortegas were trying to defend their home here. The Austringer went in the little building, with everyone else stretched out across the center and Niño on the rocks. Pretty standard gun line.

My Deployment
Todd deployed on the other side trying to use the terrain to his advantage. He kept a Silurid, Shikome and Razorspine behind the forest and clustered Marcus, Myranda, the other Silurid and the Sabertooth behind the small shack. Trying to stay out of line of sight.
Todd's Deployment
Turn 1


I won the flip for initiative and started by activating Francisco, who used El Mayor! on Perdita, before using the Focus action twice. Todd responded by double moving the Razorspine foward as fast as he could. Perdita then stepped forward and leveled her Peacebringer at the Rattler, firing a pair of shots that did 4 wounds. The Silurid then leaps forward, coming up in support of the Razorspine, eager to get its filthy claws on the Ortegas. Santiago bravely steped up and with a flurry of shots, blasted the Silurid apart. The Shikome, not wanting to be left behind, flies forwards out of the forest.

The Austringer focused his attention on the Razorspine Rattler, before instructing his Bayou Raptor to swoop down on it, dealing another 4 wounds. Myranda double moved away towards the forest to reinforce Todd's rapidly folding flank. One of the Guild Guard then steped forwards and uses a Focus action. The Second Silurid then leaped forwards, trying to stay out of range of the remaining Guild Guard. Unfortunately the slimy creature got too close to Niño, who blew a hole through its skull. The Sabertooth then leaped up the flank, eager to tear poor Niño to pieces. The remaining Guild Guard moved forwards and fired his pistol at the creature, but failed to do any damage. Finally, Marcus ran up and charged the Focused Guild Guard and managed to do 2 wounds to him. At the end of the Turn I gain one point for controlling two table quarters and Todd gains none.

End of Turn 1

Turn 2

I again win the initiative and Francisco charged Marcus, and in a display of martial skill dealt 7 wounds to the Beast Master. The Sabertooth charged into poor Niño and easily dispatched of him. Perdita decided to finish what she started and killed the Razorspine with a well aimed pistol shot. Inspired, Santiago fired at the Shikome and dealt two wounds to the harpy. In a flurry of attacks, Marcus dealt an impressive 6 wounds to Fancisco, dropping him to his last wound.

The brave Guardsman still fighting Marcus attacked and did a single wound. in response, Myranda moved over to her mate and casted Hunting Call on him, causing him to drop Francisco to his last wound. The Austringer's Raptor dealt another 3 wounds to the Shikome, who again flew up, eager to deal with the pesky Guardsman and his bird. Finally, in a surprisingly skilled routine, the Guild Guard engaged with the Cerberus managed to deal 6 wounds to the beast! We again tally points and there's no points gained by either side.

End of Turn 2
Turn 3

This time Todd wins the flip for initiative, and activates Marcus, who murders Francisco, netting me another 3 points. The Austringer kills the Shikome, and deals a wound to Myranda. Perdita decides to press the advantage and deals 5 more wounds to her. Myranda then moves over, heals Marcus for 1 wound and then Summons a Slateridge Mauler.

Santiago then Fires his Peacebringer into the Mauler and deals two wounds. The Sabertooth Cerberus then easily dispatches of the Guild Guard that wounded it and drops a scheme marker. The remaining Guild Guard deals another 2 wounds to Marcus. Finally, the newly summoned Slateridge Mauler deals a wound to Perdita. Once again, no more points were scored.

End of Turn 3
Turn 4

I once again win initiative and my remaining Guild Guard deals 1 wound to Marcus. Perdita then activates and shoots point blank into the Mauler, dealing 7 wounds. Marcus then hands the Guild guard a Cursed Item, disengages, and then charges Perdita, but fails to do any damage. The Austringer attempts to kill off the Sabertooth, but fails, and then Santiago deals one damage to Marcus . The Sabertooth then Leaps away, and drops a scheme marker. This turn Todd got 3 points. 

End of Game
Total VPs

Guild - 4 (3 for Frame for Murder, 1 for The Scheme)

Marcus - 3 (2 for Breakthrough, and 1 for the Cursed Object)

Post-Game Thoughts

That was a fun game, though a little one sided. We ended up ending the game at the end of Turn 4, because of time constraints, but given another turn I would easily have been able to kill off Marcus for another 2 points, and most likely get rid of the Sabertooth as well. I think given a little more terrain it could have been a much close game.

The cards were fairly even this game, though I did get a very good first turn, severely wounding the Razorspine and killing both Silurid. Over all, I think that my ability to Chain Activate really was a big deal, as was my sheer amount of fire power. The Guild Guard also proved to be surprisingly resilient, which I didn't expect.

As always thanks for reading. More reports to come soon!