Battle reports, tactics, and general banter about Warhammer 40k, D&D 3.5/Pathfinder, Malifaux, and Warhammer Fantasy!

Wednesday, 27 May 2015

Blood for the Blood God!: Codex Khorne Daemonkin Review

Fanatical devotees of the Blood God's creed, the Khorne Daemonkin form warbands dedicated to murder and destruction on a galactic scale. Many of these begin as zealous mortal hosts, each worshiping one of the terrible and mighty Bloodthirsters. As the Daemonkin perform ever greater acts of violence and carnage, Khorne's daemonic cohorts are gradually lured forth from the Realm of Chaos to take their place within the warband's ranks. When, eventually, the host is as much Daemon as mortal, one of  Khorne's Bloodthirsters will burst forth into the material realm through one of his chosen vessels to lead them in glorious, never-ending slaughter.


Hey everyone! I'm back with a review of Codex: Khorne Daemonkin. This review will be different from the one about the harlequins, because all of the units in the Codex are already from either Codex: Chaos Space Marines or Codex: Chaos Daemons. Both of these books have been out for over 2 years, so its likely that you all know about them already anyways. That being said, there are a few new things, like 3 new Bloodthirster variants, so I will go over those. Mainly, this review will be about the Blood Tithe system, the formations, detachment and relics. Also unlike the Harlequins Codex, I have had a chance to use this book a couple of times, so I have a bit of practical experience with it.

The Bloodthirsters


All of these Bloodthirsters have the same base statline, which is the same as in the Chaos Daemons book, so that's easy. In addition, the Bloodthirster of Unfettered Fury is exactly the same as the base Bloodthirster.

Bloodthirster of Insensate Rage

This is the one that everyone is talking about. Instead of the Whip and Axe of Khorne, you have a Great Axe of Khorne, which is an unwieldy 2 handed axe. Sounds bad, until you see that it makes the Bloodthirster's attacks Strength D. Wow. You get this for 25 points more than a regular 'Thirster, so there's really no reason to use the other one.

Wrath of Khorne Bloodthirster

This is a Bloodthirster that exchanges the Lash of Khorne for a Bloodflail, which is just a Specialist Weapon, so when paired with the Axe of Khorne it grants another attack. Pretty sweet. In addition, it gets the Adamantium Will and Hatred (Characters) special rules. This is a weird rule, as it brings up a few questions. Under the Hatred special rule it says "A model striking a Hated foe in close combat re-rolls failed to hit rolls". Does this mean that if there is a character that is part of a unit in base contact with the 'Thirster then you get your Hatred against the whole unit, or does it only come up in a challenge? I would assume the first one, but it is a little ambiguous. Oh well. You get all this for 50 points more than a standard Bloodthirster. Not bad, but not amazing. Take the Bloodthirster of Insensate Rage instead.

Artefacts of Slaughter


These are the relics of Codex Khorne Daemonkin. As with all of these kind of things, you can only have one of each of these in an army.

Goredrinker

Revered by Khorne's warriors as much as it is feared by the Blood God's foes, this terrible weapon houses a powerful Daemon that hungers for the life essence of its victims. The more the murderous axe feeds, the greater its potency, and once glutted upon its bloody feast, Goredrinker's mere touch is death.

Goredrinker is a Power Axe that gives the bearer bonuses the more wounds he deals with it. At 1-2 wounds dealt you get +1 Strength. 3-4 you get Rampage, 5-7 you double your Strength (from the modified bonus from earlier), and at 8+ all your melee attacks gain the Instant Death rule. So basically, once you deal 8 wounds in combat, you'll be Strength 10, Instant Death, with Rampage, so if you become outnumbered, you likely won't be for long. It really will make whichever character using it into a complete beast, although its fairly expensive, at twice the points cost of a regular Power Axe. Another note is that it's only usable by a Chaos Lord or Daemon Prince, so no Heralds will be running around with it. Oh well.

The Blood-Forged Armour

Legend tells that Khorne forged this armour himself, heating it in the fires of his fury and quenching it with the blood of murdered kings. Ever slick with runnels of gore, its plates are as hard and unyielding as the mountainous hull of a starship, and are able to withstand the mightiest of blows.

The Blood-Forged armour is usable by a Lord or Daemon Prince only. Basically it's Power Armour that gives the wearer Feel no Pain and Eternal Warrior. For 50 points, it's a steal for a Daemon Prince, since you'll probably be buying Power Armour for it anyways, and with no psychic powers to toughen you up the Feel no Pain and Eternal Warrior are a great boost. It's not horrible on a Lord either, but I think that it's much better on a Prince.

The Brazen Rune

Khorne's hatred of witchery made manifest, the Brazen Rune is a burning brand that sears itself into the very skull of its bearer. Though agonizing, the rune wards off the psychic machinations of the foe, preserving its bearer from pernicious spellcraft. Furthermore, the bearer can expend the rune's power, sending its energies roaring forth like a hurricane to shatter sorcerous incantations and burn out the minds of enemy psykers.

The Brazen Rune can be taken by anyone, and grants the bearer Adamantium Will. Also, once per game at the start of your opponent's psychic phase, you can force all psyker's within 24" to take a Perils of the Warp on any double. At the end of the phase though, you lose Adamantium Will. It's ok, but for the same points, you can get a collar of Khorne whitch grants a +2 to Deny the Witch rolls. Of course, for 30 points, you could take both, and deny powers on a 3+. I think that it would be much more effective against Telepathy psykers trying to cast Invisibilty, or Summoners.as they'll be casting powers that require lots of dice.

The Blade of Endless Bloodshed

Even the slightest nick or cut from this weapon's blade causes grotesque sprays of gore to jet forth from the wound. In battle, the blade's wielder and his comrades are swiftly drenched in the gushing lifeblood of his horrified victims.

This is a Power Sword that basically just grants an extra Blood Tithe if the bearer causes one or more casualties. Again, I think this is best used on a Daemon Prince, as they'll make it AP 2. Honestly, it's probably more expensive then it should be for what it does.

The Skull-Helm of Khorne

This ancient helm was carved from the skull of an unknown entity in an age long since forgotten. It is emblazoned with the rune of Khorne, and imbues its wearer with a shadow of Khorne's own terrible aspect.

I really like this item. It can only be taken by Lords, and it gives the bearer Fear and any to hit rolls of a 6 in combat grant him additional attacks. These attacks do not grant further attacks. For 15 points this is awesome. I like the idea of it on a Juggerlord, for the extra attack.

Kor'lath, the Axe of Ruin

The essence of a mighty Bloodthirster rages within every axe of Khorne, the entities bound forcibly within the blades by leering daemonic smiths. Of all of these imprisoned demigods it is Kor'lath of the Unfettered Fury, caged within the Axe of Ruin, who rails most violently against his imprisonment. Should this berserk entity ever break free, he will vent his murderous anger upon those unfortunates caught nearby, before plunging back into the Warp to seek revenge on those who caged him.

Once again, this can only be taken by a Lord or Daemon Prince. This is a Specialist Weapon with AP 2, and any to wound rolls of 6 inflict instant death, In addition, if the bearer of the axe is reduced to zero wounds or is otherwise removed as a casualty, you deep strike in a Bloodthirster of Unfettered Fury within  6". This Bloodthirster takes d3 wounds at the end of each of your turns which ignore armour saves. For 60 points, its not bad, considering your opponent pretty much has the decision to make of killing him, and having a Bloodthirster join the party, or let him rip around chopping everything up. Not a great choice to have to make.

Blood Tithe


The Blood Tithe system is the Daemonkin's special thing. It pretty much is there to help us along since there are no psychic powers in this book, and everything is pretty much melee oriented. It's a nice little boost, but honestly, I think it could have been done better. Pretty much everything in the Codex has a special rule called Blood for the Blood God!. Any time a unit with at least one model with this rule is completely destroyed or destroys an enemy unit, you gain a Blood Tithe Point. Any time a character with this rule is slain or slays an enemy character, you also gain a point. So pretty much any time anything dies when you're using this book, you're getting blood tithe points. These can be used at the start of your turn to give your units various special rules or summon Khorne Daemons.

While this is not bad, it has one glaring issue. When you decide to use your points, all points that aren't spent are lost, and you can only "purchase" one thing off the table at a time. This means that as soon as you have 8 points, you need to spend them, as any more you get will just be wasted. I really think that instead, your points should remain in the pool until you use them, or at least allow people to get more than one thing with them. It would really make this rule go from a minor buff, to a fantastic rule that would maybe even make the codex competitive. Anyways, wishlisting aside, lets look at what you can get.

1 Point: Infernal Contempt - All friendly units with the Blood for the Blood God special rule gain Adamantium Will until the start of your next turn. Not bad for 1 point, but since Adamantium Will doesn't help you against blessings and stuff, you still can't stop any of the really nasty powers.

2 Points: Insatiable Bloodlust - All friendly units with the Blood for the Blood God special rule gain Furious Charge and Rage until the start of your next turn. This would be excellent if every unit in the army didn't have at least one of these rules already anyways. As it is, it's kinda stupid. It's really good if you're running a whole bunch of Bloodletters, as they'll get some more attacks on the charge, but that's about it. Meh.

3 Points: Unstoppable Ferocity - All friendly units with the Blood for the Blood God special rule gain Feel no Pain until the start of your next turn. Yes yes. This is what I like to see. Army wide Feel no pain is excellent, and for only 3 points, you'll be able to get it pretty early.

4 Points: Apocalyptic Fury - All friendly units with the Blood for the Blood God special rule add 1 to their Attacks characteristic until the start of your next turn. Again, this is pretty good, as more attacks is always a good thing to have.

5 Points: Daemontide - You can summon a unit of either 8 Bloodletters or 5 Flesh Hounds within 12" of a unit with Blood for the Blood God! So a free unit of Bloodletters or Flesh Hounds immediately Deep Strikes anywhere within 12" of one of your units, which is pretty cool. It's definitely more useful later on when all of your stuff is in the enemy's grill, and lots of their units are tied up, so that your new unit won't just get shot to bits.

6 Points: Harbingers of Blood and Brass -  You can summon a unit of either 3 Bloodcrushers or a Skull Cannon within 12" of a unit with Blood for the Blood God! It's... ok... I guess. Bloodcrushers aren't really great, and neither is the Skull Cannon. I'd pass, unless you just want one of these for the lulz.

7 Points: Dark Apotheosis - One friendly character with the Blood for the Blood God! rule makes a Ld test, and if it's passed they get to become a Daemon Prince with Warp-Forged Armour (3+ save) and if the model being used for it has wings, it gets those too for free. Cool! Of course, if you fail, the character becomes a Spawn. I think this is really cool, and it's especially neat to use on a Cultist champion, because either way it's a step up from a Cultist.

8 Points: Fury Unbound - One friendly character with the Blood for the Blood God! rule makes a Ld test, and if it's passed they get to become a Bloodthirster of Unfettered Fury. It's exactly the same as the Dark Apotheosis, except you get a cooler thing if you pass the test.

Formations


Slaughtercult

Chanting the praises of their bloody god, the warriors of a Slaughtercult hurl themselves into battle to claim the skulls of their foes. These are the most fervent mortal worshippers of Khorne, serving no agenda but that of the Daemons they venerate, seeking nothing but glory in the eyes of their chosen god. Khorne looks with favor upon the bloodthirsty endeavors of these fanatics, armouring them in his contempt of sorcery and imbuing them with an echo of his endless rage. In battle these warbands fight as dictated by the Scriptures of Slaughter, echoing the organisation of the Blood God's Daemon cohorts. They care nothing for their own losses, the champions of Khorne spending the lives of their underlings willingly in furtherance of their aims. However, once they reach the enemy lines, it is the foe who's blood falls like rain.

This is the first formation in the Daemonkin codex, and it's one of my favorites. It consist of 1 HQ (excluding the Bloodthirster of Insensate Rage and the Wrath of Khorne Bloodthirster), 2-8 units of Chaos Space Marines, Berzerkers, or Bloodletters in any combination, 1-4 units of Possessed, 0-2 units of Cultists, and 0-2 units of Spawn. If you take the minimum requirements, this can be a pretty cheap force, but I think you're better off to take as much as you can from it, to maximize the benefits. You get 3 special rules for this formation. The first allows your warlord to re-roll his trait if this formation is your primary detachment, and you roll on the Daemonkin table. The second rule allows any Cultist unit that fails a morale test to be removed as casualties (thus granting you a Blood Tithe point). Lastly, any time you cash in your Blood Tithe points, you may choose another effect off the table of lesser value (but not of a value of more than 4) and apply the result to all units from this formation. This is a fantastic rule, and it really makes the Blood Tithe system awesome. Consider taking this alongside a CAD for some Cultist units to milk Blood Tithe points, and maybe a Land Raider or two to put your heavy hitters in.

Brazen Onslaught

Like a great mailed fist, the Brazen Onslaught smash into the foe. The sheer resilience of this warrior host allows them to shrug off even the most punishing enemy fire, snarling contemptuously as hails of shot ricochet from their ironclad forms. As they plough toward the enemy lines, their momentum builds, the ground shaking beneath the thunderous tread of so many mighty warriors. Daemon and mortal alike howl their devotion to Khorne, the Terminators exulting at the manifestation of their daemonic counterparts. Blood spills, armour and flesh tear asunder, and heads topple from spurting necks as Khorne's favoured vent their fury. Enemy numbers count for nothing against these heavily armed and armoured killing machines, for the greater the odds, the greater the glory earned in the eyes of their wrathful god.

This is a cool formation, but it's really not all that great. It consists of 1-4 units of Terminators, and 2-4 units of Bloodcrushers. Both of these are sub-par units, primarily because they're quite expensive, and not all that survivable. They only get one special rule as well, though its fairly decent. Any time a unit from this formation is outnumbered in a combat, they get to add 1 to their attacks characteristic until the end of the phase. It's ok, but nothing to write home about, and really only worth using if you already like Bloodcrushers and Termies, or if you just want to do something wacky.

Khorne's Bloodstorm

The skies seethe crimson at the onset of Khorne's Bloodstorm, like blood spilled in water. Plunging from amid the ruddy clouds, this swarm of airborne killers decends upon their victims with predatory shrieks. A furnace-hot wind billows at their backs, seeming to hurll the warriors of the Bloodstorm down upon their foes all the faster, while in their wake fall squalls of bloody rain that blind and terrify in equal measure. The warriors of the Bloodstorm strike with ferocious speed, lashing through the enemy ranks like the talons of some vast daemonic beast. The luckiest of the foes die quickly. The rest are borne aloft into the crimson skies, there to have their heads torn from their necks by screeching Daemonkin. Even as the sundered bodies rain back to the earth, Khorne's Bloodstorm surges onward in search of new victims.

Again, I wouldn't consider this formation all that good, because it's made up of kind of crappy units. This formation is 2-4 units of Raptors, and 1-4 units of Warptalons, with a 0-1 Helldrake option. As jump infantry are generally not the best, and Warp Talons are just way too expensive for a T4 3+/5++, I really can't recommend it. Their special rule is +1 Strength to any Hammer of Wrath or Vector Strikes they make, which is only really great for the Helldrake, because most of the time you end up using the Jump Packs in the movement phase, so you don't get a Hammer of Wrath at all. Again, a little disappointing.

Gorepack

The baying of daemonic hounds and the roar of mighty engines heralds the coming of the Gorepack. Drawn to the scent of their foes' fear,  these merciless huntsmen will run their quarry to ground no matter how far they may flee. Should the enemy stand and fight, the Gorepack arrows straight toward their heart, packs of loping Flesh Hounds and speeding Chaos Bikers vying to be first into the fray. Nothing can stay the charge of these Daemonkin; the energies of the Warp swirl around them, allowing them to flicker through obstructions as though they were not there. Though they will claim the skulls of any who stand in their path, the favoured prey of the Gore pack are those who disgust Khorne through their use of cowardly witchcraft. For such prey, the Gorepack will stalk the very edges of reality and beyond.

This is a much better formation in my opinion, as both Bikers and Flesh Hounds are quite good, especially in an army that wants to get to combat quickly. The formation consist of 2-4 units of Chaos Bikers, and 1-4 units of Flesh Hounds. All the units gain Move Through Cover (useful for both of them, though for different reasons) and Prefered Enemy (Psykers). In addition, the Flesh Hounds all gain a Hammer of Wrath attack, and the Bikers' Hammer of Wrath gets the Shred special rule. Not too shabby.

Charnel Cohort

Unnatural annihilators from beyond the veil, Khorne's Daemon cohorts pour into realspace to murder and destroy. Should a Daemonkin Warband achieve their ultimate aim, their ranks will be bolstered by the summoned daemons of their chosen patron, until an entire daemonic cohort stands alongside them. Ruled over by bellowing arch-fiends, and wielding the hellish weapons of Khorne's own forges, such a host of unnatural entities can devastate armies and murder worlds. As rank upon rank of blood-splattered Daemons hack their way through their desperate foes, the sky darkens with a rain of flaming skulls. Blood runs in rivers, corpses pile up in heaps, and above it all booms the cruel booming laughter of Khorne.

This is an ok formation, and probably the way to go if you want to run a Daemon-centric army. The formation consists of a Daemon Prince, Herald, Blood Throne, or Skulltaker, 2-8 units of Bloodletters, 1-4 units of Flesh Hounds, 1-4 units of Bloodcrushers, and 0-4 Skull Cannons. Their rules are not bad either. Everything in the formation gets Counter-attack, if the Warlord is from this formation he can re-roll a Daemonkin Warlord Trait, if the HQ is in reserve, you can re-roll its reserve roll to see if it comes in, and anything Deep Striking within 6" of the HQ don't scatter, even if the HQ itself came on that turn, and finally, all units making Fear tests against a unit from this formation take a -2 ld penalty. Lots of rules, but the second one I think is the most important. If you managed to bring in the whole formation in the same turn, you could have a very sizable force in the enemy's face really early, and you're pretty much guaranteed for something to make it to combat.

The Bloodhost Detatchment


The Bloodhost Detachment is the Khorne Daemonkin's special detachment. Basically what it is is a mashup of the various formations for form an army. You start with a base of a Slaughtercult formation. From there you can take 1-8 formations (per Slaughtercult) in any combination from the Daemonkin Codex. You can also take a Lord of Slaughter per Slaughtercult (which gives you the option to take any of the Bloodthirsters, or a Lord of Skulls), or a War Engine (either 1 Hellbrute, Defiler, Soul Grinder, Forgefiend, Maulerfiend, or Lord of Skulls) which uses one of your 8 options from the Slaughtercult. Your rules, in addition to any of your formation rules, are pretty good. You gain a Blood Tithe point at the beginning of your turn, before you spend any points (which is excellent), and if the Detachment is your primary, your Warlord can re-roll his trait.

Now, I think that this the Bloodhost is pretty decent, but personally I'm not too into it. I really am not into the fact that they force you to take certain things, and pretty much all of the formations have at least 1 poor unit in it that you have to take, which means a lot of points are going into units that generally aren't going to be able to perform well. Also, the only way to get a Land Raider into your Daemonkin army using this detachment is to take a Brazen Onslaught and take them as dedicated transports for the Terminators. This means the only assault vehicle option for your assault army (which is already a very expensive investment) can only be taken if you take one specific formation, that forces you to take subpar and expensive units. The other thing that I dislike is that it makes it tough to get lots of badass HQ's into your army, due to the fact that the Slaughtercult only allows you to take a single HQ. From my brief experience, attaching a Lord or a Herald is the thing that makes a unit go from "pretty good" to "oh god, yes" in combat, so by limiting the number of them that you can easily take they're basically limiting how many super scary units you can have.

Aside from the power levels of the formations, or the Bloodhost itself, I also just really don't like being forced to use certain units. I very much value my freedom when it comes to list building, so I'm not all that keen to be bound by anything more than the force org chart.

Warlord Traits


Icon of War

This Warlord leads from the very front, his warriors borne along in his bloody wake.

This is one of the best traits in the book, especially if you're running lots of Daemons or things without access to the Icon of Wrath. It allows your Warlord and all units with the Blood for the Blood God! rule within 12" of him to re-roll failed charges.

Disciple of Khorne

This Warlord's howls of fury are infectious, whipping his men into a frenzy.

This trait is...ok I guess. It gives the Warlord the Zealot (Hatred and Fearless) rule. Not anything really great, as all your HQs are fearless already, but Hatred isn't terrible. Not one I would hope for.

Arch-slaughterer

This Warlord is a whirlwind of carnage, hacking and hewing with every stroke.

Again, nothing too great, but a nice little buff to your Warlord. The Warlord gains +1 Attack. Meh.

Favoured of Khorne

So brutal is this Warlord that the Blood God favours him above all others - for now.

This is one of the better ones. The Warlord generates an extra Blood Tithe point whenever he slays an enemy character in a challenge. Especially good against Chaos or Waaagh! Ghazgkull players that have to accept challenges.

Butcher King

This Warlord has a butcher's mastery of anatomy, knowing just where to strike.

This one is kinda like Disciple of Khorne. The Warlord gets Preferred Enemy. Definately better on a Bloodthirster or Daemon Prince, as they're going to be hitting on 3's (almost always) and wounding on 2's (again, almost always), so they really benefit from re-rolling 1's.

Destined for Glory

Khorne has long observed this Warlord's bloody deeds, and will reward him accordingly when the time is right.

This one is awesome on a cheap Lord. When resolving the Dark Apotheosis or Fury unbound result on the Blood Tithe table, the Warlord automatically passes the leadership test, if they're chosen as the vessel. Really good when your Lord is down to his last wound or out of position, as you can turn him into a Prince or 'Thirster and fly him back to the fight.

Overall Thoughts


Overall, I think that if one wants to play a Khorne army, this Codex is the book to use.While I think its power level is a little low overall, it isn't a terrible book, and it's certainly better than trying to ally CSM and Daemons. There are some major things though that really bother me about this Codex though.

1. No Kharn. Seriously, what? How could you not include the coolest Khornate character in the game in the Khorne codex? What a stupid mistake.

2. Still a lack of assault transport to get your generally fairly fragile units to the fight. The only thing we have is the Land Raider, but it's just so many points, that you often may be better off just taking more troopers to charge headlong into the guns. A Rhino with assault ramps or something would have been amazing for this army.

3. The Blood Tithe system is almost excellent. If you were allowed to keep excess points in your pool when you spent some points it would actually rival psychic powers. Either that or allow you to buy more than one thing with them at a time, similar to the Slaughtercult. So far, in my experience with this codex, you really start to get all your points in turns 2 and 3, and once your force gets into combat, you can easily rack up 8 points in a turn (between destroying units, having your units destroyed, and getting points whenever anyone wins a challenge, it gets crazy), which means if you had one or two points that you didn't use on the way up, (either because the first couple thing aren't that great, or because it's only turn 2) you're likely going to be wasting a lot of Blood Tithe points. This is a fairly big issue to me, but even with that, the system is usable, and certainly better than nothing.

So, does it have its problems? Yes. Would I still use it? Of course. Would I recommend it to others? Yes, if they were planning on playing a Khorne army anyways. It is overall a decent book, that with a little ingenuity, proper tactical maneuvering, and maybe some luck, will be able to win games against most any codex out there. Plus, it's super fun to horde up a ton of Khorne units and just rush in headlong.

Monday, 25 May 2015

D&D Character: Romek Serpenthelm

Hey everyone! So my gaming group and I recently began a new D&D campaign using the 3.5 rules. This is sort of a side-campaign which takes place in the Forgotten Realms setting, at the same time as another long running (around 2-3 years now I think) campaign that we've been playing. We've had a few players leave the group due to schooling and a career change, so this campaign is sort of an introduction to D&D and our way of playing for a few new players.

My character is a Human Soulknife (a sort of psionic light fighter/rogue) of noble blood, and after the first session, I'm really enjoying it. I'm planning on writing out the story of this campaign in the form of journal entries from the perspective of Romek, but I won't be starting that until at least after the next session, as the character doesn't really have access to his journal yet. In the mean time, here is his backstory and some of his character traits.

Character Name: Romek Serpenthelm                          

Race: Human

Class: Soulknife

Background

Romek Serpenthelm was born the first son to the noble Serpenthelm family, a powerful noble family who rose to prominence due to their unique and powerful psionic abilities. From a young age, Romek displayed some of these abilities himself, though in a less prominent fashion then most of his relatives. Instead, of focusing on the more mental aspects of his abilities, his tutors decided to focus more on his physical abilities, teaching him to manifest powerful mind blades.

Apart from his training, Romek's upbringing wasn't a whole lot different from any other noble child's. He played often with the children of his servants, and his cousins on his massive estate. In particular he enjoyed playing hide-and-seek, as he found himself naturally adept at sneaking and hiding. Like any child, he and his friends enjoyed playing pranks, particularly on the cranky groundskeeper, Henry.

As he aged, his abilities became more pronounced, and his mental training was joined by physical training. He learned to move unencumbered in light armours, and wield a shield alongside his mind blades. He grew strong, and graceful, his physical muscles enhanced by his staggering mental will. He also grew handsome and charming, and found himself to be a popular and charismatic bachelor at the many balls and parties enjoyed by the upper class. With his family's power still on the rise, it seemed that his life would be a comfortable one.

All this was to change one fateful night. Spurred by their distrust of the psionic powers wielded by his family, a number of the noble houses united under the banner of Lord Gilbert Weston III in open warfare against the Serpenthelms. Though the Serpenthelms maintained amongst the more formidable garrisons of personal soldiers in the city, boasted by their family's considerable psychic might, the intruders had weight of numbers, and slowly but surely, the Serpenthelm garrison was pushed back. Roused from his slumber by the fighting outside, Romek donned his armour and shield, a magical Mithril chainshirt, and a fine Darkwood shield, and ventured out into the halls of his manor to bolster the defense. Pushing his way to the front lines, Romek rallies his troops, smashing into the foe with his dazzling blue mindblade, releasing pent up psionic energies to blow giant holes in torsos and sever limbs from bodies. Despite his impressive abilities, however, the press of enemy bodies began to wear down his guards, and one by one they began to fall. As his numbers dwindled further, Lord Gilbert's son and Romek's long time political rival, Vincent Weston stepped forwards in his shining plate armour and challenged young Romek to an honour dual to the death. All fighting in the area stopped as the two noble sons circled each other, with hate in their eyes, their supporters forming a ring around their champions. Vincent had sheer size, and thick armour plating, as well as a massive greatsword, but Romek had speed, skill, and his psionic blade. Vincent went on the offensive first, hoping to overpower the smaller Romek quickly, but Romek dodged and parried too quickly for the heavily encumbered man. Taking his time to focus his mind, just as his tutors had taught him, Romek slowly began to channel his psionic energies into his blade, As the fight dragged on, Vincent had scarcely stopped his relentless assault, but Romek had yet to retaliate in any way. As Vincent began to slow and tire, Romek's eyes blazed with a fierce blue light. With a bellow that caused all watching to take a step back in surprise, Romek ducked a swing intended to decapitate him and rammed his mind blade up under the chin of Vincent Weston, before releasing the pent up energies in the blade, detonating his head spectacularly.

Enraged by the loss of their champion, Vincent's men set themselves on the Serpenthelm soldiers with renewed vigor and ferocity, and though a great many more were killed, the garrison was wiped out completely, leaving and exhausted Romek alone. Just as the killing blow was about to land, a powerful, commanding voice ordered a halt. Pushing his way roughly through the crowd came Lord Weston himself, his anger a nearly tangible force in the air. As the nobleman looked upon the mutilated remains of his son, he calmly commanded his soldiers to restrain Romek. Leaning close, Lord Gilbert brandished a long, serrated dagger, cursing Romek for murdering his only son, and cursing his family for their mysterious psionic ways. Deftly, Gilbert cut a pair of long deep lines into Romek's gaunt cheeks, whispering to the helpless Serpenthelm that he would die slowly for killing Vincent. Something struck Romek from behind and the world went dark.

Romek awoke to a muffled thump followed by the sound of jangling keys. In an instant he had risen and taken stock of his surroundings. He was chained in a small brick cell, with only a few tiny shafts of light to provide air. In front of him was a heavy iron door, that soon swung open, revealing a shadowy, hunched figure. The figure approached and threw back his cowl, revealing himself to be the old groundskeeper, Henry. Quickly, Henry unlocked Romek's chains. When Romek attempted to ask how he survived the massacre at the estate, the elderly man simply shushed him and moved on. They made only one stop during their stealthy journey through the dungeons in order to retrieve Romek's shield and armor from a nearby storage room. Each time they encountered a guard, Romek would ready his mind blade, only for Henry to wave him down and continue walking, right past the guard. After a short time, the pair exited the dungeon, walking as casually as if they were leaving their own homes, and stole a pair of horses before riding off into the dawn light.


They rode for weeks, keeping off the main roads, for fear of attracting the attention of Lord Weston's spies. Along the way, Henry began answering many of Romek's questions. Henry revealed to the young noble that he was actually a distant cousin of Romek's father, and as such, had psionic powers of his own, though his were self taught. They also discussed their plans for how to reclaim their noble titles. Eventually it was decided that they would split up, in order to more easily find allies for their cause. Vowing revenge, the two of them split up and began the long road to reclaim their nobility and their estate.

Appearance 

Romek Serpenthelm is of noble stock, and as such takes great pride in his appearance. He wears his black hair short and well groomed, and keeps his thin, angular face cleanly shaven. Running along his jaw line are two razor thin scars. Rather than try and hide these marks, he uses them as constant reminders of what he's lost. His eyes are a piercing blue that almost seem to glow when he's focused.


His dress is always immaculate and clean, and he tends towards simple yet elegant clothing and jewelry, always in the latest styles. When on the road, he wears his travel clothes, which while still fashionable and finely cut, are more hardy and durable. Underneath his travel cloak, he wears a fine, and magical Mithril Chainshirt, with his Darkwood Shield emblazoned with his family crest slung across his back. He carries no physical weapons, making him seem like an easy target to bandits and marauders. The truth, of course, is far different.

Personality

Romek is proud, noble, disciplined, and driven. His psionic background gives him extreme mental fortitude. While these may seem to be all good traits, he is not without his flaws too. His pride and noble upbringing often cause him to seem arrogant, and snobbish to commoners and those of "lesser" races. While most of the time, this arrogance manifest in subtle ways, when it comes to the more savage races, his disdain often becomes even more apparent.

He is also a natural leader, more than ready and capable of directing his allies in and out of combat. While some may see this as annoying and bossy, his decisions are usually sound, and unclouded by his emotions.

Tactics

In battle, Romek prefers to take measure of his enemies before committing fully to a fight, using his keen eyes and mind to pick out fighting styles, weapons, and vulnerabilities. Meanwhile, he'll use his  mental focus to empower his mind blades, before exploiting the weaknesses in an enemy's defenses and unleashing devastating attacks. He also works well with other front line fighters, maneuvering himself to get into ideal flanking positions, and allowing his allies to wear down the enemy before finishing them off with a precision attack.

Whenever possible, Romek tries to use a fallen foe's mental energies to re-energize his mind blades, but this can only be done if the enemy is slain, or knocked unconscious. Because of this, he'll often hold back the true power of his weapons in order to weaken his opponents, before finishing them off.

Friday, 1 May 2015

Warhammer 40k Campaign Battle Report Part 2: Reclamation

With the forward outpost now controlled by the Black Legion, the Imperial high command has ordered Tank Commander Harris to reclaim the forward outpost before the Black Legion can dig in in earnest. Meanwhile, the arrival of Sorcerer Lord Ankhotep, and Asarune the Perverse has allowed Zargor and Festus to leave the moon to resupply.

This is part 2 of our narrative campaign featuring my Black Legion army and Brennan's Children of Tarr. In this part, we have the attempted re-taking of the Imperial outpost in order to keep the Chaos forces from getting a solid foothold on the world. This battle we did the Crusade mission with 3 Objectives, with a Hammer and Anvil Deployment.

The Armies

Black Legion

HQ:
- Lord Ankhotep - Sorcerer with 3 Mastery Levels, Spell Familiar, Mark of Tzeentch, Terminator Armour, Sigil of Corruption, Gift of Mutation (+1 Weapon Skill), Veterans of the Long War, Combi-Melta, and Force Staff - 212

- Asarune the Perverse - Sorcerer with 3 Mastery Levels, Spell Familiar, Mark of Slaanesh, Sigil of Corruption, Gift of Mutation (Shred), Veterans of the Long War, Meltabombs, and Force Sword - 185

Elites:
- 5 Chaos Terminators with Mark of Tzeentch, 5x Combi-Meltas, 3x Chainfist, and 2x Power Maul with a Gift of Mutation (+1 Toughness) Veterans of the Long War - 273

Troops:
- 10 Chaos Space Marines with Lascannon, Plasma Gun, and Veternas of the Long War, in a Rhino with Havoc Launcher and Dozer Blade - 251

- 6 Thousand Sons with Force Sword, in a Rhino with Dozer Blades - 213

Heavy Support:
- Predator with Lascannon Turret and Lascannon Sponsons - 140

- Predator with Lascannon Turret and Lascannon Sponsons - 140

Fortification:
- Aegis Defence Line with Icarus Lascannon -  85

Total: 1499

In this battle I wanted to bring out the other characters leading this Black Legion army. The two Sorcerers would be working together in order to hold the ground taken by the more blunt Chaos Lords. Under the overall command of Lord Ankhotep, this force consists mainly of Tzeentch aligned units, in order to further illustrate his dominance over the ambitious and powerful Asarune. The Chaos forces have had a little time to fortify, and have put up an Aegis Defence Line at the edge of the camp for some added cover, and have brought in a pair of Predator tanks to defend against a potential armoured push from the puny Guardsmen. Ankhotep plans to wait in reserve with his Terminator Bodyguard until the time is right to teleport in, and put both his psychic might and his unit's firepower to good use.

The Black Legion
Children of Tarr

HQ:
- Tank Commander Harris - in a Vanquisher with Multi-Melta Sponsons, Camo Netting, with 2 Leman Russ Eradicators with Heavy Flamer Sponsons and Camo Netting - 490

- Primaris Psyker with 2 Mastery Levels - 75

Elites:
- 3 Ratlings - 30

Troops:
- 12 Veterans with 3x Plasma Guns, Camo Gear, Snare Mines, and Grenadiers in a Chimera with Camo Netting and a Dozer Blade - 215

- 12 Veterans with 3x Plasma Guns, Camo Gear, Snare Mines, and Grenadiers in a Chimera with Camo Netting and a Dozer Blade - 215

Fast Attack:
- Drop Sentinel with Multi-Melta and Camo Netting - 80

- Hellhound with Multi-Melta, Camo Netting, and Dozer Blade - 155

- Hellhound with Multi-Melta, Camo Netting, and Dozer Blade - 155

Heavy Support:
- Hydra with Camo Netting - 85

Total: 1500

With a long trek from the main Hive on Badru through the dangerous jungles of the death moon, the Imperial Guard have come prepared, equipped with plenty of Flamers to help clear a path to the camp. Commander Harris also came prepared with a couple of Eradicators, who's shells can pierce through even the thickest cover. In addition he brought along a Primaris Psyker to help defend against any potential dark energies that they may encounter.

Children of Tarr
The Game

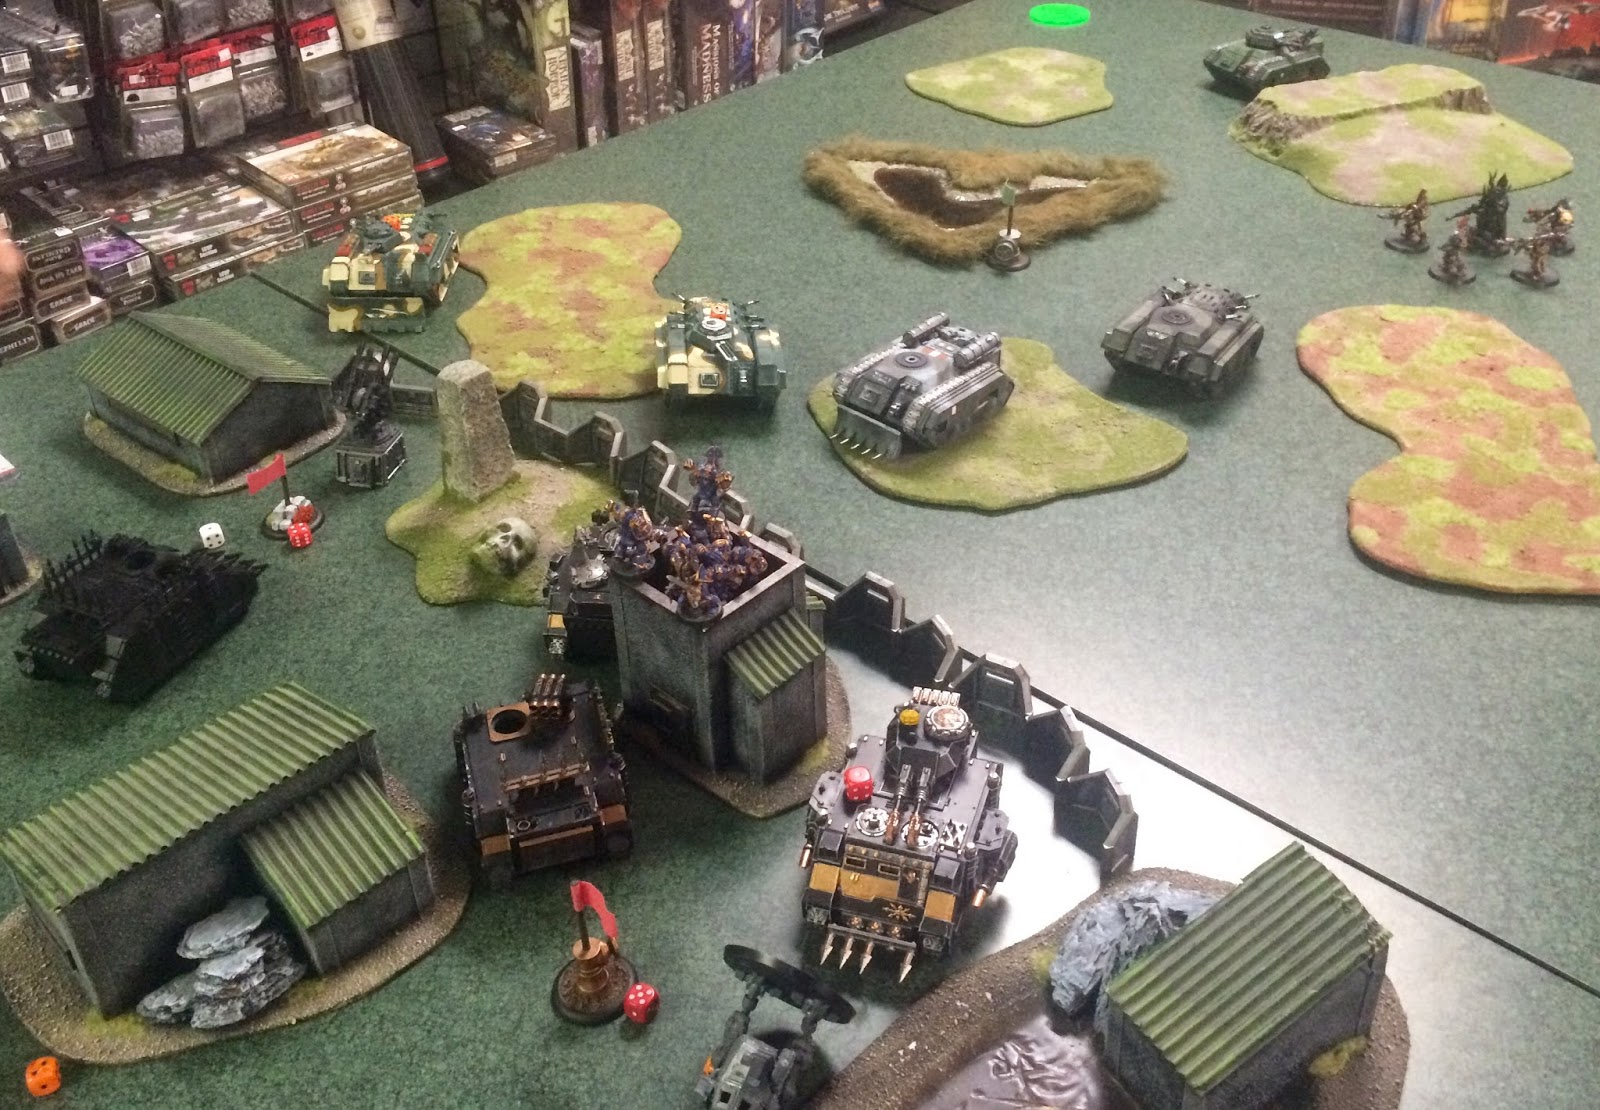
Brennan and I rolled off for first turn and I won the roll, opting to go first. My deployment was easy with a Predator in the middle, and one on the right flank. The Sons in their Rhino went in between the two Predators behind a building. Finally the Chaos Marines with Asarune went on the left flank to operate the Lascannon. Ankhotep went into Deep Strike reserve with the Terminators. Asarune generated Fire Shield, Endurance and Smite, as well as Sensory Overload, and Ankhotep generated Psychic Shriek, Invisibility, and Mental Fortitude, as well as Tzeench's Firestorm. The Aspiring Sorcerer generated Doombolt and Tzeentch's Firestorm.

Black Legion Deployment
To Counter, Brennan deployed both Chimeras on the left flank, the Hellhounds in the center, and Commander Harris' Squadron on the right. In the back on a hill sat the Hydra, and the Ratlins infiltrated up into a swamp of ooze (5+ cover, but going to ground causes a toughness test or wound). His Primaris Psyker generated Telekine Dome and Psychic Mealstrom, as well as Assail.We rolled for night fighting and it was night turn 1.

The Children of Tarr Deployment

Turn 1

The Black Legion army moves very little, opting to hunker down in their fortifications while the Imperial armour advances. The Thousand Sons' Rhino advances slightly to glimpse a Ratling in the Dark.

Channeling the dark energies of the Warp, Asarune casts Endurance on his unit, and Fire Shield on the furthest Predator Tank. While casting the latter however, he suffers some psychic backlash, and is wounded.

The Rhino unleashes a storm of missiles from its Havoc Launcher into the dark jungles, and kills two of the Ratlings hiding in the swamp, who break and run. The center predator targets the lead Hellhound with its Lascannons, glancing the vehicle, before illuminating it with its searchlight. The other Predator attempts to finish the job, but only shakes the tank. Fire from the Icarus Lascannon, and the Marine's Lascannon stabs in at the Hellhound as well, but strike some intervening cover instead.

The Ratling manages to regroup and moves back towards his objective. Commander Harris orders a general advance and both Hellhounds and Chimeras move forwards. Unfourtunately, the Chimeras disturb a nest of Razorwings, and one of them takes some minor damage from the creatures before escaping the trees.

Harris orders his squadron to fire into the Chaos Marines manning the Lascannon, and between the Chimeras and Eradicators, half the squad dies, including the Lascannon Marine. Harris Fires his Vanquisher into the illuminated Predator, but misses his mark, while the Hellhounds both fire their Multi-Meltas at it, only to be blocked by the Aegis Defence Line.

End of Turn 1
Turn 2

With a flash of iridescent light, Ankhotep and his body guard teleport behind Commander Harris' squadron, Unfortunately, a miscalculation causes a rough transit, which wounds Lord Ankhotep, despite his Terminator Armour. The Marines advance to the wall slightly in order to draw better lines of fire, and the Thousand Sons exit their Rhino and climb onto the top of the watch tower.

As quickly as they came, Ankhotep and his Terminators disappear, their presence removed from the enemies' minds by the mighty Sorcerer Lord. Once again Asarune uses the power of the Warp to infuse his unit with unnatural vigor. Finally, the Aspiring Sorcerer sends a lance of psychic energy into the damaged Hellhound, but it is deflected by the vehicle's armour.

With a single command from their master, the Terminators unleash the fury of their Combi-Meltas, aiming for the ammo holds of the Leman Russ squadron. In a cataclysmic blast, all 3 vehicles have their ammo stores ignite, blowing their once-mighty vehicles to smithereens, and showering the Terminators with shrapnel. The rightmost Predator fires its Lascannons again into the damaged Hellhound, this time wrecking the vehicle, and the other Predator unleashes its weapons at the other Hellhound, shaking it as well. The Rhino once again fires the Havoc Launcher at the Ratling, but this time its missiles scatter wide, blasting harmlessly into the foliage.

Dropping in from the skies comes the Sentinel, landing right behind the Predator and Rhino. Heedless of their Commander's demise, the Chimeras plow onward, once again suffering some predations from the denizens of the moon. The Hellhound also advances, hoping for a lucky shot against the center Predator. With the Terminators so close, the Hydra drives off the hill.

The Sentinel fires its Multi-Melta into the rear of the Predator, but it's shot just clips the vehicle, merely glancing its armour. The Hellound shoots its Multi-Melta at the other Predator, but its crew is too shaken up to hit anything. Once again, both Chimeras and the Veterans inside unload on the Marines, killing the Plasma Marine, and a few others. Finally, the Hydra shoots at Ankhotep's squad, but their armour protects them.

End of Turn 2
Turn 3

With the Imperial forces approaching the battle line, Asarune orders his squad out to attempt an assault on the Chimeras. The Aspiring Sorcerer pushes his way to the back of his unit, ready to unleash his psychic might into the Sentinel, and the glanced Predator turns around to bring its Lascannons to bear, and the Marines' Rhino rushes over to reinforce their objective. Finally, after having fended off some carniverous plants in the jungle, Ankhotep urges his unit towards the lone Ratling and its objective.

Neither of the Sorcerer Lords attempt to manifest any powers this turn, deciding that the risk to their own being is not worth it. The Aspiring Sorcerer fires his Doombolt into the Sentinel and glances its armour.

As expected, the Predator easily finishes off the Drop Sentinel with its payload. The other Predator fires into the Hellhound and wrecks it as well. The Terminators fire their Combi-Bolters long range and kill off the Ratling in the swamp, and finally the Marines throw a Krak Grenade at the nearest Chimera, but it bounces harmlessly off its armour. With their opening Gambit having failed, the Marines attempt a charge into the vehicle, only for the first member of the unit to be blown apart by Plasma fire from the hatch. With casualties taken, and the thick underbrush impeding them, the assault loses momentum before they can make their target.

With Asarune's unit now in the open, both Chimeras maneuver to try and finish off the Sorcerer. Unfortunately, in doing so, both of the transports disturb yet more Razorwings, which further damage their hulls. The Primaris psyker tries to use his powers on the Marines, but Asarune's psychic might easily denies his feeble attempts.

Both units and Chimeras unleash their entire payloads into Asarune and his unit, and though their power armour holds out for awhile, eventually the sheer weight of fire wipes out all the Marines, and fells Asarune himself. Once again, the Hydra fires into the Terminators, this time killing one.

End of Turn 3
Turn 4

His rival defeated, Ankhotep continues his relentless push forward, aiming to trap the Guardsmen in a pincer maneuver. The Rhino moves forward a bit to try and get an arc of fire on the Primaris Psyker's Chimera, and the Aspiring Sorcerer pushes back to the front of his unit to try and get a shot at the Chimera as well. With the Sentinel dealt with, the Predator turns back around and moves up to target the oncoming APCs, and the other Predator pivots as well. Once again, very few powers are cast, with the Doombolt on the Chimera being denied, and all other powers simply bouncing off the armour, and it takes both Predators to finally reduce the Chimera to a wreck.

The last Chimera plows over the Aegis Defence Line, and right up to the Icarus Lascannon, aiming to claim the objective held by the Rhino. Meanwhile, the Primaris Psyker stays where he is. Once again, he attempts to manifest his powers, this time at Ankhotep, but the mighty Sorcerer dispels them.

Firing all their remaining Plasma Guns, as well as their Lasguns, the Veterans manage to gun down two more Terminators. The other unit is a little less successful, only glancing the armour of the Rhino camped out on its objective.

End of Turn 4
Turn 5

The guardsmen finally in the open and their assault force in shambles, Ankhotep presses his advantage, moving in closer to the Psyker's unit. All the Predators shift around to Draw lines of fire on the remaining vehicles.

With their prey in the open, the two remaining Sorcerers unleash a devestating barrage of witchfire into the guardsmen, slaying all but four, including the Primaris Psyker. The Center Predator fires at the last Chimera, but fails to damage it, and the other one fires at the Hydra with similar results. Lastly, the Terminators charge the remaining Guardsmes, and though one is killed by overwatch fire, Ankhotep and his last remaining Terminator charge in and kill only two Guardsmen, the others running for their lives.

Their force in shambles, and their Commander's fate presumably grim, the remaining forces flee into the jungle, back towards the hive city.

End of Game
Post-Game Thoughts

This was another rough battle for Brennan, as it seemed like nothing went his way. As I mentioned before, we're using an alternate table for our mysterious forests, and so pretty much everything was either a Carnivorous Jungle or a Razorwing nest. While it shouldn't have been that big a deal, the amount of Hull points his vehicles took from the terrain was staggering. He also rolled about 50% 1s for his plasma guns. I think I only actually killed one of his Plasma Gunners, and the rest that died were killed by gets hot! rolls.

Besides that, I think my target priority was a little poor. I focused on the Hellhounds, mainly because I kept forgetting to pivot my Predators, but I really should have been dealing with the Chimeras so that he would have to walk. If I had been able to pop his transports, the rest of the battle would have been a shooting gallery for me.

Brennan also made an error early on, when he forgot to get his Psyker out of the transport to cast Telekine Dome on the Tank Commander. He was going to do it, but then forgot, and by the time he remembered, too much had happened, so we just left it. There's a good chance that it wouldn't have worked anyways, because I had so many dice in my pool, but you never know.

Ultimately, this game wasn't as fun as the first, as it really just felt like Brennan was fighting against circumstance as much as he was battling me, and it ended up being kind of lame. Still, he fought hard, and had certain things gone a little differently, this game really could have gone either way.

Tuesday, 21 April 2015

Warhammer 40k Campaign Battle Report Part 1: First Contact

Upon the moon of Badru , a death world orbiting Tarr, a force of Chaos Space Marines has been detected. What their purpose there is is yet unknown, but the planetary governor has not wasted any time asking pointless questions. Under the command of Field Commander Lzick, a recon force has been sent to the moon to set up a forward camp near where the Chaos threat was sighted.

This is the first battle report of a series of games between my Black Legion army, and Brennan's Imperial Guard, the Children of Tarr. The battles will be depicting the invasion of a moon orbiting Tarr by a force of Chaos Space Marines for reasons still unknown to the Guardsmen defending their homeworld.

For this campaign, we will each have some named characters who will be leading our armies at different points during the campaign. Should one of these characters be killed in a battle, the controlling player will roll on a table to see what actually happens to the character. They may be killed, wounded in some way, or make a miraculous escape. We will also be tweaking some rules a little to make them work better for a long story. For example, any boons that my Characters get will stay with them until the end of the campaign, and we have decided to modify the Dark Apotheosis result on the boon table a little bit to make a little more sense. Should one of my Characters have mastery levels and become a Prince, the Prince will retain those mastery levels. Likewise, should a Character with a jump pack get Dark Apotheosis, the Daemon Prince will be gifted with Wings. Lastly, since Badru is a Death Moon, we decided that the likelihood of razorwing flocks and carnivorous jungles would be much higher, so we changed the table to reflect that.

There will also likely be some custom scenarios. We will endeavor to make these as balanced as possible, and may even redo games if the mission ended up favoring one side too heavily. With all this in mind, lets get to it.

This first battle is the first interaction between the two forces. The points limit was 1250.  The mission is a custom scenario with 3 objectives, one in each deployment zone, and one in no man's land. The objective in our own zones is worth 1 point at the end of the game, the one in the middle is worth 2, and the one in the enemy zone is worth 3. This is to represent the Chaos forces attempting to push into the encampment, and the Guard force attempting to establish a perimeter. In addition, we agreed that no Heavy Support units would be taken, and instead up to 4 Fast Attack choices would be allowed. Also, we decided to give all fast attack units Objective secured, to help represent their importance in a scouting mission. We rolled for deployment type and got Dawn of War, with night fighting not in effect.

The Armies

Black Legion

HQ: 
- Lord Festus the Undying - Chaos Lord with Mark of Nurgle, Black Mace, Bike, Sigil of Corruption Gift of Mutation (Re-Roll failed Armour Saves), Meltabombs, Warlord (Feel no Pain) - 185

- Zargor Thull - Chaos Lord with Mark of Khorne, Axe of Blind Fury, Juggernaught, Sigil of Corruption, Gift of Mutation (Icy Aura) - 180

Troops:
- 14 Cultists with Mark of Nurgle - 100

- 16 Cultists with Mark of Khorne - 112

- 7 Plague Marines with 2x Plasma Guns, Champion with Gift of Mutation in a Rhino - 243

Fast Attack:
- 5 Spawn with Mark of Nurgle - 180

- 8 Bikers with Mark of Khorne, 2x Meltaguns, Icon of Wrath, and Champion with Power Maul and Gift of Mutation - 251

Total: 1251

Led by 2 Chaos Lords, both mounted up, this was going to be a very fast and killy list. The Cultists would help give me some numbers and take objectives after the Lords and their retinues had cleared the way. The Plague Marines would be able to take an objective and hunker down, hopefully proving tough enough to survive.

The Forces of Chaos


Children of Tarr

HQ:
Field Commander Lzick - Company Command Squad with 4 Veterans with Camo Cloaks, Carapace Armour, 2x Plasma Guns, Vox Caster, and Medi-Pack with Lzick with Power Sword, Carapace Armour, Bolt Pistol, Meltabombs, and Camo Cloak in a Chimera with an Autocannon - 246

Elites:
- 3 Ratlings - 30

Troops:
- 10 Veterans with Carapace Armour, Camo Gear, Vox Caster, 3x Grenade Launchers, in a Chimera with Autocannon - 175

- 10 Veterans with Carapace Armour, Camo Gear, Vox Caster, 3x Grenade Launchers, in a Chimera with Autocannon - 175

- 10 Veterans with Carapace Armour, Camo Gear, Vox Caster, 3x Meltaguns, in a Chimera with Autocannon - 190

Fast Attack:
- 3 Scout Sentinels with Lascannons - 135

- 3 Scout Sentinels with Lascannons - 135

- 3 Tauros with Camo Netting and Tauros Grenade Launchers - 165

Total: 1251

This list has lots of stuff that I would expect to see in an Imperial Guard recon force. Plenty of APCs, Sentinals, Tauros, and skilled men and women with good gear. The main thing that was going to be an issue for me was all the armour. I have basically 1 unit that can deal with armour well, and basically everything is all mech'd up, so if my Bikes die too soon I could have a really hard time with this list.

Note that the Hellbrutes and Heavy Weapons are stand ins for his Sentinels
The Game

Brennan won the roll off for first turn and elected to go first. His deployment was pretty simple, with the Sentinels on either flank, and all the Chimeras stretched in between them. The Tauros went on the right , and the Ratlings infiltrated up a bit on the right.

Guard deployment
In response I put the Bikes and Spawn in the middle, ready to push forward with the Khorne Cultists next to the Bikes, and the Nurgle Cultists babysitting my objective. The Plague Marines went on the left flank to hopefully grab the center objective with their Rhino.

Chaos Deployment
Turn 1

With the chaos hordes approaching, the Commander Lzick orders a slight advance of all of his troops to try and take down as much as possible. All of the Autocannons and Heavy Bolters from the Chimeras unload on the Spawn, as well as all the Grenade Launchers in range. and in the end, 3 of the mutated monstrosites are destroyed. The Ratlings take aim at the Cultists, hoping to kill a couple, but thanks to the small shrine they are unharmed. With not much other armour to deal with, the Sentinels both fire into the Rhino, Immobilizing it and doing another hull point, but not destroying it.

With his bodyguard already dwindling, Lord Festus spurs his Spawn into action. Needing little encouragement, and not to be outdone by his fellow Lord, Zargor and his bikes blast forward recklessly, and Zargor takes an injury whilst charging through the dense jungles. The Khorne Cultists advance as well, though not as quickly as their commander, and the Plague Marines disembark from their damaged transport.

Electing not to fire, the Rhino's crew get to work trying to fix their damaged tank, and manage to repair its immobilization! The Plague Marines fire their Plasma Guns into the Sentinels, but their shots prove ineffective.

Finally, the Bikes and Spawn charge. The Bikes lose a member of their unit to overwatch fire from Lzick's Command Squad, but spurred on by their dedication to Khorne, they make the long charge into the vehicle. The Spawn charge into the Tauros, and despite it also being a long charge, also make it into combat. Zargor makes short work of the Chimera with his axe, the passengers spilling out of the rear hatch as he carves his way in and murders the crewmen.The Tauros fare a little better with a pair of their crews being killed by the Spawn and Festus.

End of Turn 1/ Shooting Phase Turn 2
Turn 2

His Chimera destroyed, Lzick and his squad fall back to try and put as much distance between himself and the crazed Zargor as possible. The other Chimeras adjust themselves to draw lines of fire on the Bikes, and the Tauros tears away from Festus and his Spawn.

Once again, both units of Sentinels fire into the Rhino, this time a Lascannon finding the feul tank, causing the APC to explode spectacularly. The two Chimeras on the left flank unload into the Bikes, but their armour does a remarkable job of protecting them and only one more biker is killed. The final Chimera, Tauros, and Ratlings fire into Festus' unit and kill another Spawn, wound the last Spawn, and wound Festus himself. Finally, Lzick orders his men to fire at Zargor Thune, who is wounded by a Plasma Gun.

Spotting the enemy commander, Festus leaves the Spawn to its own devices and heads off alone to fight Commander Lzick. Zargor likewise leaves the Bikes to take down another Chimera while they head over to kill the one on the left flank. The Spawn rushes over to destroy the last remaining Tauros, while both the Khorne Cultists and Plague Marines advance.

Taking a some pot shots at the Chimera's exposed flank with their Plasma Guns proves ineffective for the Plague Marines thanks to the dense jungle obscuring it. The Cultists, eager to prove themselves to their Lord run further, hoping to shed some blood soon. The Meltaguns of the Bikes manage to damage the Chimera, but not enough to destroy it, forcing the Bikes to assault once more.

In the Assault, Zargor charges and easily wrecks his second Chimera, and the Bike Champion smashed the other Chimera into a wreck with his Power Maul. The Spawn charges into the last Tauros and wrecks it as well. Finally, Festus charges into Lzick's Command Squad and challenges the commander to single combat. He has some difficulty controling the Daemon bound to his Mace however, and only manages to wound Lzick, who is protected by his refractor field. Unfortunately, the dark energies of the Black Mace take their toll on the Scout Master, who crumples to the ground in a heap. Taking their revenge, Lzick's Veterans deal another wound to Festus, who is busy basking in the reward granted to him by Nurgle, before running off with the body of their commander.

End of Turn 2

Turn 3

With Festus and Zargor both injured, the remaining Guardsmen target the two lords with all their firepower, and though Zargor is nearly brought down, when the dust clears, the two Lords are still standing, and more angry then ever. Thankfully, the Veterans of Lzick's command squad were able to relay a message to high command, who order a general retreat, leaving the forces of chaos to consolidate their position in the captured encampment.

End of Turn 3(ish)

Post-Game Thoughts

That was a pretty fun game, and honestly the only reason it ended so quickly and decisively was that my dice were on fire! The two charges from the Bikes and Spawn turn 1 were 11 and 12 inch charges that I managed to make, thanks to fleet and the Icon of Wrath, and that really was the turning point here. Additionally, I made a ton of saves with my Bikes, and managed to save away 3 Lascannons firing at Festus on turn 3, which is pretty much when we decided to call it.

All that being said, I think that maybe Brennan should have gotten his Guardsmen out of their transports early to bring some more weight of fire down on me. Granted his lasguns would be wounding on 6s, but those extra dice could have made some difference.

On another note, having the named characters really made it feel more important that they survive for me. I really didn't want to lose one of my Lords in the first battle, and while it didn't make me play any more cautiously, it did make it a whole lot more exciting. It was also cool to have more of a reason for the battle to be taking place. Now that the Black Legion has a foothold, the Children of Tarr may have a much harder time wiping them off their planet.

Tuesday, 31 March 2015

Send in the Clowns! Codex: Eldar Harlequins Review Part 3

Hello again readers. In this third installment of the Codex Harlequins review I'll be going over a few list ideas that I've had running through my brain, as well as some general tactics, combinations and some things to be aware of when using Harlequins in your army.


The first thing I want to get at is the basic Harlequin Troupe, and how best to use them. While they may be fantastic in combat, especially with the right upgrades, they are crazy squishy if left unsupported. We're talking Guardsman killable here. Toughness 3 can be pretty brutal on a unit, particularly when you have to weather shooting as you come up the board, potentially a transport explosion (which will likely spell the end of a Harlequin unit inside of it) and then overwatch fire. This means you'll have to mitigate this however you can.

The first way is to take a transport. Obviously you can have Starweavers, but if you want larger squads, look to your allies, Eldar and Dark Eldar. With Dark Eldar, you can take Raiders, which are generally more durable than a Starweaver, with a larger capacity, and honestly in my opinion, the best choice. Eldar give you the Wave Serpent, which is more durable still, with 12 capacity, so you can bring along a Shadowseer and Jester, but the downside is that you can't disembark and assault from it in the same turn. Huge bummer. Its not all bad for the Wave Serpent though, as some psychic support from the Shadowseer could really give you some good defenses the turn you jump out via Invisibility, or Fog of Dreams.

The other way to try and do it is to take them in big blobs on foot. 12 Harlies with a Shadowseer. This is looking to be my preferred method at the moment, because with the right powers and a litte luck, these guys will soak a ton of firepower, even if they never see combat. Take them in a list with a Wraithknight and a Wave Serpent or two, and the opponent won't have a good option to shoot at. Do they kill the Knight and get creamed by Harlies and the Serpents? Kill the Harlequins and get pulverised? Or go for the vehicles and get assaulted into oblivion.

This leads me nicely into the next thing I'd like to talk about. Threat saturation. Harlequins are going to rely largely on threat saturation to get into combat and wreck face. To clarify, I'm talking about having so many things on the table that need to be dealt with right away, that something will make it through. This is also known as the "They can't kill us all!" strategum by imperial scholars. Again, the best way to do this is probably in using allies. There's a reason that this book is called Codex: Eldar Harlequins. If you want to run a solo act though, I think the way to go is a unit or two in Starweavers, with a big foot blob to back them up, and two big units of Zephyrglaive Skyweavers (think 5 or 6). This will give you 4 units that will be in combat turn 2, with the blob potentially getting a turn two charge, but a turn 3 almost for sure. Skyweavers will also take a good amount of firepower to kill, given some decent cover saves, and if there's lots of LoS blocking terrain on the field, you can maybe even hide before jumping out to clown punch some jerks.

The last way to use Harlequins is as a counter-attack unit. Keep them behind your shooty units, ideally out of sight, and wait. Use them as a threat so that people don't want to charge your more vulnerable things. Sort of like a chess game, where you use a pawn as bait to get a more valuable piece. It's not a particularly subtle or clever tactic, but even if they notice, the threat still remains. Do they sacrifice their unit to charge the thing, or stand there and get blown to pieces?

Finally, we'll start getting to some cool combinations using Harlequins, Eldar, and Dark Eldar.


The first one has seen the light of day... sort of. In a recent apocalypse game. The basic idea is this. Take an Eldar primary Combined Arms Detatchment, a Dark Eldar Allied Detatchment and the Cast of Players Harlequin formation. Now, we're going to need at least one Farseer, but try to get in 2, one with the Spirit Stone of Anath'lan, a Dark Eldar Archon with Webway Portal, Armour of Misery, and if you have the points, a Shadowfield, 12 Harlies with your chosen weapon upgrades (I like the Harlequin's Caress), a level 2 Shadowseer with the Mask of Secrets and the Death Jester. Keep in mind, we're looking at around 800 points here, so it's not very competitive, but bear with me. We're going to roll all 3 psykers on Telepathy, looking for at least 1 Invisibility, and as many Terrifies as we can get. So, everything goes in reserve, and hopefully will come in turn 2. With the Webway portal you will not scatter, so you'll drop in next to whatever unit(s) you want to not be a thing anymore, as close as you can. The Archon's Armour of Misery, and the Shadowseer's Mask of Secrets are now giving all units within 6" -4 to their Ld. That's huge. Now, we'll hopefully get to cast some powers. Invisibility goes up to save you from scary shooting, and hopefully we got terrify a bunch of times. Lets say we got it twice and droped down right close to 2 units. We'll cast it once on each so their Ld is at -5. Thats a MAXIMUM of Ld 5, if they had 10. Now's the fun part. Psychic shriek happens as many times as possible. For those of you who don't know, Psychic shriek is a psychic shooting attack wherein you roll 3d6 minus the target's Ld. Anything that exceeds their Ld does the difference in wounds that ignore armour and cover saves. If we get that off twice on a unit with Ld 5 (from all our debuffs) we're looking at an average of about 11 wounds. So basically, any unit that is not a vehicle is going to be erased, unless it's a big unit of something. This will likely force a morale check, which they will more then likely fail. If they don't you still have your shooting phase with your good friend the Death Jester. Hopefully they'll still have a guy or two within 6" of your Archon. If so, and you manage to kill a model (not terribly unlikely with a Shuriken Cannon against a horde) they're making a morale test on Ld 3... at best.

Expensive? Yes. Gimmicky? My GOD yes. Reliant on psychic powers to work? 100% yes! But, if it works, your opponent will throw everything he has at that unit, because if it survives, the same thing will keep happening turn after turn. There's a catch, however. The rest of your force should be made up of units that can do some anti-tank duty for you. We're talking Wave Serpents, Ravagers, Fire Prisms, that sort of stuff. You need for units to not be in their transports early, so that your Harliestar of  doom has something to destroy.

Now, if you don't feel like hinging your whole army around a single unit, I have some other ideas as well, so chill out.


Eldar/Harlequin List 1500 Points

HQ:
- Farseer on Jetbike with Spirit Stone of Anath'lan - 130

Troops:
- 5 Dire Avengers in Wave Serpent with Twin-Linked Scatter Lasers, Shuriken Cannon, and Holo
   Fields -210

- 5 Dire Avengers in Wave Serpent with Twin-Linked Scatter Lasers, Shuriken Cannon, and Holo
   Fields -210

- 3 Windrider Jetbikes - 51

Fast Attack:
- 5 Warpspiders with Exarch with Fast Shot - 134

Heavy Support:
-Wraithknight with Suncannon and Scattershield, and a Scatter Laser - 300

Harlequin Formation Detatchment
Cast of Players
- 12 Players with 11x Harlequin's Caress, Troupe Master with Harlequin's Caress and Cruscendo - 301

- Death Jester - 60

- Shadowseer Mastery Level 2 with Mask of Secrets and Haywire Grenades - 105

Total: 1501

This list gives you a good mix. The Wave Serpents will provide some solid fire support, along with the Warp Spiders and Wraithknight, while the Harlequins and Wraithknight close with the enemy. The Farseer is on a Jetbike so that he can join the Harlequins and not slow them down, and he'll hopefully be getting Invisibility, while the Shadowseer rolls on Phantasmancy for Veil, Fog of Dreams, and Dance of Shadows. I took the Mask of Secrets again, because it really is fantastic, and hopefully the Death Jester will be able to benefit from it to pull some units into charge range.


Dark Eldar/ Harlequin List 2000 Points

HQ:
- Archon with Agoniser, Blaster, Haywire Grenades, Shadowfield, and Webway Portal - 180

Elites:
- 5 Trueborn with 4x Blaster and a Dracon with Haywire Grenades in a Raider with Darklance and
   Nightshields - 205

Troops:
- 5 Wyches with Hekatrix with Haywire Grenades in a Venom with extra Splinter Cannon - 130

- 5 Wyches with Hekatrix with Haywire Grenades in a Venom with extra Splinter Cannon - 130

Harlequin Formation Detatchment
The Serpent's Brood
- 6 Players with 5x Harlequin's Caress and a Troupe Master with Harlequin's Caress and Haywire
   Grenades - 163

- 6 Players with 5x Harlequin's Embrace and a Troupe Master with Harlequin's Embrace, Haywire
   Grenades and Cruscendo - 150

- 6 Players with 5x Harlequin's Kiss and a Troupe Master with Cegorach's Rose, and Haywire
  Grenades - 155

- 5 Skyweavers with 5x Zephyrglaive - 300

- 5 Skyweavers with 5x Zephyrglaive - 300

- Starweaver - 70

- Starweaver - 70

- Starweaver - 70

- Voidweaver - 75

Total: 1998

This is a very different list. It relies on lots of small fast units to get into combat and pulp what they're fighting. The Archon goes with the Trueborn and drops down to nuke a vehicle. Everything else boosts forwards as fast as possible, using as much LoS blocking terrain as possible to close the distance. Everything in this army should be jinking, except maybe the Harlequin stuff, which can use their mirage launchers. Hopefully you'll be able to get a few units into combat, and I would recommend assaulting a unit or two with multiple squads, to ensure that you won't take many attacks back, before moving on to your next target. It also would likely be worth it to take one of your Troupe Masters as your Warlord, as some of those traits are pretty good, and you'll get to re-roll thanks to the formation.


Harlequins 2000 Points
Cegorach's Revenge

Troops:
- 12 Players with 5x Harlequin's Caress, Troupe Master with Cegorach's Rose, and Haywire Grenades
   - 260

- 12 Players with 5x Harlequin's Kiss, Troupe Master with Harlequin's Kiss, Cruscendo and Haywire
   Grenades - 245

- 12 Players with 5x Harlequin's Kiss, Troupe Master with Harlequin's Kiss, and Haywire Grenades
   - 240

Elites:
- Shadowseer Mastery Level 2, with Mask of Secrets and Haywire Grenades - 105

- Shadowseer Mastery Level 2, with the Laughing God's Eye, and Haywire Grenades - 110

- Shadowseer Mastery Level 2 - 85

- Death Jester - 60

- Death Jester - 60

- Death Jester - 60

- Solitaire - 145

Fast Attack:
- 4 Skyweaver Jetbikes with Zephyrglaives - 240

- 4 Skyweaver Jetbikes with Zephyrglaives - 240

Heavy Support:
- 2 Voidweavers - 150

Total: 2000

This list uses the Cegorach's Revenge formation, because at high points, I think it's the best way to try and play a solo Harlequin list.What we've got is 3 big foot blobs of clowns (36 in all) with a Shadowsser for each. I think what I would do, is keep the Death Jesters all by themselves. The reason for this is that if your opponent want's to kill them, they have to devote resources to killing JUST them, which really sucks to have to do (especially for a T3 model). If they decide to ignore them, then they're going to have to deal with them making their units run all over the place, especially when (if) the Mask of Secrets Shadowseer gets close. The Skyweavers will offer some melee support/distraction, and the Voidweavers can lay down a bit of support. The main weakness of this army is that there's little that can do anything to flyers, so a flying spam army will wreck you, and vehicles will be unopposed until you get to combat as well. Still, you've got decent model count, and with some psychic support, I think that the Players will be tough to deal with.

Keep in mind that I still haven't gotten a chance to do much playtesting, and so while some of this stuff may look good on paper, it may not perform as well in an actual game.

And with that, I will end this chapter. I may come back in awhile and do a part 4 after I've gotten a chance to use this book a little more, but for now I think that this is really all I have to say about Codex: Eldar Harlequins. Thanks for reading!